Volkswagen Golf Variant / Jetta. Manual - part 413
 

  Index      Volkswagen     Volkswagen Golf Variant (2007), Jetta (2005) - service repair manual


Search            


Content   ..  411  412  413  414   ..


Volkswagen Golf Variant / Jetta. Manual - part 413


Note

♦

The fuel delivery unit flange can only be installed in this posi‐

tion.

♦

Make sure the supply and return lines are still clipped to the

fuel tank after the fuel delivery unit flange has been installed.

4.4

Fuel Tank, Draining

⇒ “4.4.1 Fuel Tank, Draining When More than 3/4 Full”,

page 235
⇒ “4.4.2 Fuel Tank, Draining When Less Than 3/4 Full”,

page 236

 .

4.4.1

Fuel Tank, Draining When More than 

3

/

4 Full

Special tools and workshop equipment required
♦ Wrench - Fuel Sending Unit - T10202-
♦ Torque Wrench 1332 40-200Nm - VAG1332-
♦ Fuel Extraction Unit - VAS5190-

DANGER!

♦ Observe safety precautions when working on fuel supply.

Refer to

⇒ “1 Safety Precautions when Working on Fuel Supply

System”, page 223

 .

♦ Pay attention to the guidelines for clean working condi‐

tions. Refer to

⇒ “2 Guidelines for Clean Working Conditions”,

page 224

 .

Always pay attention to these instructions before and during

work.

Caution

Secure the Fuel Extraction Unit - VAS5190- ground wire to a

bare area of the chassis.

4. Fuel Supply System Components    

235

Extraction Unit - VAS5190- .

– Using insulating tape, apply a mark on the hose -arrow- -a- =

1,180 mm from the end of the suction hose.

– Open fuel tank flap and remove fuel tank cap.
– Attach the shaft piece -1- from the Fuel Extraction Unit -

VAS5190- to the fuel tank filler tube.

– Slide the suction hose as far into fuel tank until the mark ap‐

plied earlier -arrow- stands on shaft piece.

Note

There is a ball valve -2- located at the lower end of the filler neck

in the fuel tank -1- that must not be damaged by the suction hose

-3-. Therefore slide in hose only up to the marking -arrow- applied

earlier.

– Empty the fuel tank as much as possible via the filler neck.
– Carefully pull out the suction hose.

Note

♦

When no more fuel can be extracted, the tank is emptied only

enough for the fuel delivery unit to be opened without any

danger.

♦

Fuel tank must be drained completely. Refer to

⇒ “4.4.2 Fuel Tank, Draining When Less Than 3/4 Full”, page

236

 .

4.4.2

Fuel Tank, Draining When Less Than 

3

/

4 Full

Special tools and workshop equipment required
♦ Wrench - Fuel Sending Unit - T10202-
♦ Torque Wrench 1332 40-200Nm - VAG1332-
♦ Fuel Extraction Unit - VAS5190-

236

♦ Observe safety precautions when working on fuel supply.

Refer to

⇒ “1 Safety Precautions when Working on Fuel Supply

System”, page 223

 .

♦ Pay attention to the guidelines for clean working condi‐

tions. Refer to

⇒ “2 Guidelines for Clean Working Conditions”,

page 224

 .

Always pay attention to these instructions before and during

work.

– Remove the bench seat. Refer to ⇒  Body Interior; Rep. Gr. 

72 ; Rear Seats; Rear Bench Seat, Removing and Installing .

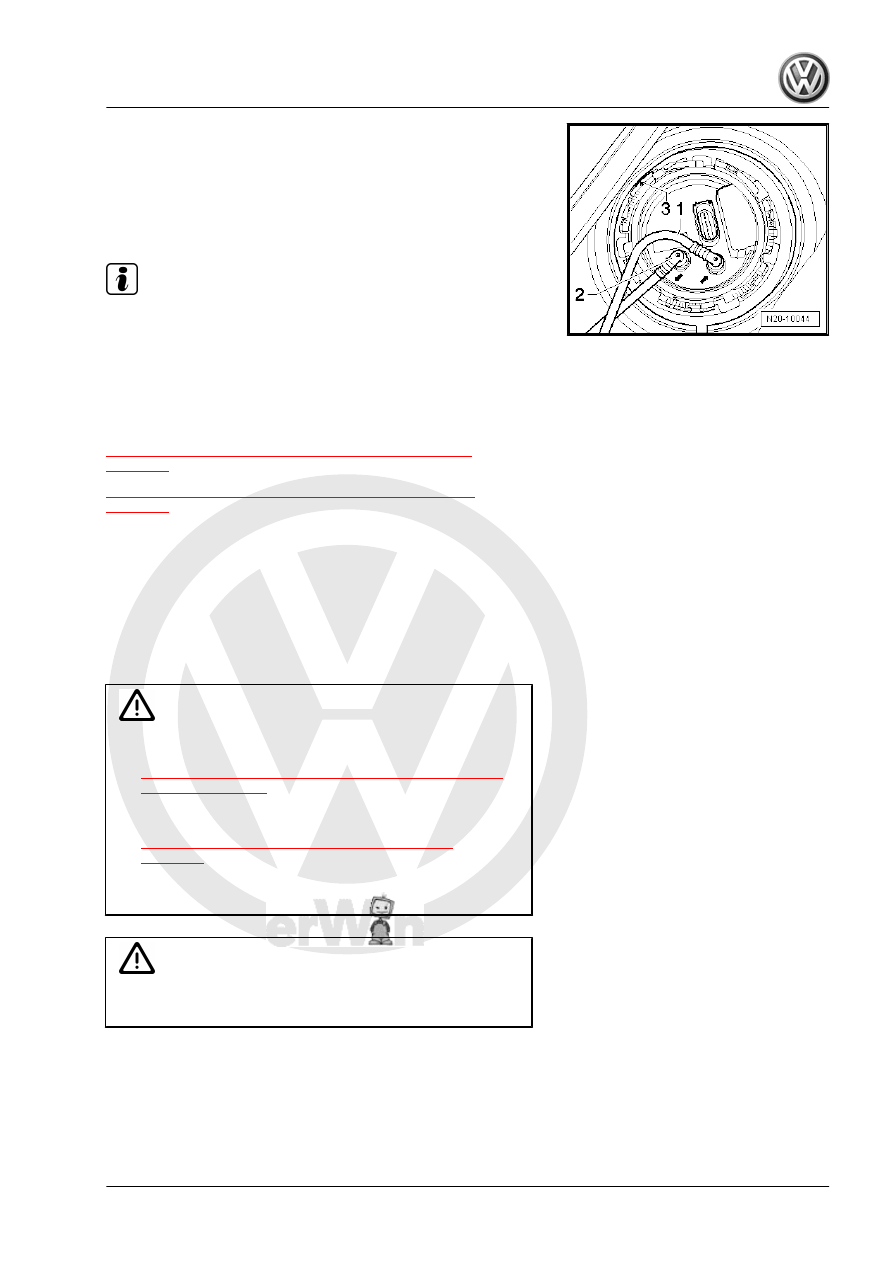
– Unclip the cover -1- for the fuel delivery unit. The arrow -2-

points in the direction of travel.

DANGER!

♦ The fuel supply line is under pressure. Always wear pro‐

tective eyewear and protective clothing to prevent injuries

and contact with skin.

♦ Wrap a cloth around the wiring connections before loos‐

ening hose connections. Then release pressure by care‐

fully pulling off the line.

– Disconnect -1-, the black supply line -2- and the blue return

line -3-.

Note

Press the locking ring to release the fuel lines.

– Seal the lines so that no dirt can enter the fuel system.
– Open locking ring using Wrench - Fuel Sending Unit -

T10202- .

– Slightly lift out the fuel delivery unit flange.
– Insert the suction hose from the Fuel Extraction Unit -

VAS5190- as far as possible into the fuel tank and extract the

fuel.

If the fuel tank only needed to be emptied, install the fuel delivery

unit again. Refer to

⇒ “4.6 Fuel Delivery Unit, Removing and Installing”, page 241

 .

4. Fuel Supply System Components    

237

Fuel Tank, Removing and Installing

DANGER!

♦ Observe safety precautions when working on fuel supply.

Refer to

⇒ “1 Safety Precautions when Working on Fuel Supply

System”, page 223

 .

♦ Pay attention to the guidelines for clean working condi‐

tions. Refer to

⇒ “2 Guidelines for Clean Working Conditions”,

page 224

 .

Always pay attention to these instructions before and during

work.

Special tools and workshop equipment required
♦ Torque Wrench 1331 5-50Nm - VAG1331-
♦ Engine and Gearbox Jack - VAS6931-
Removing:
Conditions
• Fuel tank may be a maximum of 

1

/4 full.

Note

If necessary, empty the fuel tank using the Fuel Extraction Unit -

VAG5190- . Refer to 

⇒ “4.4 Fuel Tank, Draining”, page 235

 .

Procedure

Caution

Electronic components could be destroyed when the Battery -

A- is disconnected:

♦ Complete the steps for disconnecting the Battery - A- .

– When the ignition is switched off, disconnect the ground cable

-arrow- from the Battery - A- . Refer to ⇒  Electrical Equipment;

Rep. Gr.  27 ; Battery; Battery, Disconnecting and Connecting .

– Clean the surrounding area around the fuel filler tube.
– Open fuel tank flap and remove fuel tank cap.
– Remove the bolts from the fuel filler door unit and then remove

Fuel Filler Door Unit .

– Remove the right rear wheel housing liner. Refer to ⇒  Body

Exterior; Rep. Gr.  66 ; Wheel Housing Liner .

238


Content   ..  411  412  413  414   ..