Renault Grand Scenic (2016 year). Manual - part 5
1.66
ON-BOARD COMPUTER: trip settings
(4/5)
The display of information shown below DEPENDS ON THE VEHICLE EQUIPMENT AND COUNTRY.
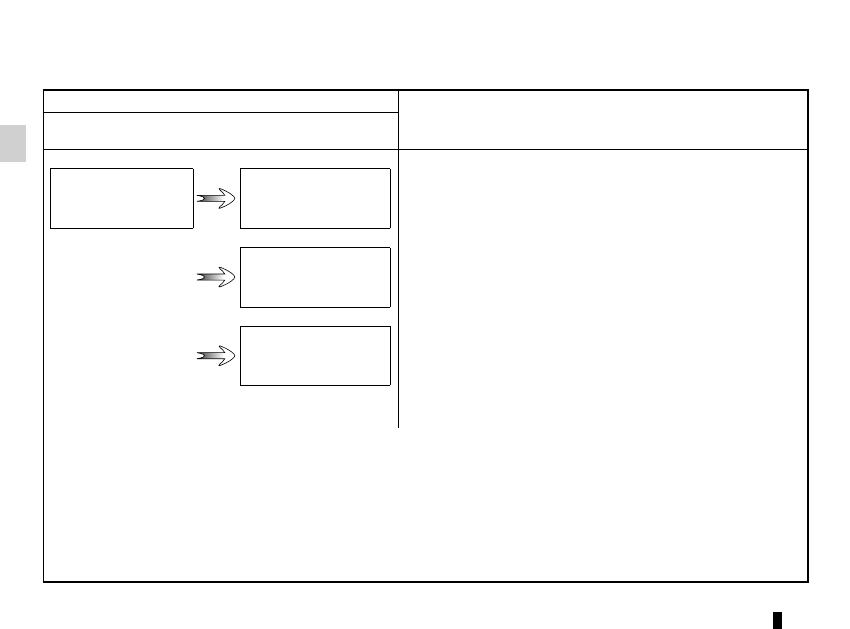
Examples of selections
Interpreting the display selected
On-board computer with distance before
next service message (cntd.)
c) Mileage before service or oil change.
Mileage before service
With the ignition switched on and the engine not running,
when the message “Mileage before next service” is displayed,
press button 2 or 3 for around 5 seconds to display the mile-
age before the next service, then briefly press button 2 or 3 to
view the mileage before the next oil change (distance or time
remaining before the next service). When the distance value ap-
proaches its limit, there are several possible scenarios:
–
distance/time remaining less than 900 miles (1,500 km) or
one month: the message “Service due in” is displayed ac-
companied by the nearest term (distance or time);
–
range equal to 0 km/miles or service date reached: the
message “service vehicle” is displayed accompanied by the
©
warning light.
The vehicle requires an oil change as soon as possible.
SERVICE
INTERVALS
Oil change in
30 000 Kms /
24 Months
Service due in
300 Kms / 24 days
Service required
Depending on the vehicle, the mileage before an oil change varies according to the driving style (frequent driving at low speed,
door-to-door journeys, extensive use at idling speed, towing a trailer, etc.). The distance remaining until the next oil change can
therefore decrease more quickly in some cases than the actual distance travelled.
Resetting: to reset the mileage before the next service, press and hold button 2 or 3 for approximately 10 seconds until the
display shows the mileage before service without flashing.
NB: if a service is performed without changing the engine oil, only the mileage before the next service should be reset. In the
event of an oil change, both the distance before the next service and the next oil change should be reset.