Peugeot 307 Break Dag (2007 year). Manual - part 12
162
ESC
MENU
LIST
MENU
ESC
MENU
LIST
ESC
LIST
MENU
ESC
MENU
LIST
ESC
MENU
LIST
11
22
33
44
55
66
77
88
ESC
MENU
LIST
ESC
MENU
LIST
ESC
MENU
LIST
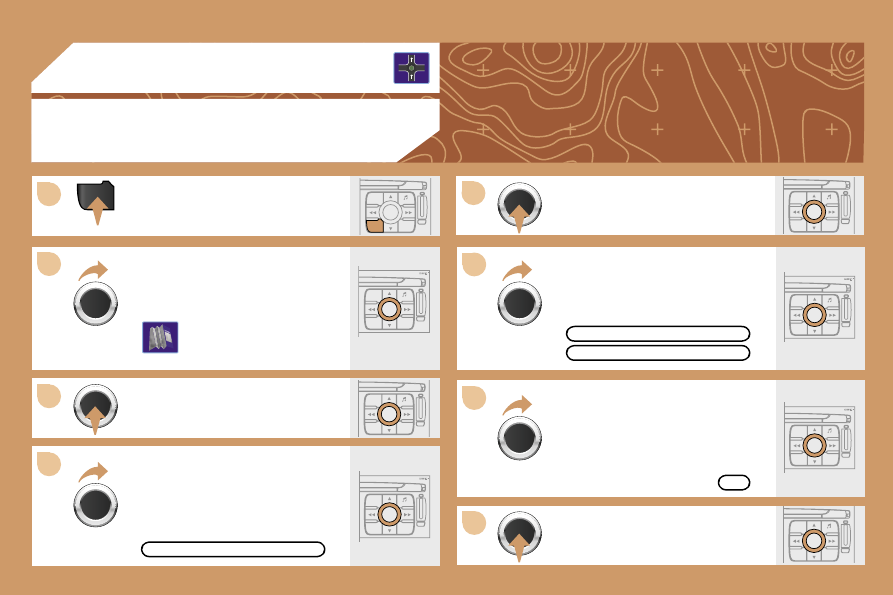
Press the MENU button.
Press the dial to confirm the selection.
Turn the dial and select the MAP
function.
Turn the dial and select the MAP IN
WINDOW or FULL SCREEN MAP
tab.
Select OK.
Press the dial to confirm the
selection.
Press the dial to confirm the selection.
Turn the dial and select the DISPLAY
MAP function.
DISPLAYING THE MAP IN A WINDOW OR
IN FULL SCREEN MODE
03 GPS
DISPLAY MAP
FULL SCREEN MAP
OK
MAP IN WINDOW