Mazda CX-5 (2019 year). Manual - part 15
Windshield Wipers and
Washer
The ignition must be switched ON to use
the wipers.
WARNING
Use only windshield washer fluid or plain
water in the reservoir:
Using radiator antifreeze as washer fluid is
dangerous. If sprayed on the windshield, it
will dirty the windshield, affect your
visibility, and could result in an accident.
Only use windshield washer fluid mixed
with anti-freeze protection in freezing
weather conditions:
Using windshield washer fluid without
anti-freeze protection in freezing weather
conditions is dangerous as it could freeze
on the windshield and block your vision
which could cause an accident. In addition,
make sure the windshield is sufficiently
warmed using the defroster before
spraying the washer fluid.
NOTE
If the windshield wipers are operated
under cold weather conditions or during
snowfall, they could stop due to
accumulated snow on the windshield. If
the windshield wipers stop due to
accumulated snow on the windshield, park
the vehicle in a safe place, turn the wiper
switch off, and then remove the
accumulated snow. If the wiper switch is
turned to another position other than OFF,
the wipers will operate. If the wipers do
not operate even though the wiper switch
is turned to a position other than OFF,
consult an Authorized Mazda Dealer as
soon as possible.
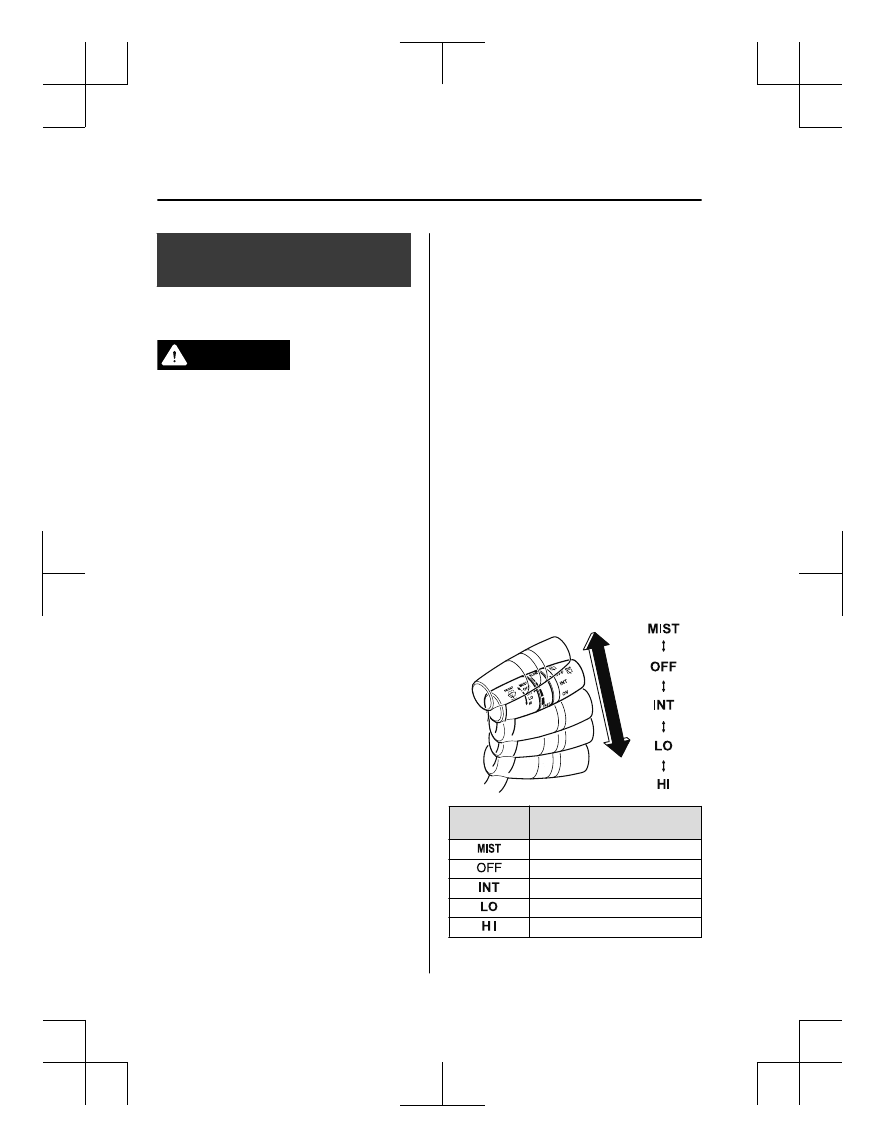
▼ Windshield Wipers
Turn the wipers on by pressing the lever
up or down.
With intermittent wiper
Switch Posi‐
tion
Wiper operation
Operation while pulling up lever
Stop
Intermittent
Low speed
High speed
When Driving
Switches and Controls
4-78
CX-5_8HE3-EA-18I_Edition1
2018-6-29 13:44:47