Lincoln Zephyr (2006 year). Instruction - part 2


  Index      Lincoln     Lincoln Zephyr (2006 year) - instruction in english


Search            copyright infringement  


Content      ..      1      2      3      ..


Lincoln Zephyr (2006 year). Instruction - part 2


sound returns. PRESET # will appear in the display. You may store up to
18 stations, six presets in AM, FM1 and FM2.

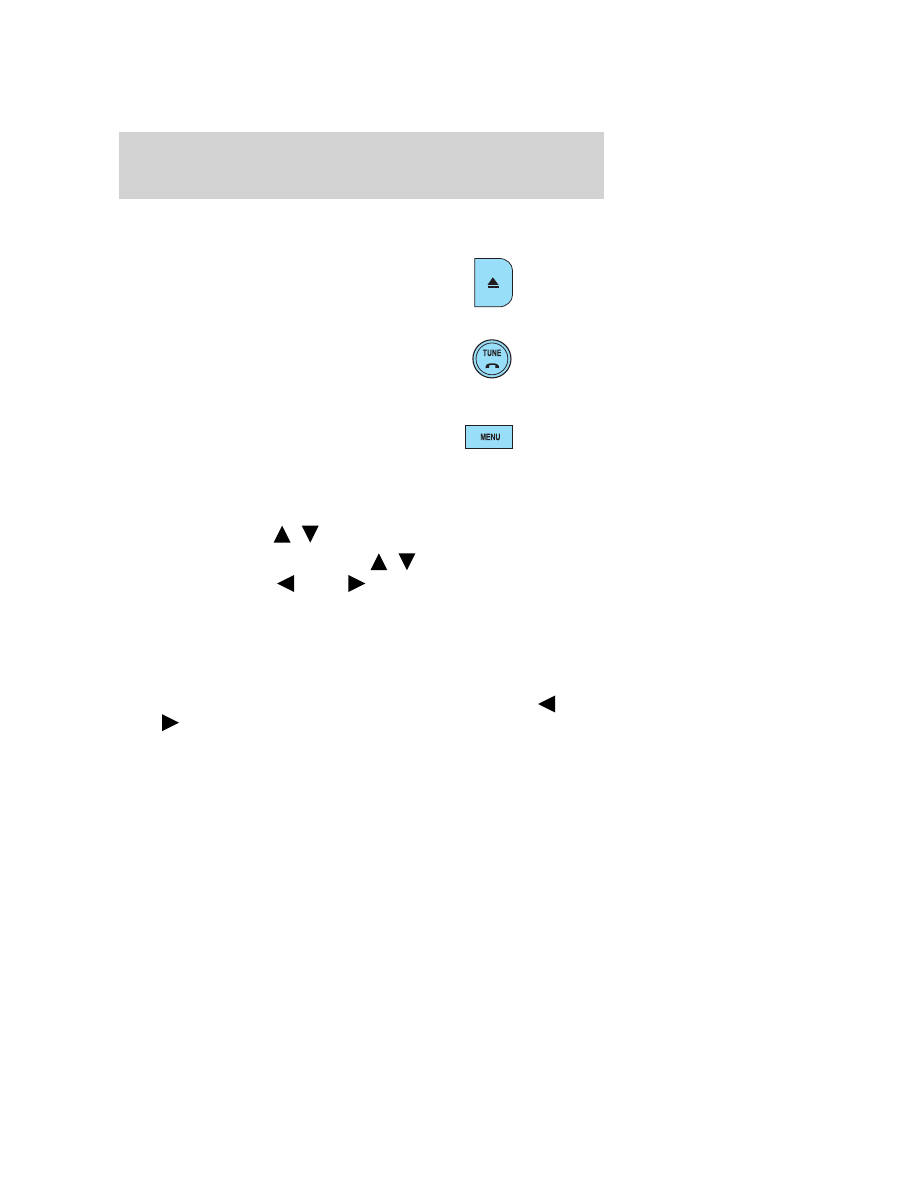
2. Eject: Press to eject the current
CD. To eject a specific CD, press
Eject and the corresponding
memory preset. Press and hold to
autoeject all discs in the system.

3. TUNE: In radio mode, turn to go
up/down the frequency band in
individual increments.
In MP3 mode, turn to advance to
the next/previous MP3 folder.

4. MENU: Press repeatedly to scroll
through the following modes:

Setting the clock: Your vehicle is equipped with an in-dash clock. Refer
to Clock in the Driver Controls chapter for instructions on how to set the
time.

RBDS ON/OFF: Press

/

to turn RBDS ON or OFF.

Program Type: If RBDS is ON, press

/

to find the desired

program type, then use

SEEK

or SCAN to search for FM radio

stations broadcasting the desired program type.

RBDS (Radio Broadcast Data System): Available in FM mode only.
Allows you to search RBDS-equipped stations for certain categories of
music or announcements. With RBDS ON, you may select from: Info
(Information), Alert, Test, Religious, R&B, Classical, Jazz, Oldies,
Country, Top 40, Soft and Rock as described under Program Type
above. When the desired category appears in the display, press
SEEK

to initiate the search. The system will cycle through the

frequency bands searching for stations broadcasting the selected
category type. If the desired program type is not found after searching
the frequency band three times, the search will stop. The announcement
categories are as follows:
• Alert: Searches for RBDS stations actively broadcasting important

messages relating to weather or government emergencies.

• Test: Searches for RBDS stations actively broadcasting a test message.

2006 Zephyr (378)
Owners Guide (post-2002-fmt)
USA 
(fus)

Entertainment Systems

17

-------------------------------------------------------------------------------------------------------------------------------------------------------------

Autoset: Allows you to set the strongest local radio stations without
losing your original instructionly set preset stations for AM/FM1/FM2.

Use

/

to turn on/off.

When the six strongest stations are filled, the station stored in preset 1
will begin playing. If there are less than six strong stations, the system
will store the last one in the remaining presets.

Bass: Press

/

to adjust the bass setting.

Treble: Press

/

to adjust the treble setting.

Balance: Press

/

to adjust the audio between the left and right

speakers.

Fade: Press

/

to adjust the audio between the front and rear

speakers.

Speed sensitive volume: Radio volume automatically changes slightly
with vehicle speed to compensate for road and wind noise. Use

/

to adjust. Recommended level is 1–3. Level 0 turns the feature off and
level 7 is the maximum setting.

Occupancy mode: Use

/

to select and optimize sound for ALL

SEATS, DRIVERS SEAT or REAR SEATS.

Compression: Available in CD mode, this feature brings soft and loud
CD passages together for a more consistent listening level. Press MENU
until compression status is displayed. Press

/

to turn the feature

on/off.

5. Select: These controls are used
in Menu mode to select various
settings/options.

6. Play/Pause/Mute: In radio mode,
press to mute the playing media.
MUTE will appear in the display.
Press again to return to the playing media.
In CD/MP3 mode, press to pause the playing media. PAUSE will appear
in the display. Press again to return to the playing media.

7. SEEK

: Press to access the

next strong station or track.

2006 Zephyr (378)
Owners Guide (post-2002-fmt)
USA 
(fus)

Entertainment Systems

18

-------------------------------------------------------------------------------------------------------------------------------------------------------------

8. FWD (Fast Forward): Press to
instructionly advance in a CD track.

9. TEXT/SCAN: In radio mode,
when listening to a RBDS-equipped
station, press and release to view
the text information of the radio station, if available. Press and hold for a
brief sampling of radio stations.
In CD/MP3 mode, press and release to view the track title, artist name,
disc title or file name, if available. Press and hold for a brief sampling of
all tracks on the current disc.

10. REV (Reverse): Press to
instructionly reverse in a CD track.

11.

SEEK: Press to access the

previous strong station or track.

12. SHUFFLE: Press to play all
tracks on the current disc in random
order.

13. AM/FM: Press to select
AM/FM1/FM2 frequency band.

14. CD: Press to enter CD mode. If
a CD is already loaded into the
system, CD play will begin where it
ended last. If no CD is loaded, NO DISC will appear in the display.

CD units are designed to play commercially pressed 4.75 in (12
cm) audio compact discs only. Due to technical incompatibility,
certain recordable and re-recordable compact discs may not
function correctly when used in Ford CD players. Dirty, warped
or damaged CDs, irregular shaped CDs, CDs with a scratch
protection film attached, and CDs with homemade paper
(adhesive) labels should not be inserted into the CD player. The
label may peel and cause the CD to become jammed. It is
recommended that homemade CDs be identified with permanent
felt tip marker rather than adhesive labels. Ballpoint pens may
damage CDs. Please contact your authorized dealer for further
information.

2006 Zephyr (378)
Owners Guide (post-2002-fmt)
USA 
(fus)

Entertainment Systems

19

-------------------------------------------------------------------------------------------------------------------------------------------------------------

15. AUX: This control is not
operational.

16. ON/OFF/Volume: Press to turn
ON/OFF. Turn to increase/decrease
volume.
If the volume is set above a certain
level and the ignition is turned off, the volume will come back on at a
“nominal” listening level when the ignition switch is turned back on.

17. CD slot: Insert a CD label side
up.

18. LOAD: Press to load a CD.
Press LOAD and a memory preset
to load to a specific slot. Press and
hold to autoload up to six CDs.

GENERAL AUDIO INFORMATION

Radio frequencies: AM and FM frequencies are established by the
Federal Communications Commission (FCC) and the Canadian Radio and
Telecommunications Commission (CRTC). Those frequencies are:

AM: 530, 540–1700, 1710 kHz

FM: 87.7, 87.9–107.7, 107.9 MHz

Radio reception factors: There are three factors that can affect radio
reception:
• Distance/strength: The further you travel from a station, the weaker

the signal and the weaker the reception.

• Terrain: Hills, mountains, tall buildings, power lines, electric fences,

traffic lights and thunderstorms can interfere with your reception.

• Station overload: When you pass a broadcast tower, a stronger signal

may overtake a weaker one and play while the weak station frequency
is displayed.

CD/CD player care:

Do:
• Handle discs by their edges only. Never touch the playing surface.
• Inspect discs before playing. Clean only with an approved CD cleaner

and wipe from the center out.

2006 Zephyr (378)
Owners Guide (post-2002-fmt)
USA 
(fus)

Entertainment Systems

20

-------------------------------------------------------------------------------------------------------------------------------------------------------------

Don’t:
• Expose discs to direct sunlight or heat sources for extended periods

of time.

• Clean using a circular motion.
CD units are designed to play commercially pressed 4.75 in (12
cm) audio compact discs only. Due to technical incompatibility,
certain recordable and re-recordable compact discs may not
function correctly when used in Ford CD players. Dirty, warped
or damaged CDs, irregular shaped CDs, CDs with a scratch
protection film attached, and CDs with homemade paper
(adhesive) labels should not be inserted into the CD player. The
label may peel and cause the CD to become jammed. It is
recommended that homemade CDs be identified with permanent
felt tip marker rather than adhesive labels. Ballpoint pens may
damage CDs. Please contact your authorized dealer for further
information.

Audio system warranty and service: Refer to the Warranty Guide
for audio system warranty information. If service is necessary, see your
dealer or qualified technician.

Navigation system (if equipped)

Your vehicle may be equipped with a Navigation System. Refer to the
Navigation supplement for further information.

2006 Zephyr (378)
Owners Guide (post-2002-fmt)
USA 
(fus)

Entertainment Systems

21

-------------------------------------------------------------------------------------------------------------------------------------------------------------

DUAL AUTOMATIC TEMPERATURE CONTROL (DATC) SYSTEM
WITH HEATED SEATS (IF EQUIPPED)

Temperature conversion: To switch between Fahrenheit and Celsius,
refer to Units (Fahrenheit/Celsius) in the Driver Controls chapter.

MAX A/C setting: In order to achieve maximum cooling performance,
press

, A/C,

, and set the temperature to 60° F (16° C) and the

highest blower setting.

1.

Defrost: Distributes outside air through the windshield defroster

and demister vents. Can be used to clear thin ice or fog from the
windshield. To exit

select another mode.

2. Passenger side temperature control: Press to engage the dual zone
feature of the DATC system. Allows the passenger to choose and control
a different temperature than the driver, if desired.

3.

R

Rear defroster: Press to defrost the rear window. Refer to

Rear window defroster in this section for more information. If your
vehicle is equipped with both rear defroster and heated mirrors, the
same button will activate both.

4. DUAL zone selector: Press to engage/disengage separate passenger
side temperature control.

5.

Passenger heated seat: Press to turn on the passenger side

heated seat. Press once for full heat (two lights above passenger heated
seat control will be illuminated). Press a second time to select low heat

2006 Zephyr (378)
Owners Guide (post-2002-fmt)
USA 
(fus)

Climate Controls

22

-------------------------------------------------------------------------------------------------------------------------------------------------------------

(one light). Press a third time to disengage the feature (all lights will be
off). Note: The passenger heated seat will turn off automatically after 15
minutes of use.

6.

Recirculation control: Press to engage/disengage. Used to

instructionly enable or disable recirculated air operation. When activated,
recirculates air in the cabin thereby reducing the amount of time to cool
down the interior of the vehicle. May also help reduce undesired odors
from reaching the interior of the vehicle. Will work in all modes except
defrost. In automatic operation, the recirculated air operates
automatically as necessary to achieve the selected temperature.

7.

Airflow direction control: Press to toggle through the air

distribution modes listed below. The selected mode will illuminate in the
display.

Distributes air through the windshield defroster ducts, demister

outlets and the front and rear seat floor ducts. The system will
automatically provide outside air to reduce window fogging.

Distributes air through the floor and rear seat floor ducts. The

system will automatically provide outside air to reduce window fogging.

Distributes air through the instrument panel registers and the front

and rear seat floor ducts.

Distributes air through the instrument panel registers.

8. A/C control: Press to activate/deactivate air conditioning. Use with
recirculated air to improve cooling performance and efficiency. Engages
automatically in AUTO,

(defrost) and

(floor/defrost).

9.

Driver heated seat control: Press to heat the driver seat. Press

once for full heat (two lights above passenger heated seat control will be
illuminated). Press a second time to select low heat (one light). Press a
third time to disengage the feature (all lights will be off). Note: The
passenger heated seat will turn off automatically after 15 minutes of use.

10.

Fan Speed: Press to instructionly increase or decrease the fan

speed. To return to automatic fan operation, press AUTO.

11. OFF: Outside air is shut out and the fan will not operate.

12. Driver’s side temperature control: Press to increase/decrease the
temperature in the vehicle cabin.

2006 Zephyr (378)
Owners Guide (post-2002-fmt)
USA 
(fus)

Climate Controls

23

-------------------------------------------------------------------------------------------------------------------------------------------------------------

13. AUTO: To engage automatic temperature control, press AUTO and
select the desired temperature using the temperature control. The
system will automatically determine fan speed, airflow location, A/C on
or off, and outside or recirculated air, to heat or cool the vehicle to reach
the desired temperature.

14. EXT: Press to display outside temperature. Press again to display
cabin temperature settings.

Dual Automatic Temperature Control (DATC) system with heated
and cooled seats (if equipped)

Temperature conversion: To switch between Fahrenheit and Celsius,
refer to Units (Fahrenheit/Celsius) in the Driver Controls chapter.

MAX A/C setting: In order to achieve maximum cooling performance,
press

, A/C,

, and set the temperature to 60° F (16° C) and the

highest blower setting.

1.

Defrost: Distributes outside air through the windshield defroster

and demister vents. Can be used to clear thin ice or fog from the
windshield. To exit

select another mode.

2. Passenger side temperature control: Press to engage the dual zone
feature of the DATC system. Allows the passenger to choose and control
a different temperature than the driver, if desired.

3.

R

Rear defroster: Press to defrost the rear window. Refer to the

Rear window defroster section in this chapter for more information.

2006 Zephyr (378)
Owners Guide (post-2002-fmt)
USA 
(fus)

Climate Controls

24

-------------------------------------------------------------------------------------------------------------------------------------------------------------

4. DUAL zone selector: Press to engage/disengage separate passenger
side temperature control.

5.

Passenger heated seat: Press to turn on the passenger side heated

seat. Press once for full heat (three lights above passenger heated seat
control will be illuminated). Press a second time to select medium heat
(two lights). Press a third time to select low heat (one light). Press a
fourth time to disengage the feature (all lights will be off). Note: The
passenger heated seat will turn off automatically after 15 minutes of use.

6.

Passenger cooled seat: Press to turn on the passenger side

cooled seat. Press once for full cool (three lights above passenger cooled
seat control will be illuminated). Press a second time to select medium
cool (two lights). Press a third time to select low cool (one light). Press
a fourth time to disengage the feature (all lights will be off). Note: The
passenger cooled seat will turn off automatically after 30 minutes of use.

7.

Airflow direction control: Press to toggle through the air

distribution modes listed below. The selected mode will illuminate in the
display.

Distributes air through the windshield defroster ducts, demister

outlets and the front and rear seat floor ducts. The system will
automatically provide outside air to reduce window fogging.

Distributes air through the floor and rear seat floor ducts. The

system will automatically provide outside air to reduce window fogging.

Distributes air through the instrument panel registers and the front

and rear seat floor ducts.

Distributes air through the instrument panel registers.

8.

Driver heated seat: Press to turn on the driver side heated seat.

Press once for full heat (three lights above driver heated seat control will
be illuminated). Press a second time to select medium heat (two lights).
Press a third time to select low heat (one light). Press a fourth time to
disengage the feature (all lights will be off). Note: The driver heated
seat will turn off automatically after 15 minutes of use.

9.

Driver cooled seat: Press to turn on the driver side cooled seat.

Press once for full cool (three lights above driver cooled seat control will
be illuminated). Press a second time to select medium cool (two lights).
Press a third time to select low cool (one light). Press a fourth time to
disengage the feature (all lights will be off). Note: The driver cooled
seat will turn off automatically after 30 minutes of use.

2006 Zephyr (378)
Owners Guide (post-2002-fmt)
USA 
(fus)

Climate Controls

25

-------------------------------------------------------------------------------------------------------------------------------------------------------------

10.

Fan Speed: Press to instructionly increase or decrease the fan

speed. To return to automatic fan operation, press AUTO.

11.

Recirculation control: Press to engage/disengage. Used to

instructionly enable or disable recirculated air operation. When activated,
recirculates air in the cabin thereby reducing the amount of time to cool
down the interior of the vehicle. May also help reduce undesired odors
from reaching the interior of the vehicle. Will work in all modes except
defrost. In automatic operation, the recirculated air operates
automatically as necessary to achieve the selected temperature.

12. EXT control: Press to display the outside air temperature. Press
again to return to interior temperature. Note: Exterior readings are most
accurate when the vehicle has been moving for a period of time.

13. A/C control: Press to activate/deactivate air conditioning. Use with
recirculated air to improve cooling performance and efficiency. Engages
automatically in AUTO,

(defrost) and

(floor/defrost).

14. OFF: Outside air is shut out and the fan will not operate.

15. Driver’s side temperature control: Controls the temperature on
the driver side of the vehicle in dual zone and controls the temperature
of both the driver and passenger sides in single zone.

16. AUTO: Press to engage automatic temperature control. Use the
temperature control to select the desired temperature setting. The
system will automatically determine fan speed, airflow location, A/C on or
off, and outside or recirculated air to heat or cool the vehicle, allowing it
to reach the desired temperature. Press and hold AUTO for about two
seconds to toggle between single zone and dual zone temperature control.

Dual Automatic Temperature Control (DATC) system operating tips
• To reduce fog build up on the windshield during humid weather, place

the air flow selector in the

position.

• To reduce humidity build up inside the vehicle, do not drive with the

system OFF, or with recirculated air

engaged and A/C off.

• Do not put objects under the front seats that will interfere with the

airflow to the back seats.

• Remove any snow, ice or leaves from the air intake area at the base of

the windshield.

• To improve the A/C cool down, drive with the windows slightly open

for 2-3 minutes after start up or until the vehicle has been “aired out.”

2006 Zephyr (378)
Owners Guide (post-2002-fmt)
USA 
(fus)

Climate Controls

26

-------------------------------------------------------------------------------------------------------------------------------------------------------------

• For maximum cooling performance (MAX A/C):
Automatic operation:
• Press AUTO for full automatic operation.
• Do not override A/C or

(recirculated air).

• Set the temperature to 60° F (16° C).
Override operation:
• Select air distribution.
• Select A/C and

(recirculated air). Use

(recirculated air)

with A/C to provide colder airflow.

• Set the temperature to 60° F (16° C).
• Set highest fan speed initially, then adjust to maintain comfort.
In MAX A/C setting:
• Move the temperature control to full cold.
• Set highest fan speed initially, then adjust to maintain comfort.
In

(panel) or

(panel/floor) modes:

• Move temperature control to full cold.
• Select A/C and

(recirculated air). Use recirculated air with A/C

to provide colder airflow.

• Set highest fan speed initially, then adjust to maintain comfort.
• To aid in side window defogging/demisting in cold weather:
1. Select

.

2. Select A/C.

3. Adjust the temperature control to maintain comfort.

4. Set the fan speed to the highest setting.

5. Direct the outer instrument panel vents towards the side windows.

To increase airflow to the outer instrument panel vents, close the vents
located in the middle of the instrument panel.

Do not place objects on top of the instrument panel as these
objects may become projectiles in a collision or sudden stop.

2006 Zephyr (378)
Owners Guide (post-2002-fmt)
USA 
(fus)

Climate Controls

27

-------------------------------------------------------------------------------------------------------------------------------------------------------------

REAR WINDOW DEFROSTER

R

The rear defroster control is located on the climate control panel and
works to clear the rear window of fog and thin ice.

The ignition must be in the 3 (RUN) position to operate the rear window
defroster.

The rear defroster turns off automatically after 10 minutes or when the
ignition is turned to the 1 (LOCK) position. To instructionly turn off the
defroster before 10 minutes have passed, push the control again.

Do not use razor blades or other sharp objects to clean the inside
of the rear window or to remove decals from the inside of the
rear window. This may cause damage to the heated grid lines and
will not be covered by your warranty.

2006 Zephyr (378)
Owners Guide (post-2002-fmt)
USA 
(fus)

Climate Controls

28

-------------------------------------------------------------------------------------------------------------------------------------------------------------

HEADLAMP CONTROL

Turns the lamps off.

Turns on the parking lamps,

instrument panel lamps, license
plate lamps and tail lamps.

Turns the headlamps on.

Autolamp control

The autolamp system provides light
sensitive automatic on-off control of
the exterior lights normally
controlled by the headlamp control.
• To turn autolamps on, rotate the

control counterclockwise to

.

• To turn autolamps off, rotate the

control clockwise to

.

The autolamp system also keeps the
lights on for a predetermined
amount of time after the ignition switch is turned to LOCK. You can
change the amount of time the lamps stay on by using the programming
procedure that follows:

Autolamps - Programmable exit delay

Programmable exit delay allows the length of the autolamp exit delay to
be changed.

To program the auto lamp exit time delay:

1. Start with the ignition in the LOCK position and the headlamp control
in the autolamp position.

2. Turn the headlamp switch to

.

3. Turn the ignition switch to RUN and then back to LOCK.

4. Turn the headlamp switch to the autolamp position. The headlamps
will turn on.

2006 Zephyr (378)
Owners Guide (post-2002-fmt)
USA 
(fus)

Lights

29

-------------------------------------------------------------------------------------------------------------------------------------------------------------

5. Wait the desired amount of time for the exit delay you want (up to
three minutes), then turn the headlamp switch to

. The headlamps

will turn off.

Foglamp control

With the ignition on, the foglamps
can be turned on when the
headlamp control is pulled toward
you and is in any of the following
positions:
• Parking lamps
• Low beams
• Autolamps (when active)
The foglamps will not operate when
the high beams are active.

Daytime running lamps (DRL) (if equipped)

Turns on the front turn lamps.

To activate:
• the ignition must be in the ON position,
• the headlamp control is in the OFF, autolamps or parking lamp

position and

• the transmission must be out of the Park position.

Always remember to turn on your headlamps at dusk or during
inclement weather. The Daytime Running Lamp (DRL) system

does not activate the tail lamps and generally may not provide
adequate lighting during these conditions. Failure to activate your
headlamps under these conditions may result in a collision.

2006 Zephyr (378)
Owners Guide (post-2002-fmt)
USA 
(fus)

Lights

30

-------------------------------------------------------------------------------------------------------------------------------------------------------------

High beams

Push the lever toward the
instrument panel to activate. Pull
the lever towards you to deactivate.

Flash to pass

Pull toward you slightly to activate
and release to deactivate.

PANEL DIMMER CONTROL

Use to adjust the brightness of the
instrument panel and all applicable
switches in the vehicle during
headlamp and parklamp operation.

Move the control to the full upright
position, past detent, to turn on the
interior lamps.

At dusk and dawn, the brightness
are illuminated to higher than
normal intensity to enhance contrast
and visibility. The system automatically “dims down” as ambient light
reaches the dash-mounted sensor. The interior control lights dim
progressively in four steps until they reach nighttime operating levels.
Certain displays like the message center and the climate control unit do
not change with the dimmer control till the dash-mounted sensor senses
full night conditions.

OFF

2006 Zephyr (378)
Owners Guide (post-2002-fmt)
USA 
(fus)

Lights

31

-------------------------------------------------------------------------------------------------------------------------------------------------------------

AIMING THE HEADLAMPS

The headlamps on your vehicle are properly aimed at the assembly plant.
If your vehicle has been in an accident the alignment of your headlamps
should be checked by your authorized dealer.

Vertical aim adjustment

1. Park the vehicle directly in front of a wall or screen on a level surface,
approximately 25 feet (7.6 meters) away.
• (1) 8 feet (2.4 meters)
• (2) Center height of lamp to

ground

• (3) 25 feet (7.6 meters)
• (4) Horizontal reference line
2. Measure the height of the
headlamp bulb center from the
ground and mark an 8 foot (2.5
meter) horizontal reference line on
the vertical wall or screen at this
height (a piece of masking tape works well).

3. Turn on the low beam headlamps to illuminate the wall or screen and
open the hood.

To see a clearer light pattern for adjusting, you may want to block the
light from one headlamp while adjusting the other.

4. On the wall or screen you will
observe an area of high intensity
light. The top of the high intensity
area should touch the horizontal
reference line, if not, the beam will
need to be adjusted using the next
step.

2006 Zephyr (378)
Owners Guide (post-2002-fmt)
USA 
(fus)

Lights

32

-------------------------------------------------------------------------------------------------------------------------------------------------------------


Content      ..      1      2      3      ..