Medha MEP 660. Troubleshooting Manual (2008) - page 3
wiring and rectify.
B. If the voltage is more than 65V, check the voltage between
S21FB and locomotive 4 wire.
a) If the voltage is zero, the interlock is bad. Replace the
interlock/aux. Contact.
b) If the voltage is more than 65V,
1) Check the slackness of the connector at the MEP660
control unit for the cable ID: AU. If the connector is slack
tighten the connector.
2) Check the continuity of the wire S21FB from the
contactor to the cable (ID: AU) connector pin-L. If
necessary replace the cable.
3) If still Green LED 10 is not glowing, the digital input card
MDIP16 in slot No. 10 defective. Replace the card and
check.
11. If the Green LED 10 is glowing and corresponding yellow LED is not
glowing also, the MDIP16 card is defective.
198
PARAMETER
DESCRIPTION
FAULT CODE
1197
FAULT MESSAGE
S31 Auxiliary Contact Stuck Open. Run Auto/Manual Test
RESTRICTIONS
--
ALARM BELL
--
RESET LEVEL
Low, Manual
If the fault condition is still present when cleared manually, the fault
will be generated again.
FAULT
Automatic when the S31 power contactor Aux. Contact closes.
RECOVERY
PROBABLE
1.
Defective Power contactor
CAUSES
2.
Defective wiring.
3.
Defective digital output card MLSD16 in slot No. 14.
4.
Defective digital input card MDIP16 in slot No. 10
FAULT
1.
Set the display mode to ‘Manual Test for outputs’ under ‘Test Mode’
ISOLATION
available in main menu. The display exhibits certain conditions to
be full filled. After that press Enter key to start testing of outputs.
Ensure control air pressure is 5 Kg./Sq.Cm.
2.
Enter 8 against channel no. and then press Enter key to test S31
power contactor. Press 1 to energise the contactor and 0 to de-
energise the contactor.
3.
Press 1 to energise the S31 power contactor.
4.
If the contactor is not picking up. Check the voltage across the
operating coil of the magnet valve.
5.
If the voltage is zero, check the voltage between Wire 13 at the coil
terminal and locomotive 4 wire.
A. If the voltage is zero, check the continuity of 13 wire connected
to the coil terminal.
B. If the voltage is more than 65V, check the voltage between
locomotive 13 wire and S31CL wire at the coil terminal.
C. If the voltage is zero, negative path is not getting completed
through MEP.
a) Check the slackness of the connector at MEP-660 control unit
for the cable ID: AY. If found slack tighten the connector.
b) Check the continuity of wire S31CL from the coil terminal to
the connector of cable ID: AY (pin - J). If necessary replace
the cable.
c) If still voltage is zero, the digital output card MLSD16 in slot
No. 14 might be defective. Replace the card and check once
again.
6.
If the Voltage is more than 65V and still power contactor is not
picking up, then the power contactor or magnet valve or pneumatic
circuit is defective. Identify and replace the component/contactor.
7.
Press 0 to de-energise the power contactor.
8.
While you are toggling the power contactor, check the status of the
Green LED 11 and Yellow LED 11 on the digital input card MDIP16
in slot 10.
9.
With power contactor energized, Both the LEDs should glow.
10. If the Green LED is not glowing, check the voltage between wire 51
at the power contactor aux. Interlock and locomotive 4 wire.
A. If the voltage is zero, check the continuity of the wire Loop 51
connected to S31 power contactor interlock. Identify faulty
199
wiring and rectify.
B. If the voltage is more than 65V, check the voltage between
S31FB and locomotive 4 wire.
a) If the voltage is zero, the interlock is bad. Replace the
interlock / aux. Contact.
b) If the voltage is more than 65V,
1) Check the slackness of the connector at the MEP660
control unit for the cable ID: AU. If the connector is slack
tighten the connector.
2) Check the continuity of the wire S31FB from the
contactor to the cable (ID: AU) connector pin-M. If
necessary replace the cable.
3) If still Green LED 11 is not glowing, the digital input card
MDIP16 in slot No. 11 defective. Replace the card and
check.
11. If the Green LED 11 is glowing and corresponding yellow LED is not
glowing also, the MDIP16 card is defective.
200
PARAMETER
DESCRIPTION
FAULT CODE
1198
FAULT MESSAGE
P1 Auxiliary Contact Stuck Open. Run Auto/Manual Test
RESTRICTIONS
Dynamic braking
ALARM BELL
--
RESET LEVEL
Low, Manual
If the fault condition is still present when cleared manually, the fault
will be generated again.
FAULT
Automatic when the P1 power contactor Aux. Contact closes.
RECOVERY
PROBABLE
1.
Defective Power contactor
CAUSES
2.
Defective wiring.
3.
Defective digital output card MLSD16 in slot No. 14.
4.
Defective digital input card MDIP16 in slot No. 10
FAULT
1.
Set the display mode to ‘Manual Test for outputs’ under ‘Test Mode’
ISOLATION
available in main menu. The display exhibits certain conditions to
be full filled. After that press Enter key to start testing of outputs.
Ensure control air pressure is 5 Kg./Sq.Cm.
2.
Enter 0 against channel no. and then press Enter key to test P1
power contactor. Press 1 to energise the contactor and 0 to de-
energise the contactor.
3.
Press 1 to energise the P1 power contactor.
4.
If the contactor is not picking up. Check the voltage across the
operating coil of the magnet valve.
5.
If the voltage is zero, check the voltage between Wire 13 at the coil
terminal and locomotive 4 wire.
A. If the voltage is zero, check the continuity of 13 wire connected
to the coil terminal.
B. If the voltage is more than 65V, check the voltage between
locomotive 13 wire and P1CL wire at the coil terminal.
C. If the voltage is zero, negative path is not getting completed
through MEP.
a) Check the slackness of the connector at MEP-660 control unit
for the cable ID: AY. If found slack tighten the connector.
b) Check the continuity of wire P1CL from the coil terminal to
the connector of cable ID: AY (pin - A). If necessary replace
the cable.
c) If still voltage is zero, the digital output card MLSD16 in slot
No. 14 might be defective. Replace the card and check once
again.
6.
If the Voltage is more than 65V and still power contactor is not
picking up, then the power contactor or magnet valve or pneumatic
circuit is defective. Identify and replace the component/contactor.
7.
Press 0 to de-energise the power contactor.
8.
While you are toggling the power contactor, check the status of the
Green LED 3 and Yellow LED 3 on the digital input card MDIP16 in
slot 10.
9.
With power contactor energized, Both the LEDs should glow.
10. If the Green LED is not glowing, check the voltage between wire 51
at the power contactor aux. Interlock and locomotive 4 wire.
A. If the voltage is zero, check the continuity of the wire Loop 51
connected to P1 power contactor interlock. Identify faulty wiring
201
and rectify.
B. If the voltage is more than 65V, check the voltage between
P1FB and locomotive 4 wire.
a) If the voltage is zero, the interlock is bad. Replace the
interlock/aux. Contact.
b) If the voltage is more than 65V,
1) Check the slackness of the connector at the MEP660
control unit for the cable ID: AU. If the connector is slack
tighten the connector.
2) Check the continuity of the wire P1FB from the contactor
to the cable (ID: AU) connector pin-D. If necessary
replace the cable.
3) If still Green LED 3 is not glowing, the digital input card
MDIP16 in slot No. 11 defective. Replace the card and
check.
11. If the Green LED 3 is glowing and corresponding yellow LED is not
glowing also, the MDIP16 card is defective.
202
PARAMETER
DESCRIPTION
FAULT CODE
1199
FAULT MESSAGE
P21 Auxiliary Contact Stuck Open. Run Auto/Manual Test
RESTRICTIONS
Dynamic braking
ALARM BELL
--
RESET LEVEL
Low, Manual
If the fault condition is still present when cleared manually, the fault
will be generated again.
FAULT
Automatic when the P21 power contactor Aux. Contact closes.
RECOVERY
PROBABLE
1.
Defective Power contactor
CAUSES
2.
Defective wiring.
3.
Defective digital output card MLSD16 in slot No. 14.
4.
Defective digital input card MDIP16 in slot No. 10
FAULT
1.
Set the display mode to ‘Manual Test for outputs’ under ‘Test Mode’
ISOLATION
available in main menu. The display exhibits certain conditions to
be full filled. After that press Enter key to start testing of outputs.
Ensure control air pressure is 5 Kg./Sq.Cm.
2.
Enter 1 against channel no. and then press Enter key to test P21
power contactor. Press 1 to energise the contactor and 0 to de-
energise the contactor.
3.
Press 1 to energise the P21 power contactor.
4.
If the contactor is not picking up. Check the voltage across the
operating coil of the magnet valve.
5.
If the voltage is zero, check the voltage between Wire 13 at the coil
terminal and locomotive 4 wire.
A. If the voltage is zero, check the continuity of 13 wire connected
to the coil terminal.
B. If the voltage is more than 65V, check the voltage between
locomotive 13 wire and P21CL wire at the coil terminal.
C. If the voltage is zero, negative path is not getting completed
through MEP.
a) Check the slackness of the connector at MEP-660 control unit
for the cable ID: AY. If found slack tighten the connector.
b) Check the continuity of wire P21CL from the coil terminal to
the connector of cable ID: AY (pin - B). If necessary replace
the cable.
c) If still voltage is zero, the digital output card MLSD16 in slot
No. 14 might be defective. Replace the card and check once
again.
6.
If the Voltage is more than 65V and still power contactor is not
picking up, then the power contactor or magnet valve or pneumatic
circuit is defective. Identify and replace the component/contactor.
7.
Press 0 to de-energise the power contactor.
8.
While you are toggling the power contactor, check the status of the
Green LED 4 and Yellow LED 4 on the digital input card MDIP16 in
slot 10.
9.
With power contactor energized, Both the LEDs should glow.
10. If the Green LED is not glowing, check the voltage between wire 51
at the power contactor aux. Interlock and locomotive 4 wire.
A. If the voltage is zero, check the continuity of the wire Loop 51
connected to P21 power contactor interlock. Identify faulty
203
wiring and rectify.
B. If the voltage is more than 65V, check the voltage between
P21FB and locomotive 4 wire.
a) If the voltage is zero, the interlock is bad. Replace the
interlock/aux. Contact.
b) If the voltage is more than 65V,
1) Check the slackness of the connector at the MEP660
control unit for the cable ID: AU. If the connector is slack
tighten the connector.
2) Check the continuity of the wire P21FB from the contactor
to the cable (ID: AU) connector pin-E. If necessary
replace the cable.
3) If still Green LED 4 is not glowing, the digital input card
MDIP16 in slot No. 11 defective. Replace the card and
check.
11. If the Green LED 4 is glowing and corresponding yellow LED is not
glowing also, the MDIP16 card is defective.
204
PARAMETER
DESCRIPTION
FAULT CODE
1200
FAULT MESSAGE
P31 Auxiliary Contact Stuck Open. Run Auto/Manual Test
RESTRICTIONS
Dynamic braking
ALARM BELL
--
RESET LEVEL
Low, Manual
If the fault condition is still present when cleared manually, the fault
will be generated again.
FAULT
Automatic when the P31 power contactor Aux. Contact closes.
RECOVERY
PROBABLE
1.
Defective Power contactor
CAUSES
2.
Defective wiring.
3.
Defective digital output card MLSD16 in slot No. 14.
4.
Defective digital input card MDIP16 in slot No. 10
FAULT
1.
Set the display mode to ‘Manual Test for outputs’ under ‘Test Mode’
ISOLATION
available in main menu. The display exhibits certain conditions to
be full filled. After that press Enter key to start testing of outputs.
Ensure control air pressure is 5 Kg./Sq.Cm.
2.
Enter 2 against channel no. and then press Enter key to test P31
power contactor. Press 1 to energise the contactor and 0 to de-
energise the contactor.
3.
Press 1 to energise the P31 power contactor.
4.
If the contactor is not picking up. Check the voltage across the
operating coil of the magnet valve.
5.
If the voltage is zero, check the voltage between Wire 13 at the coil
terminal and locomotive 4 wire.
A. If the voltage is zero, check the continuity of 13 wire connected
to the coil terminal.
B. If the voltage is more than 65V, check the voltage between
locomotive 13 wire and P31CL wire at the coil terminal.
C. If the voltage is zero, negative path is not getting completed
through MEP.
a) Check the slackness of the connector at MEP-660 control unit
for the cable ID: AY. If found slack tighten the connector.
b) Check the continuity of wire P31CL from the coil terminal to
the connector of cable ID: AY (pin - C). If necessary replace
the cable.
c) If still voltage is zero, the digital output card MLSD16 in slot
No. 14 might be defective. Replace the card and check once
again.
6.
If the Voltage is more than 65V and still power contactor is not
picking up, then the power contactor or magnet valve or pneumatic
circuit is defective. Identify and replace the component/contactor.
7.
Press 0 to de-energise the power contactor.
8.
While you are toggling the power contactor, check the status of the
Green LED 5 and Yellow LED 5 on the digital input card MDIP16 in
slot 10.
9.
With power contactor energized, Both the LEDs should glow.
10. If the Green LED is not glowing, check the voltage between wire 51
at the power contactor aux. Interlock and locomotive 4 wire.
A. If the voltage is zero, check the continuity of the wire Loop 51
connected to P31 power contactor interlock. Identify faulty
205
wiring and rectify.
B. If the voltage is more than 65V, check the voltage between
P31FB and locomotive 4 wire.
a) If the voltage is zero, the interlock is bad. Replace the
interlock/aux. Contact.
b) If the voltage is more than 65V,
1) Check the slackness of the connector at the MEP660
control unit for the cable ID: AU. If the connector is slack
tighten the connector.
2) Check the continuity of the wire P31FB from the contactor
to the cable (ID: AU) connector pin-F. If necessary
replace the cable.
3) If still Green LED 5 is not glowing, the digital input card
MDIP16 in slot No. 11 defective. Replace the card and
check.
11. If the Green LED 5 is glowing and corresponding yellow LED is not
glowing also, the MDIP16 card is defective.
206
PARAMETER
DESCRIPTION
FAULT CODE
1201
FAULT MESSAGE
P2 Auxiliary Contact Stuck Open. Run Auto/Manual Test
RESTRICTIONS
--
ALARM BELL
--
RESET LEVEL
Low, Manual
If the fault condition is still present when cleared manually, the fault
will be generated again.
FAULT
Automatic when the P2 power contactor Aux. Contact closes.
RECOVERY
PROBABLE
1.
Defective Power contactor
CAUSES
2.
Defective wiring.
3.
Defective digital output card MLSD16 in slot No. 14.
4.
Defective digital input card MDIP16 in slot No. 10
FAULT
1.
Set the display mode to ‘Manual Test for outputs’ under ‘Test Mode’
ISOLATION
available in main menu. The display exhibits certain conditions to
be full filled. After that press Enter key to start testing of outputs.
Ensure control air pressure is 5 Kg./Sq.Cm.
2.
Enter 3 against channel no. and then press Enter key to test P2
power contactor. Press 1 to energise the contactor and 0 to de-
energise the contactor.
3.
Press 1 to energise the P2 power contactor.
4.
If the contactor is not picking up. Check the voltage across the
operating coil of the magnet valve.
5.
If the voltage is zero, check the voltage between Wire 13 at the coil
terminal and locomotive 4 wire.
A. If the voltage is zero, check the continuity of 13 wire connected
to the coil terminal.
B. If the voltage is more than 65V, check the voltage between
locomotive 13 wire and P2CL wire at the coil terminal.
C. If the voltage is zero, negative path is not getting completed
through MEP.
a) Check the slackness of the connector at MEP-660 control unit
for the cable ID: AY. If found slack tighten the connector.
b) Check the continuity of wire P2CL from the coil terminal to
the connector of cable ID: AY (pin - D). If necessary replace
the cable.
c) If still voltage is zero, the digital output card MLSD16 in slot
No. 14 might be defective. Replace the card and check once
again.
6.
If the Voltage is more than 65V and still power contactor is not
picking up, then the power contactor or magnet valve or pneumatic
circuit is defective. Identify and replace the component/contactor.
7.
Press 0 to de-energise the power contactor.
8.
While you are toggling the power contactor, check the status of the
Green LED 6 and Yellow LED 6 on the digital input card MDIP16 in
slot 10.
9.
With power contactor energized, Both the LEDs should glow.
10. If the Green LED is not glowing, check the voltage between wire 51
at the power contactor aux. Interlock and locomotive 4 wire.
A. If the voltage is zero, check the continuity of the wire Loop 51
connected to P2 power contactor interlock. Identify faulty wiring
207
and rectify.
B. If the voltage is more than 65V, check the voltage between
P2FB and locomotive 4 wire.
a) If the voltage is zero, the interlock is bad. Replace the
interlock/aux. Contact.
b) If the voltage is more than 65V,
1) Check the slackness of the connector at the MEP660
control unit for the cable ID: AU. If the connector is slack
tighten the connector.
2) Check the continuity of the wire P2FB from the contactor
to the cable (ID: AU) connector pin-G. If necessary
replace the cable.
3) If still Green LED 6 is not glowing, the digital input card
MDIP16 in slot No. 11 defective. Replace the card and
check.
11. If the Green LED 6 is glowing and corresponding yellow LED is not
glowing also, the MDIP16 card is defective.
208
PARAMETER
DESCRIPTION
FAULT CODE
1202
FAULT MESSAGE
P22 Auxiliary Contact Stuck Open. Run Auto/Manual Test
RESTRICTIONS
--
ALARM BELL
--
RESET LEVEL
Low, Manual
If the fault condition is still present when cleared manually, the fault
will be generated again.
FAULT
Automatic when the P22 power contactor Aux. Contact closes.
RECOVERY
PROBABLE
1.
Defective Power contactor
CAUSES
2.
Defective wiring.
3.
Defective digital output card MLSD16 in slot No. 14.
4.
Defective digital input card MDIP16 in slot No. 10
FAULT
1.
Set the display mode to ‘Manual Test for outputs’ under ‘Test Mode’
ISOLATION
available in main menu. The display exhibits certain conditions to
be full filled. After that press Enter key to start testing of outputs.
Ensure control air pressure is 5 Kg./Sq.Cm.
2.
Enter 4 against channel no. and then press Enter key to test P22
power contactor. Press 1 to energise the contactor and 0 to de-
energise the contactor.
3.
Press 1 to energise the P22 power contactor.
4.
If the contactor is not picking up. Check the voltage across the
operating coil of the magnet valve.
5.
If the voltage is zero, check the voltage between Wire 13 at the coil
terminal and locomotive 4 wire.
A. If the voltage is zero, check the continuity of 13 wire connected
to the coil terminal.
B. If the voltage is more than 65V, check the voltage between
locomotive 13 wire and P22CL wire at the coil terminal.
C. If the voltage is zero, negative path is not getting completed
through MEP.
a) Check the slackness of the connector at MEP-660 control unit
for the cable ID: AY. If found slack tighten the connector.
b) Check the continuity of wire P22CL from the coil terminal to
the connector of cable ID: AY (pin - E). If necessary replace
the cable.
c) If still voltage is zero, the digital output card MLSD16 in slot
No. 14 might be defective. Replace the card and check once
again.
6.
If the Voltage is more than 65V and still power contactor is not
picking up, then the power contactor or magnet valve or pneumatic
circuit is defective. Identify and replace the component/contactor.
7.
Press 0 to de-energise the power contactor.
8.
While you are toggling the power contactor, check the status of the
Green LED 7 and Yellow LED 7 on the digital input card MDIP16 in
slot 10.
9.
With power contactor energized, Both the LEDs should glow.
10. If the Green LED is not glowing, check the voltage between wire 51
at the power contactor aux. Interlock and locomotive 4 wire.
A. If the voltage is zero, check the continuity of the wire Loop 51
connected to P22 power contactor interlock. Identify faulty
209
wiring and rectify.
B. If the voltage is more than 65V, check the voltage between
P22FB and locomotive 4 wire.
a) If the voltage is zero, the interlock is bad. Replace the
interlock/aux. Contact.
b) If the voltage is more than 65V,
1) Check the slackness of the connector at the MEP660
control unit for the cable ID: AU. If the connector is slack
tighten the connector.
2) Check the continuity of the wire P22FB from the contactor
to the cable (ID: AU) connector pin-H. If necessary
replace the cable.
3) If still Green LED 7 is not glowing, the digital input card
MDIP16 in slot No. 11 defective. Replace the card and
check.
11. If the Green LED 7 is glowing and corresponding yellow LED is not
glowing also, the MDIP16 card is defective.
210
PARAMETER
DESCRIPTION
FAULT CODE
1203
FAULT MESSAGE
P32 Auxiliary Contact Stuck Open. Run Auto/Manual Test
RESTRICTIONS
Dynamic braking
ALARM BELL
--
RESET LEVEL
Low, Manual
If the fault condition is still present when cleared manually, the fault
will be generated again.
FAULT
Automatic when the P32 power contactor Aux. Contact closes.
RECOVERY
PROBABLE
1.
Defective Power contactor
CAUSES
2.
Defective wiring.
3.
Defective digital output card MLSD16 in slot No. 14.
4.
Defective digital input card MDIP16 in slot No. 10
FAULT
1.
Set the display mode to ‘Manual Test for outputs’ under ‘Test Mode’
ISOLATION
available in main menu. The display exhibits certain conditions to
be full filled. After that press Enter key to start testing of outputs.
Ensure control air pressure is 5 Kg./Sq.Cm.
2.
Enter 5 against channel no. and then press Enter key to test P32
power contactor. Press 1 to energise the contactor and 0 to de-
energise the contactor.
3.
Press 1 to energise the P32 power contactor.
4.
If the contactor is not picking up. Check the voltage across the
operating coil of the magnet valve.
5.
If the voltage is zero, check the voltage between Wire 13 at the coil
terminal and locomotive 4 wire.
A. If the voltage is zero, check the continuity of 13 wire connected
to the coil terminal.
B. If the voltage is more than 65V, check the voltage between
locomotive 13 wire and P32CL wire at the coil terminal.
C. If the voltage is zero, negative path is not getting completed
through MEP.
a) Check the slackness of the connector at MEP-660 control unit
for the cable ID: AY. If found slack tighten the connector.
b) Check the continuity of wire P32CL from the coil terminal to
the connector of cable ID: AY (pin - F). If necessary replace
the cable.
c) If still voltage is zero, the digital output card MLSD16 in slot
No. 14 might be defective. Replace the card and check once
again.
6.
If the Voltage is more than 65V and still power contactor is not
picking up, then the power contactor or magnet valve or pneumatic
circuit is defective. Identify and replace the component/contactor.
7.
Press 0 to de-energise the power contactor.
8.
While you are toggling the power contactor, check the status of the
Green LED 8 and Yellow LED 8 on the digital input card MDIP16 in
slot 10.
9.
With power contactor energized, Both the LEDs should glow.
10. If the Green LED is not glowing, check the voltage between wire 51
at the power contactor aux. Interlock and locomotive 4 wire.
A. If the voltage is zero, check the continuity of the wire Loop 51
connected to P32 power contactor interlock. Identify faulty
211
wiring and rectify.
B. If the voltage is more than 65V, check the voltage between
P32FB and locomotive 4 wire.
a) If the voltage is zero, the interlock is bad. Replace the
interlock/aux. Contact.
b) If the voltage is more than 65V,
1) Check the slackness of the connector at the MEP660
control unit for the cable ID: AU. If the connector is slack
tighten the connector.
2) Check the continuity of the wire P32FB from the contactor
to the cable (ID: AU) connector pin-J. If necessary
replace the cable.
3) If still Green LED 8 is not glowing, the digital input card
MDIP16 in slot No. 11 defective. Replace the card and
check.
11. If the Green LED 8 is glowing and corresponding yellow LED is not
glowing also, the MDIP16 card is defective.
212
PARAMETER
DESCRIPTION
FAULT CODE
1204
FAULT MESSAGE
EXPR Stuck Closed. Run Auto/Manual Test
RESTRICTIONS
Cranking prohibited
ALARM BELL
--
RESET LEVEL
Low, Manual
If the fault condition is still present when cleared manually, the fault
will be generated again.
FAULT
Automatic when the EXPR interlock found open.
RECOVERY
PROBABLE
1. Defective EXPR relay
CAUSES
2. Defective wiring.
3. Defective digital output card MLSD16 in slot No. 14.
FAULT
1. Shut down the engine. Switch ON MB1, MB2, MPCB, MFPB1, and
ISOLATION
MFPB2 circuit breakers. Check the status of the EXPR relay.
2. If EXP Relay is in energized position, check the voltage across the
EXPR coil terminals.
A. If the voltage is zero but relay is in picked up position, the relay
is defective. Replace the relay.
B. If the voltage is more than 65V, MLSD16 in slot No. 14 is
defective. Replace the card and check up.
3. If EXP Relay is in de-energised position, check the status of the
Green LED 2 on the digital input card in slot 9.
A. If the green LED 2 is glowing, disconnect the wire EXPRFB from
the EXPR relay interlock. Check the status of the Green LED.
a) If the Green LED 2 is still glowing, the wire EXPRFB is
shorted with some positive wire in the bunch. Identify and
remove the short circuit.
b) If the Green LED 2 is OFF, then the EXPR interlock is bad.
Replace the EXPR relay.
4. Run self test for the EXP relay to ensure proper feed back signal
under ‘Auto test for relays’ in the ‘Test Mode’ menu available in
main menu.
213
PARAMETER
DESCRIPTION
FAULT CODE
1205
FAULT MESSAGE
AGPR Stuck Closed. Run Auto/Manual Test
RESTRICTIONS
Cranking prohibited
ALARM BELL
--
RESET LEVEL
Low, Manual
If the fault condition is still present when cleared manually, the fault
will be generated again.
FAULT
Automatic when the AGPR interlock found open.
RECOVERY
PROBABLE
1. Defective AGPR relay
CAUSES
2. Defective wiring.
3. Defective digital output card MLSD16 in slot No. 15.
FAULT
1. Shut down the engine. Switch ON MB1, MB2, MPCB, MFPB1, and
ISOLATION
MFPB2 circuit breakers. Check the status of the AGPR relay.
2. If AGPR Relay is in energized position, check the voltage across the
AGPR coil terminals.
A. If the voltage is zero but relay is picked up, the relay is
defective. Replace the relay.
B. If the voltage is more than 65V, MLSD16 in slot No. 14 is
defective. Replace the card and check up.
3. With AGP Relay is in de-energised position, check the status of the
Green LED 3 on the digital input card in slot 9.
A. If the green LED 3 is glowing, disconnect the wire AGPRFB from
the AGP Relay interlock. Check the status of the Green LED.
a) If the Green LED 3 is still glowing, the wire AGPRFB is
shorted with some positive wire in the bunch. Identify and
remove the short circuit.
b) If the Green LED 3 is OFF, then the AGPR interlock is bad.
Replace the AGP Relay.
4. Run self-test for the AGP Relay to ensure proper feed back signal
under ‘Auto test for relays’ in the ‘Test Mode’ menu available in
main menu.
214
PARAMETER
DESCRIPTION
FAULT CODE
1206
FAULT MESSAGE
GF Stuck Closed. Run Auto/Manual Test
RESTRICTIONS
None
ALARM BELL
--
RESET LEVEL
Low, Manual
If the fault condition is still present when cleared manually, the fault
will be generated again.
FAULT
Automatic when the GF auxiliary contact found open.
RECOVERY
PROBABLE
1.
Defective GF contactor or aux. Contacts.
CAUSES
2.
Defective wiring.
3.
Defective digital output cards MLSD16 in slot No. 14 & 15.
FAULT
1.
Shut down the engine. Switch ON MB1, MB2, MPCB, MFPB1, and
ISOLATION
MFPB2 circuit breakers. Check the status of the GF contactor.
2.
If GF contactor is in energized position, check the voltage across
the GF contactor operating coil terminals.
A. If the voltage is zero, the contactor is defective. Replace the
contactor.
B. If the voltage is more than 65V, MLSD16 in slot No. 14 and in
slot 15 is defective. Replace the cards 1 by 1 and check up.
3.
If GF Contactor is in de-energised position, check the status of the
Green LED 0 on the digital input card MDIP16 in slot 11 and Green
LED 1 on the digital input card MDIP16 in slot 12.
A. If any of the above green LEDs is glowing, disconnect the wire
GFFB1 & 2 wires from the GF contactor Aux. Contact. Check the
status of the Green LEDs.
a) If the Green LED is still glowing, the wire GFFB1/GFFB2
is/are shorted with some positive wire in the bunch. Identify
and remove the short circuit.
b) If the Green LED is OFF, then the GF aux. Contact is welded.
Replace the GF contactor.
4.
Run self test for the GF contactor to ensure proper feed back signal
under ‘Auto test for relays’ in the ‘Test Mode’ menu available in
main menu.
215
PARAMETER
DESCRIPTION
FAULT CODE
1207
FAULT MESSAGE
Low Battery Voltage Engine may not Crank
RESTRICTIONS
None
ALARM BELL
--
RESET LEVEL
Low, Manual
If the fault condition is still present when cleared manually, the fault
will be generated again.
FAULT
Automatic when engine cranking is successful.
RECOVERY
PROBABLE
Most probably this fault is logged soon after cranking if the cranking is
CAUSES
not successful.
1. Weak batteries due to:
A. Repeated cranking or
B. Loco worked on batteries for longer period and then shut down.
2. There may be short circuit in the engine cranking circuit of Aux.
Machines.
3. Defective Aux. Machines.
FAULT
1. Measure the battery voltage with a voltmeter. Compare the
ISOLATION
measured value with the battery voltage displayed on the display
unit.
2. If both the voltages are same, change the batteries set with fully
charged set.
3. If the voltage is good and specific gravity is normal, check up the
cranking circuit for any short circuit of positive and negative cables.
Check and isolate if any short circuit is found.
4. One of the Aux. Machines may be defective internally. Check and
replace the defective machine.
216
PARAMETER
DESCRIPTION
FAULT CODE
1208
FAULT MESSAGE
GF Auxiliary Contact 1 Circuit OPEN FAULT
RESTRICTIONS
None
ALARM BELL
--
RESET LEVEL
Low, Manual
If the fault condition is still present when cleared manually, the fault
will be generated again.
FAULT
Automatic when GF auxiliary contact 1 is detected as closed.
RECOVERY
PROBABLE
1.
Defective Aux. Contact.
CAUSES
2.
Defective wiring.
FAULT
1.
Set the display mode to ‘Manual Test for outputs’ under ‘Test Mode’
ISOLATION
available in main menu. The display exhibits certain conditions to
be full filled. After that press Enter key to start testing of outputs.
2.
Enter 13 against channel no. and then press Enter key to test GF
contactor. Press 1 to energise the contactor and 0 to de-energise
the contactor.
3.
Press 1 to energise the GF contactor. The contactor should pick up.
4.
Check the status of the Green LED 0 on the digital input card
MDIP16 in slot No. 11.
5.
If the Green LED is not glowing, check the voltage between wire
No. 51 at the GF contactor Aux. Contact 1 and locomotive 4wire.
A. If the voltage is zero, check the continuity of 51-wire loop
connected to the GF contactor Aux. Contact 1.
B. If the voltage is more than 65V, check the voltage between
GFFB1 and locomotive 4 wire.
a) If the voltage is zero, GF contactor aux. Contact 1 is bad.
Replace the aux. Contact or GF contactor.
b) If the voltage is more than 65V:
1) Check the slackness of the connector at MEP-660 control
unit for the cable ID: AV. If found slack tighten the
connector.
2) Check the continuity of the wire GFFB1 from the Aux.
Contact to cable (ID: AV) connector Pin - A. If necessary
replace the cable.
3) If the Green LED is not glowing still, the digital input card
MDIP16 in slot No. 11 is defective.
6.
If the Green LED is glowing but corresponding Yellow LED is not
glowing and the fault is getting logged the digital input card
MDIP16 in slot 11 is defective.
217
PARAMETER
DESCRIPTION
FAULT CODE
1209
FAULT MESSAGE
GF Auxiliary Contact 2 Circuit OPEN FAULT
RESTRICTIONS
None
ALARM BELL
--
RESET LEVEL
Low, Manual
If the fault condition is still present when cleared manually, the fault
will be generated again.
FAULT
Automatic when GF auxiliary contact 2 is detected as closed.
RECOVERY
PROBABLE
1.
Defective Aux. Contact.
CAUSES
2.
Defective wiring.
FAULT
1.
Set the display mode to ‘Manual Test for outputs’ under ‘Test Mode’
ISOLATION
available in main menu. The display exhibits certain conditions to
be full filled. After that press Enter key to start testing of outputs.
2.
Enter 13 against channel no. And then press Enter key to test GF
contactor. Press 1 to energise the contactor and 0 to de-energise
the contactor.
3.
Press 1 to energise the GF contactor. The contactor should pick up.
4.
Check the status of the Green LED 1 on the digital input card
MDIP16 in slot No. 12.
5.
If the Green LED is not glowing, check the voltage between wire
No. 51 at the GF contactor Aux. Contact 2 and locomotive 4wire.
A. If the voltage is zero, check the continuity of 51-wire loop
connected to the GF contactor Aux. Contact 2.
B. If the voltage is more than 65V, check the voltage between
GFFB2 and locomotive 4 wire.
a) If the voltage is zero, GF contactor aux. Contact 2 is bad.
Replace the aux. Contact or GF contactor.
b) If the voltage is more than 65V:
1) Check the slackness of the connector at MEP-660 control
unit for the cable ID: AW. If found slack tighten the
connector.
2) Check the continuity of the wire GFFB1 from the Aux.
Contact to cable (ID: AW) connector Pin - B. If necessary
replace the cable.
3) If the Green LED1 is not glowing still, the digital input
card MDIP16 in slot No. 12 is defective.
6.
If the Green LED is glowing but corresponding Yellow LED is not
glowing and the fault is getting logged the digital input card
MDIP16 in slot 12 is defective.
218
PARAMETER
DESCRIPTION
FAULT CODE
1210
FAULT MESSAGE
Engine Shut Down due to OST Tripping
Check OST before restarting Engine.
RESTRICTIONS
--
ALARM BELL
--
RESET LEVEL
Low, Manual
If the fault condition is still present when cleared manually, the fault
will be generated again.
FAULT
Automatic when engine cranked.
RECOVERY
PROBABLE
1. Engine might have over speeded due to any reason and then shut
CAUSES
down.
FAULT
Most probably this fault is logged due to engine over speeding.
ISOLATION
1. Reset the fault and crank the engine.
2. If the engine is over speeding during cranking:
A. There might be problem with engine or Governor. Identify and
clear the fault from engine or governor.
3. If the engine is cranking normal:
A. Check the engine RPM notch wise. If any erratic RPM is noticed
B. Check the solenoids operation as per the notch.
4. Check the slack ness of governor amphonal plug.
PARAMETER
DESCRIPTION
FAULT CODE
1211
FAULT MESSAGE
Communication With Electronic Governor Faulty
RESTRICTIONS
--
ALARM BELL
--
RESET LEVEL
Medium, Manual
If the fault condition is still present when cleared manually, the fault
will be generated again.
FAULT
Automatic when the communication between MEP-660 and electronic
RECOVERY
governor is established.
PROBABLE
This fault will be logged with locos fitted with both MEP-660 and MEG
CAUSES
601.
1. Defective communication cable between MEP-660 and MEG 601.
FAULT
1. Defective communication cable, replace the cable and check the
ISOLATION
communication.
2. Provided ‘MEG com. Enabled’ flag should be in ON condition.
219
PARAMETER
DESCRIPTION
FAULT CODE
1212
FAULT MESSAGE
AUX EEPROM Faulty. Default CFG record loaded
RESTRICTIONS
Warning only
ALARM BELL
--
RESET LEVEL
High, Manual
FAULT
--
RECOVERY
PROBABLE
This fault will be logged while switching on the supply. Loco will work
CAUSES
with default parameters.
FAULT
--
ISOLATION
PARAMETER
DESCRIPTION
FAULT CODE
1213
FAULT MESSAGE
RTC Fault Occurred @ Power ON
RESTRICTIONS
Warning only
ALARM BELL
--
RESET LEVEL
High, Manual
If the fault condition is still present when cleared manually, the fault
will be generated again.
FAULT
Manual only
RECOVERY
PROBABLE
System Clock is detected as faulty at Power ON self check.
CAUSES
FAULT
--
ISOLATION
220
PARAMETER
DESCRIPTION
FAULT CODE
1214
FAULT MESSAGE
Aux. Analogue DB Power Supply FAULTY
RESTRICTIONS
Warning only
ALARM BELL
--
RESET LEVEL
MEDIUM, Manual
If the fault condition is still present when cleared manually, the fault
will be generated again.
FAULT
Automatic when the Aux. analogue DB power supply is detected as
RECOVERY
normal.
PROBABLE
Most probably this fault accompany with associated sensors
CAUSES
(Connected to the ADB1) faulty.
1. Defective Analog distribution box.
2. Defective wiring.
FAULT
1. Replace the ADB and check up
ISOLATION
2. Replace the cable ID: AK and check up.
3. Check for disconnected wires at back side TB for the wire No. PSH1.
4. Check the continuity of wire PSH1 from TB to the Cable connector
(Cable ID: AK Pin - C). If necessary replace the cable.
5. Check the status of the Green LED 6 on the digital input card
MDIP16 in slot No. 12.
6. If the green LED glowing and corresponding Yellow LED 4 is not
glowing the digital input card MDIP16 is defective. Replace and
check up.
221
PARAMETER
DESCRIPTION
FAULT CODE
1215
FAULT MESSAGE
Main Reservoir Pressure Sensor Faulty. Air Compressor pumps
continuously
RESTRICTIONS
Warning only
ALARM BELL
--
RESET LEVEL
MEDIUM, Manual
If the fault condition is still present when cleared manually, the fault
will be generated again.
FAULT
Automatic after the Main Reservoir Pressure Sensor has been found to
RECOVERY
function normally.
PROBABLE
1. MRPR pressure sensor faulty.
CAUSES
2. Defective cables
3. Defective ADB1
7. Defective MAIP8_AU card in slot 1.
FAULT
1. Set the display to show Auxiliary Generator parameters by selecting
ISOLATION
‘Display’ mode from the main menu and then selecting ‘Auxiliary’
sub-menu.
2. Compare the MR pressure value with the displayed MRPR value.
3. If the difference is excess, replace the sensor and check up.
4. If still the fault is still logging
A. Slackness of the connectors either at the sensor or at the ADB1.
Tighten the connectors both at the sensor and ADB of the cable
ID: BF.
B. Defective interconnecting cable ID: BF between sensor and ADB.
Replace the cable and check up.
C. Slackness of the connectors either at ADB1 or MEP-660 control
unit. Tighten the cable connectors both at ADB1 and MEP-660
control unit for the cable ID: AJ.
D. Defective interconnecting cable ID: AJ between ADB and MEP-
660 control unit.
E. Defective ADB1. Replace the ADB1 and check.
F. Defective MAIP8_AU card in slot 1. Replace the card check up.
Note: This message is displayed only when “MR Pressure Sensor connected” flag is
enabled in Configuration of the system
222
PARAMETER
DESCRIPTION
FAULT CODE
1216
FAULT MESSAGE
AUX. EEPROM Write Error at Power Off. Last AUX Fault Cleared.
RESTRICTIONS
Warning only
ALARM BELL
--
RESET LEVEL
High, Manual
FAULT
--
RECOVERY
PROBABLE
System is switched off while writing the fault message on the EEPROM.
CAUSES
FAULT
--
ISOLATION
PARAMETER
DESCRIPTION
FAULT CODE
1217
FAULT MESSAGE
Life Time Loco Data Counters Faulty and they are Reset
RESTRICTIONS
Warning only
ALARM BELL
--
RESET LEVEL
Medium Manual
FAULT
Manual only (By using Laptop / PC)
RECOVERY
PROBABLE
--
CAUSES
FAULT
--
ISOLATION
PARAMETER
DESCRIPTION
FAULT CODE
1218
FAULT MESSAGE
Life Time Loco Data counters Start. Date/Time Faulty and Counters Will
be Reset at next Time Setting
RESTRICTIONS
Warning only
ALARM BELL
--
RESET LEVEL
Medium Manual
If the fault condition is still present when cleared manually, the fault
will be generated again.
FAULT
Automatic when time is set.
RECOVERY
PROBABLE
--
CAUSES
FAULT
Through configuration software, date and time has to be update by
ISOLATION
using Laptop / PC.
223
PARAMETER
DESCRIPTION
FAULT CODE
1219
FAULT MESSAGE
Loco Data Counters for the Trip are Faulty & they are Reset
RESTRICTIONS
Warning only
ALARM BELL
--
RESET LEVEL
Medium Manual
If the fault condition is still present when cleared manually, the fault
will be generated again.
FAULT
--
RECOVERY
PROBABLE
--
CAUSES
FAULT
--
ISOLATION
224
PARAMETER
DESCRIPTION
FAULT CODE
1220
FAULT MESSAGE
Battery Voltage Sensor Faulty
RESTRICTIONS
--
ALARM BELL
--
RESET LEVEL
Medium, Manual
If the fault condition is still present when cleared manually, the fault
will be generated again.
FAULT
Automatic when the Battery Voltage sensor is detected normal
RECOVERY
working.
PROBABLE
1.
Battery voltage sensor BATV faulty.
CAUSES
2.
Defective cables
3.
Defective ADB2
4.
Defective MAIP8_WS card in slot 6.
FAULT
1.
Remove the cable connector at the sensor.
ISOLATION
2.
Measure voltage between pin B & A of the cable connector. The
voltage should be 24V with pin A positive. (+24V)
3.
Measure voltage between pin B & C of the cable connector. The
voltage should be 24V with pin B positive. (-24V)
4.
If any of the above voltages (+24V) or (-24V) is zero / less:
A. Remove sensor cable connector on ADB2 with cable ID: BE.
B. Measure voltages between pins A, B and C of the ADB2
connector.
a) If voltage between B & A is less than +24V or voltage
between B & C is less than -24V, ADB2 is defective. Replace
the ADB2.
b) If the voltages between pins B&A is +24V and voltage
between pins B & C is -24V, the interconnecting cable
between ADB and sensor with cable ID: BE is defective.
5.
If +24V and -24V supply is available at the sensor cable connector,
A. Sensor may be defective. Replace and check.
B. The 19 pin connectors between ADB2 and MEP-660 control unit
with cable ID: G may be slack. Check and tighten the
connectors.
C. The cable with ID: G may be defective. Replace the cable and
check up.
D. MAIP8_WS card might be defective. Replace the card and check
up.
225
PARAMETER
DESCRIPTION
FAULT CODE
1221
FAULT MESSAGE
Aux. Gen. Voltage Sensor Faulty
RESTRICTIONS
--
ALARM BELL
--
RESET LEVEL
Medium, Manual
If the fault condition is still present when cleared manually, the fault
will be generated again.
FAULT
Automatic when the Aux. Gen. Voltage sensor is detected normal
RECOVERY
working.
PROBABLE
1.
Battery voltage sensor AGAV faulty.
CAUSES
2.
Defective cables
3.
Defective ADB1
4.
Defective MAIP8_AU card in slot 1.
FAULT
1.
Remove the cable connector at the sensor.
ISOLATION
2.
Measure voltage between pin B & A of the cable connector. The
voltage should be 24V with pin A positive. (+24V)
3.
Measure voltage between pin B & C of the cable connector. The
voltage should be 24V with pin B positive. (-24V)
4.
If any of the above voltages (+24V) or (-24V) is zero / less:
A. Remove sensor cable connector on ADB1 with cable ID: AE.
B. Measure voltages between pins A, B and C of the ADB1
connector.
a) If voltage between B & A is less than +24V or voltage
between B & C is less than -24V, ADB1 is defective. Replace
the ADB1.
b) If the voltages between pins B&A is +24V and voltage
between pins B & C is -24V, the interconnecting cable
between ADB and sensor with cable ID: AE is defective.
5.
If +24V and -24V supply is available at the sensor cable connector,
A. Sensor may be defective. Replace and check.
B. The 19 pin connectors between ADB1 and MEP-660 control unit
with cable ID: AJ may be slack. Check and tighten the
connectors.
C. The cable with ID: AJ may be defective. Replace the cable and
check up.
D. MAIP8_AU card might be defective. Replace the card and check
up.
226
PARAMETER
DESCRIPTION
FAULT CODE
1222
FAULT MESSAGE
Battery Charging Current Sensor Faulty
RESTRICTIONS
--
ALARM BELL
--
RESET LEVEL
Medium, Manual
If the fault condition is still present when cleared manually, the fault
will be generated again.
FAULT
Automatic when the BATI battery charging current sensor is detected
RECOVERY
normal working.
PROBABLE
1.
Battery Charging current sensor BATI faulty.
CAUSES
2.
Defective cables
3.
Defective ADB1
4.
Defective MAIP8_AU card in slot 1.
FAULT
1.
Remove the cable connector at the sensor.
ISOLATION
2.
Measure voltage between pin B & A of the cable connector. The
voltage should be 24V with pin A positive. (+24V)
3.
Measure voltage between pin B & C of the cable connector. The
voltage should be 24V with pin B positive. (-24V)
4.
If any of the above voltages (+24V) or (-24V) is zero / less:
A. Remove sensor cable connector on ADB1 with cable ID: AF.
B. Measure voltages between pins A, B and C of the ADB1
connector.
a) If voltage between B & A is less than +24V or voltage
between B & C is less than -24V, ADB1 is defective. Replace
the ADB1.
b) If the voltages between pins B&A is +24V and voltage
between pins B & C is -24V, the interconnecting cable
between ADB and sensor with cable ID: AF is defective.
5.
If +24V and -24V supply is available at the sensor cable connector,
A. Sensor may be defective. Replace and check.
B. The 19 pin connectors between ADB1 and MEP-660 control unit
with cable ID: AJ may be slack. Check and tighten the
connectors.
C. The cable with ID: AJ may be defective. Replace the cable and
check up.
D. MAIP8_AU card might be defective. Replace the card and check
up.
227
PARAMETER
DESCRIPTION
FAULT CODE
1223
FAULT MESSAGE
Aux. Gen. Output Current Sensor Faulty
RESTRICTIONS
--
ALARM BELL
--
RESET LEVEL
Medium, Manual
If the fault condition is still present when cleared manually, the fault
will be generated again.
FAULT
Automatic when the Aux. Gen. Armature current sensor AGAI is
RECOVERY
detected normal working.
PROBABLE
1.
Aux. Gen. Armature Current sensor AGAI faulty.
CAUSES
2.
Defective cables
3.
Defective ADB1
4.
Defective MAIP8_AU card in slot 1.
FAULT
1.
Remove the cable connector at the sensor.
ISOLATION
2.
Measure voltage between pin B & A of the cable connector. The
voltage should be 24V with pin A positive. (+24V)
3.
Measure voltage between pin B & C of the cable connector. The
voltage should be 24V with pin B positive. (-24V)
4.
If any of the above voltages (+24V) or (-24V) is zero / less:
A. Remove sensor cable connector on ADB1 with cable ID: AD.
B. Measure voltages between pins A, B and C of the ADB1
connector.
a) If voltage between B & A is less than +24V or voltage
between B & C is less than -24V, ADB1 is defective. Replace
the ADB1.
b) If the voltages between pins B&A is +24V and voltage
between pins B & C is -24V, the interconnecting cable
between ADB and sensor with cable ID: AD is defective.
5.
If +24V and -24V supply is available at the sensor cable connector,
A. Sensor may be defective. Replace and check.
B. The 19 pin connectors between ADB1 and MEP-660 control unit
with cable ID: AJ may be slack. Check and tighten the
connectors.
C. The cable with ID: AJ may be defective. Replace the cable and
check up.
D. MAIP8_AU card might be defective. Replace the card and check
up.
228
PARAMETER
DESCRIPTION
FAULT CODE
1224
FAULT MESSAGE
Aux. Gen. Field Current Sensor Faulty
RESTRICTIONS
Warning only.
ALARM BELL
--
RESET LEVEL
Medium, Manual
If the fault condition is still present when cleared manually, the fault
will be generated again.
FAULT
Automatic when the Aux. Gen. Field current sensor AGFI is detected
RECOVERY
normal working.
PROBABLE
1.
Aux. Gen. Field Current sensor AGFI faulty.
CAUSES
2.
Defective cables
3.
Defective ADB1
4.
Defective MAIP8_AU card in slot 1.
FAULT
1.
Remove the cable connector at the sensor.
ISOLATION
2.
Measure voltage between pin B & A of the cable connector. The
voltage should be 24V with pin A positive. (+24V)
3.
Measure voltage between pin B & C of the cable connector. The
voltage should be 24V with pin B positive. (-24V)
4.
If any of the above voltages (+24V) or (-24V) is zero / less:
A. Remove sensor cable connector on ADB1 with cable ID: AC.
B. Measure voltages between pins A, B and C of the ADB1
connector.
a) If voltage between B & A is less than +24V or voltage
between B & C is less than -24V, ADB1 is defective. Replace
the ADB1.
b) If the voltages between pins B&A is +24V and voltage
between pins B & C is -24V, the interconnecting cable
between ADB and sensor with cable ID: AC is defective.
5.
If +24V and -24V supply is available at the sensor cable connector,
A. Sensor may be defective. Replace and check.
B. The 19 pin connectors between ADB1 and MEP-660 control unit
with cable ID: AJ may be slack. Check and tighten the
connectors.
C. The cable with ID: AJ may be defective. Replace the cable and
check up.
D. MAIP8_AU card might be defective. Replace the card and check
up.
229
PARAMETER
DESCRIPTION
FAULT CODE
1225
FAULT MESSAGE
Engine Water Temperature Sensor Faulty
RESTRICTIONS
Warning only.
ALARM BELL
--
RESET LEVEL
Medium, Manual
If the fault condition is still present when cleared manually, the fault
will be generated again.
FAULT
Automatic when the Engine Water Temperature sensor EWT is detected
RECOVERY
normal working.
PROBABLE
1.
Engine Water Temperature sensor EWT faulty.
CAUSES
2.
Defective cables
3.
Defective ADB3
4.
Defective MAIP8_EP card in slot 7.
FAULT
1.
Remove the cable connector at the sensor.
ISOLATION
2.
Measure voltage between pin B & A of the cable connector. The
voltage should be 24V with pin A positive. (+24V)
3.
Measure voltage between pin B & C of the cable connector. The
voltage should be 24V with pin B positive. (-24V)
4.
If any of the above voltages (+24V) or (-24V) is zero / less:
A. Remove sensor cable connector on ADB3 with cable ID: Z.
B. Measure voltages between pins A, B and C of the ADB3
connector.
a) If voltage between B & A is less than +24V or voltage
between B & C is less than -24V, ADB3 is defective. Replace
the ADB1.
b) If the voltages between pins B&A is +24V and voltage
between pins B & C is -24V, the interconnecting cable
between ADB and sensor with cable ID: Z is defective.
5.
If +24V and -24V supply is available at the sensor cable connector,
A. Sensor may be defective. Replace and check.
B. The 19 pin connectors between ADB1 and MEP-660 control unit
with cable ID: AA may be slack. Check and tighten the
connectors.
C. The cable with ID: AA may be defective. Replace the cable and
check up.
D. MAIP8_EP card might be defective. Replace the card and check
up.
230
PARAMETER
DESCRIPTION
FAULT CODE
1226
FAULT MESSAGE
Lube Oil Temperature Sensor Faulty
RESTRICTIONS
Warning only.
ALARM BELL
--
RESET LEVEL
Medium, Manual
If the fault condition is still present when cleared manually, the fault
will be generated again.
FAULT
Automatic when the Lube Oil Temperature sensor EOT is detected
RECOVERY
normal working.
PROBABLE
1.
Lube Oil Temperature sensor EOT faulty.
CAUSES
2.
Defective cables
3.
Defective ADB1
4.
Defective MAIP8_AU card in slot 1.
FAULT
1.
Remove the cable connector at the sensor.
ISOLATION
2.
Measure voltage between pin B & A of the cable connector. The
voltage should be 24V with pin A positive. (+24V)
3.
Measure voltage between pin B & C of the cable connector. The
voltage should be 24V with pin B positive. (-24V)
4.
If any of the above voltages (+24V) or (-24V) is zero / less:
A. Remove sensor cable connector on ADB1 with cable ID: AH.
B. Measure voltages between pins A, B and C of the ADB1
connector.
a) If voltage between B & A is less than +24V or voltage
between B & C is less than -24V, ADB1 is defective. Replace
the ADB1.
b) If the voltages between pins B&A is +24V and voltage
between pins B & C is -24V, the interconnecting cable
between ADB and sensor with cable ID: AH is defective.
5.
If +24V and -24V supply is available at the sensor cable connector,
A. Sensor may be defective. Replace and check.
B. The 19 pin connectors between ADB1 and MEP-660 control unit
with cable ID: AJ may be slack. Check and tighten the
connectors.
C. The cable with ID: AJ may be defective. Replace the cable and
check up.
D. MAIP8_AU card might be defective. Replace the card and check
up.
231
PARAMETER
DESCRIPTION
FAULT CODE
1227
FAULT MESSAGE
Air Temperature Sensor Faulty
RESTRICTIONS
Warning only.
ALARM BELL
--
RESET LEVEL
Medium, Manual
If the fault condition is still present when cleared manually, the fault
will be generated again.
FAULT
Automatic when the Ambient Air Temperature sensor AAT is detected
RECOVERY
normal working.
PROBABLE
1.
Ambient Air Temperature sensor AAT faulty.
CAUSES
2.
Defective cables
3.
Defective ADB1
4.
Defective MAIP8_AU card in slot 1.
FAULT
1.
Remove the cable connector at the sensor.
ISOLATION
2.
Measure voltage between pin B & A of the cable connector. The
voltage should be 24V with pin A positive. (+24V)
3.
Measure voltage between pin B & C of the cable connector. The
voltage should be 24V with pin B positive. (-24V)
4.
If any of the above voltages (+24V) or (-24V) is zero / less:
A. Remove sensor cable connector on ADB1 with cable ID: AI.
B. Measure voltages between pins A, B and C of the ADB1
connector.
a) If voltage between B & A is less than +24V or voltage
between B & C is less than -24V, ADB1 is defective. Replace
the ADB1.
b) If the voltages between pins B&A is +24V and voltage
between pins B & C is -24V, the interconnecting cable
between ADB and sensor with cable ID: AI is defective.
5.
If +24V and -24V supply is available at the sensor cable connector,
A. Sensor may be defective. Replace and check.
B. The 19 pin connectors between ADB1 and MEP-660 control unit
with cable ID: AJ may be slack. Check and tighten the
connectors.
C. The cable with ID: AJ may be defective. Replace the cable and
check up.
D. MAIP8_AU card might be defective. Replace the card and check
up.
232
PARAMETER
DESCRIPTION
FAULT CODE
1228
FAULT MESSAGE
WRONG Engine RPM at Notch 1.
Solenoids AV, BV, CV, DV or Their Wiring faulty
RESTRICTIONS
Warning only.
ALARM BELL
--
RESET LEVEL
Low, Manual
If the fault condition is still present when cleared manually, the fault
will be generated again.
FAULT
Automatic when the Engine RPM is found to be with in set limits.
RECOVERY
PROBABLE
1. Erratic engine RPM.
CAUSES
2. Governor amphonal plug is slack.
3. Defective wiring
FAULT
1. Check the engine RPM with a standard RPM meter in notch 1.
ISOLATION
2. If RPM is more or less by 35 RPM, than the set Notch 1 RPM (400
default), adjust the RPM in the Governor so that the RPM is with in
the set limit.
3. If the measured RPM is not as per notch and erratic,
A. Check the slackness of Governor amphonal plug. If slack tighten
the plug.
B. Check the wiring of the governor amphonal plug at the backside
TB.
C. Check the continuity of the wires 15A, 12A, 7C and 3A from TB
to the Governor amphonal plug pins. If necessary replace the
amphonal plug wiring.
D. Check for correct sequence of solenoids (AV, BV, CV and DV)
operation in the governor as per the notch. If necessary change
the governor.
233
PARAMETER
DESCRIPTION
FAULT CODE
1229
FAULT MESSAGE
WRONG Engine RPM at Notch 2.
Solenoids AV, BV, CV, DV or Their Wiring faulty
RESTRICTIONS
Warning only.
ALARM BELL
--
RESET LEVEL
Low, Manual
If the fault condition is still present when cleared manually, the fault
will be generated again.
FAULT
Automatic when the Engine RPM is found to be with in set limits.
RECOVERY
PROBABLE
1. Erratic engine RPM.
CAUSES
2. Governor amphonal plug is slack.
3. Defective wiring
FAULT
1. Check the engine RPM with a standard RPM meter in notch 2.
ISOLATION
2. If RPM is more or less by 35 RPM, than the set Notch 2 RPM (450
default), adjust the RPM in the Governor so that the RPM is with in
the set limit.
3. If the measured RPM is not as per notch and erratic,
A. Check the slackness of Governor amphonal plug. If slack tighten
the plug.
B. Check the wiring of the governor amphonal plug at the backside
TB.
C. Check the continuity of the wires 15A, 12A, 7C and 3A from TB
to the Governor amphonal plug pins. If necessary replace the
amphonal plug wiring.
D. Check for correct sequence of solenoids (AV, BV, CV and DV)
operation in the governor as per the notch. If necessary change
the governor.
234
PARAMETER
DESCRIPTION
FAULT CODE
1230
FAULT MESSAGE
WRONG Engine RPM at Notch 3.
Solenoids AV, BV, CV, DV or Their Wiring faulty
RESTRICTIONS
Warning only.
ALARM BELL
--
RESET LEVEL
Low, Manual
If the fault condition is still present when cleared manually, the fault
will be generated again.
FAULT
Automatic when the Engine RPM is found to be with in set limits.
RECOVERY
PROBABLE
1. Erratic engine RPM.
CAUSES
2. Governor amphonal plug is slack.
3. Defective wiring
FAULT
1. Check the engine RPM with a standard RPM meter in notch 3.
ISOLATION
2. If RPM is more or less by 35 RPM, than the set Notch 3 RPM (550
default), adjust the RPM in the Governor so that the RPM is with in
the set limit.
3. If the measured RPM is not as per notch and erratic,
A. Check the slackness of Governor amphonal plug. If slack tighten
the plug.
B. Check the wiring of the governor amphonal plug at the backside
TB.
C. Check the continuity of the wires 15A, 12A, 7C and 3A from TB
to the Governor amphonal plug pins. If necessary replace the
amphonal plug wiring.
D. Check for correct sequence of solenoids (AV, BV, CV and DV)
operation in the governor as per the notch. If necessary change
the governor.
235
PARAMETER
DESCRIPTION
FAULT CODE
1231
FAULT MESSAGE
WRONG Engine RPM at Notch 4.
Solenoids AV, BV, CV, DV or Their Wiring faulty
RESTRICTIONS
Warning only.
ALARM BELL
--
RESET LEVEL
Low, Manual
If the fault condition is still present when cleared manually, the fault
will be generated again.
FAULT
Automatic when the Engine RPM is found to be with in set limits.
RECOVERY
PROBABLE
1. Erratic engine RPM.
CAUSES
2. Governor amphonal plug is slack.
3. Defective wiring
FAULT
1. Check the engine RPM with a standard RPM meter in notch 4.
ISOLATION
2. If RPM is more or less by 35 RPM, than the set Notch 4 RPM (650
default), adjust the RPM in the Governor so that the RPM is with in
the set limit.
3. If the measured RPM is not as per notch and erratic,
A. Check the slackness of Governor amphonal plug. If slack tighten
the plug.
B. Check the wiring of the governor amphonal plug at the backside
TB.
C. Check the continuity of the wires 15A, 12A, 7C and 3A from TB
to the Governor amphonal plug pins. If necessary replace the
amphonal plug wiring.
D. Check for correct sequence of solenoids (AV, BV, CV and DV)
operation in the governor as per the notch. If necessary change
the governor.
236
PARAMETER
DESCRIPTION
FAULT CODE
1232
FAULT MESSAGE
WRONG Engine RPM at Notch 5.
Solenoids AV, BV, CV, DV or Their Wiring faulty
RESTRICTIONS
Warning only.
ALARM BELL
--
RESET LEVEL
Low, Manual
If the fault condition is still present when cleared manually, the fault
will be generated again.
FAULT
Automatic when the Engine RPM is found to be with in set limits.
RECOVERY
PROBABLE
1. Erratic engine RPM.
CAUSES
2. Governor amphonal plug is slack.
3. Defective wiring
FAULT
1. Check the engine RPM with a standard RPM meter in notch 5.
ISOLATION
2. If RPM is more or less by 35 RPM, than the set Notch 5 RPM (750
default), adjust the RPM in the Governor so that the RPM is with in
the set limit.
3. If the measured RPM is not as per notch and erratic,
A. Check the slackness of Governor amphonal plug. If slack tighten
the plug.
B. Check the wiring of the governor amphonal plug at the backside
TB.
C. Check the continuity of the wires 15A, 12A, 7C and 3A from TB
to the Governor amphonal plug pins. If necessary replace the
amphonal plug wiring.
D. Check for correct sequence of solenoids (AV, BV, CV and DV)
operation in the governor as per the notch. If necessary change
the governor.
237
PARAMETER
DESCRIPTION
FAULT CODE
1233
FAULT MESSAGE
WRONG Engine RPM at Notch 6.
Solenoids AV, BV, CV, DV or Their Wiring faulty
RESTRICTIONS
Warning only.
ALARM BELL
--
RESET LEVEL
Low, Manual
If the fault condition is still present when cleared manually, the fault
will be generated again.
FAULT
Automatic when the Engine RPM is found to be with in set limits.
RECOVERY
PROBABLE
1. Erratic engine RPM.
CAUSES
2. Governor amphonal plug is slack.
3. Defective wiring
FAULT
1. Check the engine RPM with a standard RPM meter in notch 6.
ISOLATION
2. If RPM is more or less by 35 RPM, than the set Notch 6 RPM (850
default), adjust the RPM in the Governor so that the RPM is with in
the set limit.
3. If the measured RPM is not as per notch and erratic,
A. Check the slackness of Governor amphonal plug. If slack tighten
the plug.
B. Check the wiring of the governor amphonal plug at the backside
TB.
C. Check the continuity of the wires 15A, 12A, 7C and 3A from TB
to the Governor amphonal plug pins. If necessary replace the
amphonal plug wiring.
D. Check for correct sequence of solenoids (AV, BV, CV and DV)
operation in the governor as per the notch. If necessary change
the governor.
238
PARAMETER
DESCRIPTION
FAULT CODE
1234
FAULT MESSAGE
WRONG Engine RPM at Notch 7.
Solenoids AV, BV, CV, DV or Their Wiring faulty
RESTRICTIONS
Warning only.
ALARM BELL
--
RESET LEVEL
Low, Manual
If the fault condition is still present when cleared manually, the fault
will be generated again.
FAULT
Automatic when the Engine RPM is found to be with in set limits.
RECOVERY
PROBABLE
1. Erratic engine RPM.
CAUSES
2. Governor amphonal plug is slack.
3. Defective wiring
FAULT
1. Check the engine RPM with a standard RPM meter in notch 7.
ISOLATION
2. If RPM is more or less by 35 RPM, than the set Notch 7 RPM (950
default), adjust the RPM in the Governor so that the RPM is with in
the set limit.
3. If the measured RPM is not as per notch and erratic,
A. Check the slackness of Governor amphonal plug. If slack tighten
the plug.
B. Check the wiring of the governor amphonal plug at the backside
TB.
C. Check the continuity of the wires 15A, 12A, 7C and 3A from TB
to the Governor amphonal plug pins. If necessary replace the
amphonal plug wiring.
D. Check for correct sequence of solenoids (AV, BV, CV and DV)
operation in the governor as per the notch. If necessary change
the governor.
239
PARAMETER
DESCRIPTION
FAULT CODE
1235
FAULT MESSAGE
WRONG Engine RPM at Notch 8.
Solenoids AV, BV, CV, DV or Their Wiring faulty
RESTRICTIONS
Warning only.
ALARM BELL
--
RESET LEVEL
Low, Manual
If the fault condition is still present when cleared manually, the fault
will be generated again.
FAULT
Automatic when the Engine RPM is found to be with in set limits.
RECOVERY
PROBABLE
1. Erratic engine RPM.
CAUSES
2. Governor amphonal plug is slack.
3. Defective wiring
FAULT
1. Check the engine RPM with a standard RPM meter in notch 8.
ISOLATION
2. If RPM is more or less by 35 RPM, than the set Notch 8 RPM (1050
default), adjust the RPM in the Governor so that the RPM is with in
the set limit.
3. If the measured RPM is not as per notch and erratic,
A. Check the slackness of Governor amphonal plug. If slack tighten
the plug.
B. Check the wiring of the governor amphonal plug at the backside
TB.
C. Check the continuity of the wires 15A, 12A, 7C and 3A from TB
to the Governor amphonal plug pins. If necessary replace the
amphonal plug wiring.
D. Check for correct sequence of solenoids (AV, BV, CV and DV)
operation in the governor as per the notch. If necessary change
the governor.
240
PARAMETER
DESCRIPTION
FAULT CODE
1236
FAULT MESSAGE
Traction Motor 1 High Current to be Confirmed
RESTRICTIONS
Warning only.
ALARM BELL
--
RESET LEVEL
Low, Manual
If the fault condition is still present when cleared manually, the fault
will be generated again.
FAULT
Automatic when the Tr. Motor No.1 current is reduced to normal or the
RECOVERY
current sensor is identified as faulty.
PROBABLE
--
CAUSES
FAULT
Reset the fault manually.
ISOLATION
PARAMETER
DESCRIPTION
FAULT CODE
1237
FAULT MESSAGE
Traction Motor 2 High Current to be Confirmed
RESTRICTIONS
Warning only.
ALARM BELL
--
RESET LEVEL
Low, Manual
If the fault condition is still present when cleared manually, the fault
will be generated again.
FAULT
Automatic when the Tr. Motor No.2 current is reduced to normal or the
RECOVERY
current sensor is identified as faulty.
PROBABLE
--
CAUSES
FAULT
Reset the fault manually.
ISOLATION
PARAMETER
DESCRIPTION
FAULT CODE
1238
FAULT MESSAGE
Traction Motor 3 High Current to be Confirmed
RESTRICTIONS
Warning only.
ALARM BELL
--
RESET LEVEL
Low, Manual
If the fault condition is still present when cleared manually, the fault
will be generated again.
FAULT
Automatic when the Tr. Motor No.3 current is reduced to normal or the
RECOVERY
current sensor is identified as faulty.
PROBABLE
--
CAUSES
FAULT
Reset the fault manually.
ISOLATION
241
PARAMETER
DESCRIPTION
FAULT CODE
1239
FAULT MESSAGE
Traction Motor 4 High Current to be Confirmed
RESTRICTIONS
Warning only.
ALARM BELL
--
RESET LEVEL
Low, Manual
If the fault condition is still present when cleared manually, the fault
will be generated again.
FAULT
Automatic when the Tr. Motor No.4 current is reduced to normal or the
RECOVERY
current sensor is identified as faulty.
PROBABLE
--
CAUSES
FAULT
Reset the fault manually.
ISOLATION
PARAMETER
DESCRIPTION
FAULT CODE
1240
FAULT MESSAGE
Traction Motor 5 High Current to be Confirmed
RESTRICTIONS
Warning only.
ALARM BELL
--
RESET LEVEL
Low, Manual
If the fault condition is still present when cleared manually, the fault
will be generated again.
FAULT
Automatic when the Tr. Motor No.5 current is reduced to normal or the
RECOVERY
current sensor is identified as faulty.
PROBABLE
--
CAUSES
FAULT
Reset the fault manually.
ISOLATION
PARAMETER
DESCRIPTION
FAULT CODE
1241
FAULT MESSAGE
Traction Motor 6 High Current to be Confirmed
RESTRICTIONS
Warning only.
ALARM BELL
--
RESET LEVEL
Low, Manual
If the fault condition is still present when cleared manually, the fault
will be generated again.
FAULT
Automatic when the Tr. Motor No.6 current is reduced to normal or the
RECOVERY
current sensor is identified as faulty.
PROBABLE
--
CAUSES
FAULT
Reset the fault manually.
ISOLATION
242
PARAMETER
DESCRIPTION
FAULT CODE
1242
FAULT MESSAGE
Speed sensor 1 faulty
RESTRICTIONS
--
ALARM BELL
--
RESET LEVEL
Medium, Manual
If the fault condition is still present when cleared manually, the fault
will be generated again.
FAULT
--
RECOVERY
PROBABLE
1. Defective speed sensor cable.
CAUSES
2. Defective speed sensor.
3. Un coupled gear in the Tr. Motor No. 1
4. Defective RPM Distribution Box.
5. Defective MFIP16 card.
FAULT
1. Reset the fault manually.
ISOLATION
2. Check for any cable cut/disconnection from the Tr.Motor 1 speed
sensor to RDB.
3. Check for slackness Tr.Motor 1 speed sensor cable connector
available on bottom of the chassis. If slack tighten the connector.
4. Check the continuity of the individual wires of the cable ID: J from
under chassis to RDB. If any open circuit is found replace the cable.
5. Check the continuity of 19-core cable from RDB to MEP-660 control
unit.
6. If cables are found normal and still the fault is logging frequently,
A. Check for any slackness of fixing bolts of the Tr. Motor Speed
sensor. If slack tighten.
B. Replace the Tr. Motor speed sensor and check up.
C. Check up the Gear fitted on to the Tr. Motor armature shaft by
removing the commutator end grease cup. If slack or worked
out attend.
D. Replace the MFIP16 card and check up.
243
PARAMETER
DESCRIPTION
FAULT CODE
1243
FAULT MESSAGE
Speed sensor 2 faulty
RESTRICTIONS
--
ALARM BELL
--
RESET LEVEL
Medium, Manual
If the fault condition is still present when cleared manually, the fault
will be generated again.
FAULT
--
RECOVERY
PROBABLE
1. Defective speed sensor cable.
CAUSES
2. Defective speed sensor.
3. Un coupled gear in the Tr. Motor No. 2
4. Defective RPM Distribution Box.
5. Defective MFIP16 card.
FAULT
1. Reset the fault manually.
ISOLATION
2. Check for any cable cut/disconnection from the Tr.Motor 2 speed
sensor to RDB.
3. Check for slackness Tr.Motor 2 speed sensor cable connector
available on bottom of the chassis. If slack tighten the connector.
4. Check the continuity of the individual wires of the cable ID: K from
under chassis to RDB. If any open circuit is found replace the cable.
5. Check the continuity of 19-core cable from RDB to MEP-660 control
unit.
6. If cables are found normal and still the fault is logging frequently,
A. Check for any slackness of fixing bolts of the Tr. Motor Speed
sensor. If slack tighten.
B. Replace the Tr. Motor speed sensor and check up.
C. Check up the Gear fitted on to the Tr. Motor armature shaft by
removing the commutator end grease cup. If slack or worked
out attend.
D. Replace the MFIP16 card and check up.
244
PARAMETER
DESCRIPTION
FAULT CODE
1244
FAULT MESSAGE
Speed sensor 3 faulty
RESTRICTIONS
--
ALARM BELL
--
RESET LEVEL
Medium, Manual
If the fault condition is still present when cleared manually, the fault
will be generated again.
FAULT
--
RECOVERY
PROBABLE
1. Defective speed sensor cable.
CAUSES
2. Defective speed sensor.
3. Un coupled gear in the Tr. Motor No. 3
4. Defective RPM Distribution Box.
5. Defective MFIP16 card.
FAULT
1. Reset the fault manually.
ISOLATION
2. Check for any cable cut/disconnection from the Tr.Motor 3 speed
sensor to RDB.
3. Check for slackness Tr.Motor 3 speed sensor cable connector
available on bottom of the chassis. If slack tighten the connector.
4. Check the continuity of the individual wires of the cable ID: L from
under chassis to RDB. If any open circuit is found replace the cable.
5. Check the continuity of 19-core cable from RDB to MEP-660 control
unit.
6. If cables are found normal and still the fault is logging frequently,
A. Check for any slackness of fixing bolts of the Tr. Motor Speed
sensor. If slack tighten.
B. Replace the Tr. Motor speed sensor and check up.
C. Check up the Gear fitted on to the Tr. Motor armature shaft by
removing the commutator end grease cup. If slack or worked
out attend.
D. Replace the MFIP16 card and check up.
245
PARAMETER
DESCRIPTION
FAULT CODE
1245
FAULT MESSAGE
Speed sensor 4 faulty
RESTRICTIONS
--
ALARM BELL
--
RESET LEVEL
Medium, Manual
If the fault condition is still present when cleared manually, the fault
will be generated again.
FAULT
--
RECOVERY
PROBABLE
1. Defective speed sensor cable.
CAUSES
2. Defective speed sensor.
3. Un coupled gear in the Tr. Motor No. 4
4. Defective RPM Distribution Box.
5. Defective MFIP16 card.
FAULT
1. Reset the fault manually.
ISOLATION
2. Check for any cable cut/disconnection from the Tr.Motor 4 speed
sensor to RDB.
3. Check for slackness Tr.Motor 4 speed sensor cable connector
available on bottom of the chassis. If slack tighten the connector.
4. Check the continuity of the individual wires of the cable ID: M from
under chassis to RDB. If any open circuit is found replace the cable.
5. Check the continuity of 19-core cable from RDB to MEP-660 control
unit.
6. If cables are found normal and still the fault is logging frequently,
A. Check for any slackness of fixing bolts of the Tr. Motor Speed
sensor. If slack tighten.
B. Replace the Tr. Motor speed sensor and check up.
C. Check up the Gear fitted on to the Tr. Motor armature shaft by
removing the commutator end grease cup. If slack or worked
out attend.
D. Replace the MFIP16 card and check up.
246
PARAMETER
DESCRIPTION
FAULT CODE
1246
FAULT MESSAGE
Speed sensor 5 faulty
RESTRICTIONS
--
ALARM BELL
--
RESET LEVEL
Medium, Manual
If the fault condition is still present when cleared manually, the fault
will be generated again.
FAULT
--
RECOVERY
PROBABLE
1. Defective speed sensor cable.
CAUSES
2. Defective speed sensor.
3. Un coupled gear in the Tr. Motor No. 5
4. Defective RPM Distribution Box.
5. Defective MFIP16 card.
FAULT
1. Reset the fault manually.
ISOLATION
2. Check for any cable cut/disconnection from the Tr.Motor 5 speed
sensor to RDB.
3. Check for slackness Tr.Motor 5 speed sensor cable connector
available on bottom of the chassis. If slack tighten the connector.
4. Check the continuity of the individual wires of the cable ID: N from
under chassis to RDB. If any open circuit is found replace the cable.
5. Check the continuity of 19-core cable from RDB to MEP-660 control
unit.
6. If cables are found normal and still the fault is logging frequently,
A. Check for any slackness of fixing bolts of the Tr. Motor Speed
sensor. If slack tighten.
B. Replace the Tr. Motor speed sensor and check up.
C. Check up the Gear fitted on to the Tr. Motor armature shaft by
removing the commutator end grease cup. If slack or worked
out attend.
D. Replace the MFIP16 card and check up.
247
PARAMETER
DESCRIPTION
FAULT CODE
1247
FAULT MESSAGE
Speed sensor 6 faulty
RESTRICTIONS
--
ALARM BELL
--
RESET LEVEL
Medium, Manual
If the fault condition is still present when cleared manually, the fault
will be generated again.
FAULT
--
RECOVERY
PROBABLE
1. Defective speed sensor cable.
CAUSES
2. Defective speed sensor.
3. Un coupled gear in the Tr. Motor No. 6
4. Defective RPM Distribution Box.
5. Defective MFIP16 card.
FAULT
1. Reset the fault manually.
ISOLATION
2. Check for any cable cut/disconnection from the Tr.Motor 6 speed
sensor to RDB.
3. Check for slackness Tr.Motor 6 speed sensor cable connector
available on bottom of the chassis. If slack tighten the connector.
4. Check the continuity of the individual wires of the cable ID:O from
under chassis to RDB. If any open circuit is found replace the cable.
5. Check the continuity of 19-core cable from RDB to MEP-660 control
unit.
6. If cables are found normal and still the fault is logging frequently,
A. Check for any slackness of fixing bolts of the Tr. Motor Speed
sensor. If slack tighten.
B. Replace the Tr. Motor speed sensor and check up.
C. Check up the Gear fitted on to the Tr. Motor armature shaft by
removing the commutator end grease cup. If slack or worked
out attend.
D. Replace the MFIP16 card and check up.
248
PARAMETER
DESCRIPTION
FAULT CODE
1248
FAULT MESSAGE
One Detectors of Speed Sensor Faulty on Wheel 1
RESTRICTIONS
--
ALARM BELL
--
RESET LEVEL
Medium, Manual
If the fault condition is still present when cleared manually, the fault
will be generated again.
FAULT
--
RECOVERY
PROBABLE
This fault will be logged in Ver 0 locomotives where T-813M type
CAUSES
sensors are used.
FAULT
This fault will be logged only when the locomotive is fitted with an axle
ISOLATION
mounted pulse generators having two-speed sensor.
1. Reset the fault manually.
2. Check for any cable cut/disconnection from the pulse generator to
RDB.
3. Check for slackness of wires in the junction box. If slack tighten the
connections.
4. Check the continuity of the individual wires of the cables connected
between Junction box and RDB. If any open circuit is found replace
the cable.
5. Check the continuity of 19-core cable from RDB to MEP-660 control
unit.
6. If cables are found normal and still the fault is logging frequently,
A. Replace the pulse generator and check up.
B. Replace the MFIP16 card and check up.
249
PARAMETER
DESCRIPTION
FAULT CODE
1249
FAULT MESSAGE
One Detectors of Speed Sensor Faulty on Wheel 2
RESTRICTIONS
--
ALARM BELL
--
RESET LEVEL
Medium, Manual
If the fault condition is still present when cleared manually, the fault
will be generated again.
FAULT
--
RECOVERY
PROBABLE
This fault will be logged in Ver 0 locomotives where T-813M type
CAUSES
sensors are used.
FAULT
This fault will be logged only when the locomotive is fitted with an axle
ISOLATION
mounted pulse generators having two-speed sensor.
1. Reset the fault manually.
2. Check for any cable cut/disconnection from the pulse generator to
RDB.
3. Check for slackness of wires in the junction box. If slack tighten the
connections.
4. Check the continuity of the individual wires of the cables connected
between Junction box and RDB. If any open circuit is found replace
the cable.
5. Check the continuity of 19-core cable from RDB to MEP-660 control
unit.
6. If cables are found normal and still the fault is logging frequently,
A. Replace the pulse generator and check up.
B. Replace the MFIP16 card and check up.
250
PARAMETER
DESCRIPTION
FAULT CODE
1250
FAULT MESSAGE
One Detectors of Speed Sensor Faulty on Wheel 3
RESTRICTIONS
--
ALARM BELL
--
RESET LEVEL
Medium, Manual
If the fault condition is still present when cleared manually, the fault
will be generated again.
FAULT
--
RECOVERY
PROBABLE
This fault will be logged in Ver 0 locomotives where T-813M type
CAUSES
sensors are used.
FAULT
This fault will be logged only when the locomotive is fitted with an axle
ISOLATION
mounted pulse generators having two-speed sensor.
1. Reset the fault manually.
2. Check for any cable cut/disconnection from the pulse generator to
RDB.
3. Check for slackness of wires in the junction box. If slack tighten the
connections.
4. Check the continuity of the individual wires of the cables connected
between Junction box and RDB. If any open circuit is found replace
the cable.
5. Check the continuity of 19-core cable from RDB to MEP-660 control
unit.
6. If cables are found normal and still the fault is logging frequently,
A. Replace the pulse generator and check up.
B. Replace the MFIP16 card and check up.
251
PARAMETER
DESCRIPTION
FAULT CODE
1251
FAULT MESSAGE
One Detectors of Speed Sensor Faulty on Wheel 4
RESTRICTIONS
--
ALARM BELL
--
RESET LEVEL
Medium, Manual
If the fault condition is still present when cleared manually, the fault
will be generated again.
FAULT
--
RECOVERY
PROBABLE
This fault will be logged in Ver 0 locomotives where T-813M type
CAUSES
sensors are used.
FAULT
This fault will be logged only when the locomotive is fitted with an axle
ISOLATION
mounted pulse generators having two-speed sensor.
1. Reset the fault manually.
2. Check for any cable cut/disconnection from the pulse generator to
RDB.
3. Check for slackness of wires in the junction box. If slack tighten the
connections.
4. Check the continuity of the individual wires of the cables connected
between Junction box and RDB. If any open circuit is found replace
the cable.
5. Check the continuity of 19-core cable from RDB to MEP-660 control
unit.
6. If cables are found normal and still the fault is logging frequently,
A. Replace the pulse generator and check up.
B. Replace the MFIP16 card and check up.
252
PARAMETER
DESCRIPTION
FAULT CODE
1252
FAULT MESSAGE
One Detectors of Speed Sensor Faulty on Wheel 5
RESTRICTIONS
--
ALARM BELL
--
RESET LEVEL
Medium, Manual
If the fault condition is still present when cleared manually, the fault
will be generated again.
FAULT
--
RECOVERY
PROBABLE
This fault will be logged in Ver 0 locomotives where T-813M type
CAUSES
sensors are used.
FAULT
This fault will be logged only when the locomotive is fitted with an axle
ISOLATION
mounted pulse generators having two-speed sensor.
1. Reset the fault manually.
2. Check for any cable cut/disconnection from the pulse generator to
RDB.
3. Check for slackness of wires in the junction box. If slack tighten the
connections.
4. Check the continuity of the individual wires of the cables connected
between Junction box and RDB. If any open circuit is found replace
the cable.
5. Check the continuity of 19-core cable from RDB to MEP-660 control
unit.
6. If cables are found normal and still the fault is logging frequently,
A. Replace the pulse generator and check up.
B. Replace the MFIP16 card and check up.
253
PARAMETER
DESCRIPTION
FAULT CODE
1253
FAULT MESSAGE
One Detectors of Speed Sensor Faulty on Wheel 6
RESTRICTIONS
--
ALARM BELL
--
RESET LEVEL
Medium, Manual
If the fault condition is still present when cleared manually, the fault
will be generated again.
FAULT
--
RECOVERY
PROBABLE
This fault will be logged in Ver 0 locomotives where T-813M type
CAUSES
sensors are used.
FAULT
This fault will be logged only when the locomotive is fitted with an axle
ISOLATION
mounted pulse generators having two-speed sensor.
1. Reset the fault manually.
2. Check for any cable cut/disconnection from the pulse generator to
RDB.
3. Check for slackness of wires in the junction box. If slack tighten the
connections.
4. Check the continuity of the individual wires of the cables connected
between Junction box and RDB. If any open circuit is found replace
the cable.
5. Check the continuity of 19-core cable from RDB to MEP-660 control
unit.
6. If cables are found normal and still the fault is logging frequently,
A. Replace the pulse generator and check up.
B. Replace the MFIP16 card and check up.
254
PARAMETER
DESCRIPTION
FAULT CODE
1254
FAULT MESSAGE
Altitude Sensor Faulty
RESTRICTIONS
--
ALARM BELL
--
RESET LEVEL
MEDIUM, Manual
If the fault condition is still present when cleared manually, the fault
will be generated again.
FAULT
Automatic when the Altitude sensor found working normal.
RECOVERY
PROBABLE
1. Altitude sensor APR faulty.
CAUSES
2. Defective cables
3. Defective ADB2
5. Defective MAIP8_AU card in slot 1.
FAULT
1. Set the display to show ixed parameters by selecting
‘Display’
ISOLATION
mode from the main menu and then selecting ‘Mixed’ sub-menu.
2. Check the altitude displayed in the display unit with Actual altitude
of the site.
3. If the difference is excess, replace the sensor and check up.
4. If the difference is negligible but still the fault is logging frequently:
A. Check Slackness of the connectors either at the sensor or at the
ADB1. Tighten the connectors both at the sensor and ADB of the
cable ID: BG.
B. Defective interconnecting cable ID: BG between sensor and
ADB. Replace the cable and check up.
C. Slackness of the connectors either at ADB2 or MEP-660 control
unit. Tighten the cable connectors both at ADB2 and MEP-660
control unit for the cable ID: AI.
D. Defective interconnecting cable ID: AI between ADB and MEP-
660 control unit.
E. Defective ADB2. Replace the ADB2 and check.
F. Defective MAIP8_WS card in slot 1. Replace the card check up.
255
PARAMETER
DESCRIPTION
FAULT CODE
1255
FAULT MESSAGE
Memory Card of Event Recorder Faulty
RESTRICTIONS
--
ALARM BELL
--
RESET LEVEL
Automatic when system detected as new memory card loaded for
event recording.
FAULT
LOW, Manual
RECOVERY
If the fault condition is still present when cleared manually, the fault
will be generated again.
PROBABLE
1. Memory card faulty.
CAUSES
FAULT
Replace the memory card with new memory card for Event recording
ISOLATION
purpouse.
PARAMETER
DESCRIPTION
FAULT CODE
1260
FAULT MESSAGE
Brake Pipe Pr. Sensor Faulty
RESTRICTIONS
--
ALARM BELL
--
RESET LEVEL
MEDIUM, Manual
If the fault condition is still present when cleared manually, the fault
will be generated again.
FAULT
Automatic when the Brake Pipe Pressure sensor found working normal.
RECOVERY
PROBABLE
1. Defective / blocked pressure pipelines.
CAUSES
2. Defective Brake Pipe Presure sensor (BPP).
3. Defective cables
4. Defective ADB4
5. Defective MIAI card in slot 2.
FAULT
1. Set the display to show mixed parameters by selecting
‘Display’
ISOLATION
mode from the main menu and then selecting ‘Mixed’ sub-menu.
2. Check the brake pipe pressure displayed in the display unit with
the gauge on control stand.
3. If the difference is excess, replace the sensor and check up.
4. If the difference is negligible but still the fault is logging:
A. Check Slackness of the connectors either at the sensor or at the
ADB4. Tighten the connectors both at the sensor and ADB of the
cable ID: BI.
B. Defective interconnecting cable ID: BI between sensor and ADB.
Replace the cable and check up.
C. Slackness of the connectors either at ADB4 or MEP-660 control
unit. Tighten the cable connectors both at ADB4 and MEP-660
control unit for the cable ID: BJ.
D. Defective interconnecting cable ID: BJ between ADB and MEP-
660 control unit.
E. Defective ADB4. Replace the ADB4 and check.
F. Defective MIAI card in slot 2. Replace the card check up.
256
PARAMETER
DESCRIPTION
FAULT CODE
1261
FAULT MESSAGE
Brake Cylinder Pr. Sensor Faulty
RESTRICTIONS
--
ALARM BELL
--
RESET LEVEL
MEDIUM, Manual
If the fault condition is still present when cleared manually, the fault
will be generated again.
FAULT
Automatic when the Brake Cylinder Pressure sensor found working
RECOVERY
normal.
PROBABLE
1. Defective / blocked pressure pipe lines
CAUSES
2. Brake Cylinder Pressure sensor (BCP) faulty.
3. Defective cables
4. Defective ADB4
5. Defective MIAI card in slot 2.
FAULT
1. Set the display to show mixed parameters by selecting
‘Display’
ISOLATION
mode from the main menu and then selecting ‘Mixed’ sub-menu.
2. Check the brake cylinder pressure displayed in the display unit with
the calibrated Pneumatic gauge.
3. If the difference is excess, replace the sensor and check up.
4. If the difference is negligible but still the fault is logging:
A. Check Slackness of the connectors either at the sensor or at the
ADB4. Tighten the connectors both at the sensor and ADB of the
cable ID: BH.
B. Defective interconnecting cable ID: BH between sensor and
ADB. Replace the cable and check up.
C. Slackness of the connectors either at ADB4 or MEP-660 control
unit. Tighten the cable connectors both at ADB4 and MEP-660
control unit for the cable ID: BJ.
D. Defective interconnecting cable ID: BJ between ADB and MEP-
660 control unit.
E. Defective ADB4. Replace the ADB4 and check.
F. Defective MIAI card in slot 2. Replace the card check up.
257
PARAMETER
DESCRIPTION
FAULT CODE
1262
FAULT MESSAGE
Lube Oil Pr. Sensor Faulty
RESTRICTIONS
--
ALARM BELL
--
RESET LEVEL
MEDIUM, Manual
If the fault condition is still present when cleared manually, the fault
will be generated again.
FAULT
Automatic when the Lube Oil Pressure sensor found working normal.
RECOVERY
PROBABLE
1. Defectve / blocked pressure pipelines.
CAUSES
2. Defectve Lube Oil Presure sensors (LOP).
3. Defective cables.
4. Defective ADB4.
5. Defective MIAI card in slot 2.
FAULT
1. Set the display to show mixed parameters by selecting
‘Display’
ISOLATION
mode from the main menu and then selecting ‘Mixed’ sub-menu.
2. Check the lube oil pressure displayed in the display unit with a
calibrated gauge.
3. If the difference is excess, replace the sensor and check up.
4. If the difference is negligible but still the fault is logging:
A. Check Slackness of the connectors either at the sensor or at the
ADB4. Tighten the connectors both at the sensor and ADB of the
cable ID: BM.
B. Defective interconnecting cable ID: BM between sensor and
ADB. Replace the cable and check up.
C. Slackness of the connectors either at ADB4 or MEP-660 control
unit. Tighten the cable connectors both at ADB4 and MEP-660
control unit for the cable ID: BJ.
D. Defective interconnecting cable ID: BJ between ADB and MEP-
660 control unit.
E. Defective ADB4. Replace the ADB4 and check.
F. Defective MIAI card in slot 2. Replace the card check up.
258
PARAMETER
DESCRIPTION
FAULT CODE
1263
FAULT MESSAGE
Booster Air Pr. Sensor Faulty
RESTRICTIONS
--
ALARM BELL
--
RESET LEVEL
MEDIUM, Manual
If the fault condition is still present when cleared manually, the fault
will be generated again.
FAULT
Automatic when the Booster Air Pressure sensor found working normal.
RECOVERY
PROBABLE
1. Booster Air Presure sensors (BAP) faulty.
CAUSES
2. Defective cables.
3. Defective ADB4.
4. Defective MIAI card in slot 2.
FAULT
1. Set the display to show mixed parameters by selecting
‘Display’
ISOLATION
mode from the main menu and then selecting ‘Mixed’ sub-menu.
2. Check the booster air pressure displayed in the display unit with
Pneumatic gauge.
3. If the difference is excess, replace the sensor and check up.
4. If the difference is negligible but still the fault is logging frequently:
A. Check Slackness of the connectors either at the sensor or at the
ADB4. Tighten the connectors both at the sensor and ADB of the
cable ID: BN.
B. Defective interconnecting cable ID: BN between sensor and
ADB. Replace the cable and check up.
C. Slackness of the connectors either at ADB4 or MEP-660 control
unit. Tighten the cable connectors both at ADB4 and MEP-660
control unit for the cable ID: BJ.
D. Defective interconnecting cable ID: BJ between ADB and MEP-
660 control unit.
E. Defective ADB4. Replace the ADB4 and check.
F. Defective MIAI card in slot 2. Replace the card check up.
259
PARAMETER
DESCRIPTION
FAULT CODE
1264
FAULT MESSAGE
Fuel Oil Pr. Sensor Faulty
RESTRICTIONS
--
ALARM BELL
--
RESET LEVEL
MEDIUM, Manual
If the fault condition is still present when cleared manually, the fault
will be generated again.
FAULT
Automatic when the Fuel Oil Pressure sensor found working normal.
RECOVERY
PROBABLE
1. Fuel Oil Presure sensor (FOP) faulty.
CAUSES
2. Defective cables.
3. Defective ADB4.
4. Defective MIAI card in slot 2.
FAULT
1. Set the display to show mixed parameters by selecting
‘Display’
ISOLATION
mode from the main menu and then selecting ‘Mixed’ sub-menu.
2. Check the fuel oil pressure displayed in the display unit with
Pneumatic gauge.
3. If the difference is excess, replace the sensor and check up.
4. If the difference is negligible but still the fault is logging frequently:
A. Check Slackness of the connectors either at the sensor or at the
ADB4. Tighten the connectors both at the sensor and ADB of the
cable ID: BO.
B. Defective interconnecting cable ID: BO between sensor and
ADB. Replace the cable and check up.
C. Slackness of the connectors either at ADB4 or MEP-660 control
unit. Tighten the cable connectors both at ADB4 and MEP-660
control unit for the cable ID: BJ.
D. Defective interconnecting cable ID: BJ between ADB and MEP-
660 control unit.
E. Defective ADB4. Replace the ADB4 and check.
F. Defective MIAI card in slot 2. Replace the card check up.
260
5.0 ONLY ERROR LOG MESSAGES
PARAMETER
DESCRIPTION
FAULT CODE
2500
FAULT MESSAGE
P1 Stuck Closed in Auto Test
RESTRICTIONS
--
ALARM BELL
--
RESET LEVEL
--
FAULT
--
RECOVERY
PROBABLE
Refer fault code 1085
CAUSES
FAULT
Refer fault code 1085
ISOLATION
PARAMETER
DESCRIPTION
FAULT CODE
2501
FAULT MESSAGE
P21 Stuck Closed in Auto Test
RESTRICTIONS
--
ALARM BELL
--
RESET LEVEL
--
FAULT
--
RECOVERY
PROBABLE
Refer fault code 1086
CAUSES
FAULT
Refer fault code 1086
ISOLATION
PARAMETER
DESCRIPTION
FAULT CODE
2502
FAULT MESSAGE
P31 Stuck Closed in Auto Test
RESTRICTIONS
--
ALARM BELL
--
RESET LEVEL
--
FAULT
--
RECOVERY
PROBABLE
Refer fault code 1087
CAUSES
FAULT
Refer fault code 1087
ISOLATION
261
PARAMETER
DESCRIPTION
FAULT CODE
2503
FAULT MESSAGE
P2 Stuck Closed in Auto Test
RESTRICTIONS
--
ALARM BELL
--
RESET LEVEL
--
FAULT
--
RECOVERY
PROBABLE
Refer fault code 1088
CAUSES
FAULT
Refer fault code 1088
ISOLATION
DESCRIPTION
PARAMETER
FAULT CODE
2504
FAULT MESSAGE
P22 Stuck Closed in Auto Test
RESTRICTIONS
--
ALARM BELL
--
RESET LEVEL
--
FAULT
--
RECOVERY
PROBABLE
Refer fault code 1089
CAUSES
FAULT
Refer fault code 1089
ISOLATION
PARAMETER
DESCRIPTION
FAULT CODE
2505
FAULT MESSAGE
P32 Stuck Closed in Auto Test
RESTRICTIONS
--
ALARM BELL
--
RESET LEVEL
--
FAULT
--
RECOVERY
PROBABLE
Refer fault code 1090
CAUSES
FAULT
Refer fault code 1090
ISOLATION
262
PARAMETER
DESCRIPTION
FAULT CODE
2506
FAULT MESSAGE
S1 Stuck Closed in Auto Test
RESTRICTIONS
--
ALARM BELL
--
RESET LEVEL
--
FAULT
--
RECOVERY
PROBABLE
Refer fault code 1091
CAUSES
FAULT
Refer fault code 1091
ISOLATION
PARAMETER
DESCRIPTION
FAULT CODE
2507
FAULT MESSAGE
S21 Stuck Closed in Auto Test
RESTRICTIONS
--
ALARM BELL
--
RESET LEVEL
--
FAULT
--
RECOVERY
PROBABLE
Refer fault code 1092
CAUSES
FAULT
Refer fault code 1092
ISOLATION
PARAMETER
DESCRIPTION
FAULT CODE
2508
FAULT MESSAGE
S31 Stuck Closed in Auto Test
RESTRICTIONS
--
ALARM BELL
--
RESET LEVEL
--
FAULT
--
RECOVERY
PROBABLE
Refer fault code 1093
CAUSES
FAULT
Refer fault code 1093
ISOLATION
263
PARAMETER
DESCRIPTION
FAULT CODE
2513
FAULT MESSAGE
GF Stuck Closed in Auto Test
RESTRICTIONS
--
ALARM BELL
--
RESET LEVEL
--
FAULT
--
RECOVERY
PROBABLE
Refer fault code 1206
CAUSES
FAULT
Refer fault code 1206
ISOLATION
PARAMETER
DESCRIPTION
FAULT CODE
2515
FAULT MESSAGE
EXPR Stuck Closed in Auto Test
RESTRICTIONS
--
ALARM BELL
--
RESET LEVEL
--
FAULT
--
RECOVERY
PROBABLE
Refer fault code 1204
CAUSES
FAULT
Refer fault code 1204
ISOLATION
264
PARAMETER
DESCRIPTION
FAULT CODE
2516
FAULT MESSAGE
R1 Stuck Closed in Auto Test
RESTRICTIONS
--
ALARM BELL
--
RESET LEVEL
--
FAULT
--
RECOVERY
PROBABLE
1. Defective R1 contactor
CAUSES
2. Defective wiring.
FAULT
Most probably this fault can be logged due to delayed drop out of the
ISOLATION
contactor. Adjustment of Pick up / drop out values of R1 contactor
could solve the problem.
1. Check the status of the R1 contactor.
2. If the R1 contactor is in energized position, check the supply across
the operating coil.
3. If the voltage is zero and still R1 is energised, then the R1 it self is
defective. (Due to magnatisation of core). Replace the contactor.
4. If voltage is more than 65V, the digital output card MLSD16 has
gone defective. Replace the card and check up.
After adjustment / replacement o contactor perform once again auto
test and confirm that the contactor is functioning normal.
PARAMETER
DESCRIPTION
FAULT CODE
2517
FAULT MESSAGE
R2 Stuck Closed in Auto Test
RESTRICTIONS
--
ALARM BELL
--
RESET LEVEL
--
FAULT
--
RECOVERY
PROBABLE
1. Defective R2 contactor.
CAUSES
2. Defective MLSD16 card.
FAULT
Most probably this fault can be logged due to delayed drop out of the
ISOLATION
contactor. Adjustment of Pick up / drop out values of R2 contactor
could solve the problem.
1. Check the status of the R2 contactor.
2. If the R2 contactor is in energized position, check the supply across
the operating coil.
3. If the voltage is zero and still R2 is energised, then the R2 it self is
defective. (Due to magnatisation of core). Replace the contactor.
4. If voltage is more than 65V, the digital output card MLSD16 has
gone defective. Replace the card and check up.
After adjustment / replacement o contactor perform once again auto
test and confirm that the contactor is functioning normal.
265
PARAMETER
DESCRIPTION
FAULT CODE
2518
FAULT MESSAGE
GF2 Stuck Closed in Auto Test
RESTRICTIONS
--
ALARM BELL
--
RESET LEVEL
--
FAULT
--
RECOVERY
PROBABLE
Refer fault code 1206
CAUSES
FAULT
Refer fault code 1206
ISOLATION
PARAMETER
DESCRIPTION
FAULT CODE
2519
FAULT MESSAGE
AGPR Stuck Closed in Auto Test
RESTRICTIONS
--
ALARM BELL
--
RESET LEVEL
--
FAULT
--
RECOVERY
PROBABLE
Refer fault code 1205
CAUSES
FAULT
Refer fault code 1205
ISOLATION
266
PARAMETER
DESCRIPTION
FAULT CODE
2520
FAULT MESSAGE
SANDR Stuck Closed in Auto Test
RESTRICTIONS
--
ALARM BELL
--
RESET LEVEL
--
FAULT
--
RECOVERY
PROBABLE
1. Defective Sander relay
CAUSES
2. Defective MLSD16 card.
FAULT
1. Check the status of the Green LED 12 on digital input card MDIP16
ISOLATION
in slot No. 9.
2. If the Green LED is not glowing,
A. Then the fault is due to delayed opening of the interlock.
Change the relay.
3. If the Green LED is glowing, check the status of the relay.
A. If the relay is in energized position, check the voltage across the
relay coil terminals.
a) If the voltage is zero, relay is defective. Replace the relay.
b) If the voltage is more than 65V, MLSD16 card is defective.
Replace the card and check up.
4. Once again perform the Auto test for relays and ensure correct
operation of the SANDR relay.
PARAMETER
DESCRIPTION
FAULT CODE
2522
FAULT MESSAGE
SR Stuck Closed in Auto Test
RESTRICTIONS
--
ALARM BELL
--
RESET LEVEL
--
FAULT
--
RECOVERY
PROBABLE
1. Defective SR relay
CAUSES
2. Defective MLSD16 card.
FAULT
1. Check the status of the Green LED 11 on digital input card MDIP16
ISOLATION
in slot No. 9.
2. If the Green LED is not glowing,
A. Then the fault is due to delayed opening of the interlock.
Change the relay.
3. If the Green LED is glowing, check the status of the relay.
A. If the relay is in energized position, check the voltage across the
relay coil terminals.
a) If the voltage is zero, relay is defective. Replace the relay.
b) If the voltage is more than 65V, MLSD16 card is defective.
Replace the card and check up.
4. Once again perform the Auto test for relays and ensure correct
operation of the SR relay.
267
PARAMETER
DESCRIPTION
FAULT CODE
2524
FAULT MESSAGE
FSR / FS21 to FS26 Contactor Stuck closed in Auto Test
RESTRICTIONS
--
ALARM BELL
--
RESET LEVEL
--
FAULT
--
RECOVERY
PROBABLE
Refer fault code 1074
CAUSES
FAULT
Refer fault code 1074
ISOLATION
PARAMETER
DESCRIPTION
FAULT CODE
2525
FAULT MESSAGE
VCD Relay Stuck closed in Auto Test
RESTRICTIONS
--
ALARM BELL
--
RESET LEVEL
--
FAULT
--
RECOVERY
PROBABLE
Refer fault code 1149
CAUSES
FAULT
Refer fault code 1149
ISOLATION
PARAMETER
DESCRIPTION
FAULT CODE
2526
FAULT MESSAGE
AFLR Relay Stuck Closed in Auto Test
RESTRICTIONS
--
ALARM BELL
--
RESET LEVEL
--
FAULT
--
RECOVERY
PROBABLE
Refer fault code 1151
CAUSES
FAULT
Refer fault code 1151
ISOLATION
268
PARAMETER
DESCRIPTION
FAULT CODE
2528
FAULT MESSAGE
SLBR / SLBC Contactor Stuck Closed in Auto Test.
RESTRICTIONS
--
ALARM BELL
--
RESET LEVEL
--
FAULT
--
RECOVERY
PROBABLE
Refer fault code 1030
CAUSES
FAULT
Refer fault code 1030
ISOLATION
PARAMETER
DESCRIPTION
FAULT CODE
2532
FAULT MESSAGE
P1 Stuck open in Auto Test
RESTRICTIONS
--
ALARM BELL
--
RESET LEVEL
--
FAULT
--
RECOVERY
PROBABLE
Refer fault code 1127
CAUSES
FAULT
Refer fault code 1127
ISOLATION
PARAMETER
DESCRIPTION
FAULT CODE
2533
FAULT MESSAGE
P21 Stuck open in Auto Test
RESTRICTIONS
--
ALARM BELL
--
RESET LEVEL
--
FAULT
--
RECOVERY
PROBABLE
Refer fault code 1128
CAUSES
FAULT
Refer fault code 1128
ISOLATION
269
PARAMETER
DESCRIPTION
FAULT CODE
2534
FAULT MESSAGE
P31 Stuck open in Auto Test
RESTRICTIONS
--
ALARM BELL
--
RESET LEVEL
--
FAULT
--
RECOVERY
PROBABLE
Refer fault code 1129
CAUSES
FAULT
Refer fault code 1129
ISOLATION
PARAMETER
DESCRIPTION
FAULT CODE
2535
FAULT MESSAGE
P2 Stuck open in Auto Test
RESTRICTIONS
--
ALARM BELL
--
RESET LEVEL
--
FAULT
--
RECOVERY
PROBABLE
Refer fault code 1130
CAUSES
FAULT
Refer fault code 1130
ISOLATION
PARAMETER
DESCRIPTION
FAULT CODE
2536
FAULT MESSAGE
P22 Stuck open in Auto Test
RESTRICTIONS
--
ALARM BELL
--
RESET LEVEL
--
FAULT
--
RECOVERY
PROBABLE
Refer fault code 1131
CAUSES
FAULT
Refer fault code 1131
ISOLATION
270
PARAMETER
DESCRIPTION
FAULT CODE
2537
FAULT MESSAGE
P32 Stuck open in Auto Test
RESTRICTIONS
--
ALARM BELL
--
RESET LEVEL
--
FAULT
--
RECOVERY
PROBABLE
Refer fault code 1132
CAUSES
FAULT
Refer fault code 1132
ISOLATION
PARAMETER
DESCRIPTION
FAULT CODE
2538
FAULT MESSAGE
S1 Stuck open in Auto Test
RESTRICTIONS
--
ALARM BELL
--
RESET LEVEL
--
FAULT
--
RECOVERY
PROBABLE
Refer fault code 1124
CAUSES
FAULT
Refer fault code 1124
ISOLATION
PARAMETER
DESCRIPTION
FAULT CODE
2539
FAULT MESSAGE
S21 Stuck open in Auto Test
RESTRICTIONS
--
ALARM BELL
--
RESET LEVEL
--
FAULT
--
RECOVERY
PROBABLE
Refer fault code 1125
CAUSES
FAULT
Refer fault code 1125
ISOLATION
271
PARAMETER
DESCRIPTION
FAULT CODE
2540
FAULT MESSAGE
S31 Stuck open in Auto Test
RESTRICTIONS
--
ALARM BELL
--
RESET LEVEL
--
FAULT
--
RECOVERY
PROBABLE
Refer fault code 1126
CAUSES
FAULT
Refer fault code 1126
ISOLATION
PARAMETER
DESCRIPTION
FAULT CODE
2545
FAULT MESSAGE
GF Stuck open in Auto Test
RESTRICTIONS
--
ALARM BELL
--
RESET LEVEL
--
FAULT
--
RECOVERY
PROBABLE
Refer fault code 1018
CAUSES
FAULT
Refer fault code 1018
ISOLATION
PARAMETER
DESCRIPTION
FAULT CODE
2547
FAULT MESSAGE
EXPR Stuck open in Auto Test
RESTRICTIONS
--
ALARM BELL
--
RESET LEVEL
--
FAULT
--
RECOVERY
PROBABLE
Refer fault code 1133
CAUSES
FAULT
Refer fault code 1133
ISOLATION
272
PARAMETER
DESCRIPTION
FAULT CODE
2548
FAULT MESSAGE
R1 Stuck Open in Auto Test
RESTRICTIONS
--
ALARM BELL
--
RESET LEVEL
--
FAULT
--
RECOVERY
PROBABLE
1. Defective R1 contactor
CAUSES
2. Defective wiring.
FAULT
Most probably this fault can be logged due to delayed Pick up of the
ISOLATION
contactor. Adjustment of Pick up / drop out values of R1 contactor
could solve the problem.
1. Check the status of the R1 contactor.
2. If the R1 contactor is in de-energized position, check the supply
across the operating coil.
3. If the voltage is more than 65V and still R1 is de-energised, then
the R1 it self is defective. Replace the contactor.
4. If voltage is zero, the digital output card MLSD16 has gone
defective. Replace the card and check up.
After adjustment / replacement o contactor perform once again auto
test and confirm that the contactor is functioning normal.
PARAMETER
DESCRIPTION
FAULT CODE
2549
FAULT MESSAGE
R2 Stuck Open in Auto Test
RESTRICTIONS
--
ALARM BELL
--
RESET LEVEL
--
FAULT
--
RECOVERY
PROBABLE
1. Defective R2 contactor
CAUSES
2. Defective wiring.
FAULT
Most probably this fault can be logged due to delayed Pick up of the
ISOLATION
contactor. Adjustment of Pick up / drop out values of R2 contactor
could solve the problem.
1. Check the status of the R2 contactor.
2. If the R2 contactor is in de-energized position, check the supply
across the operating coil.
3. If the voltage is more than 65V and still R2 is de-energised, then
the R2 it self is defective. Replace the contactor.
4. If voltage is zero, the digital output card MLSD16 has gone
defective. Replace the card and check up.
After adjustment / replacement o contactor perform once again auto
test and confirm that the contactor is functioning normal.
273
PARAMETER
DESCRIPTION
FAULT CODE
2550
FAULT MESSAGE
GF2 Stuck Open in Auto Test
RESTRICTIONS
--
ALARM BELL
--
RESET LEVEL
--
FAULT
--
RECOVERY
PROBABLE
Refer fault code 1018
CAUSES
FAULT
Refer fault code 1018
ISOLATION
PARAMETER
DESCRIPTION
FAULT CODE
2551
FAULT MESSAGE
AGPR Stuck Open in Auto Test
RESTRICTIONS
--
ALARM BELL
--
RESET LEVEL
--
FAULT
--
RECOVERY
PROBABLE
Refer fault code 1134
CAUSES
FAULT
Refer fault code 1134
ISOLATION
274
PARAMETER
DESCRIPTION
FAULT CODE
2552
FAULT MESSAGE
SANDR circuit Open in Auto Test
RESTRICTIONS
--
ALARM BELL
--
RESET LEVEL
--
FAULT
--
RECOVERY
PROBABLE
1. Defective SANDR relay
CAUSES
2. Defective MLSD16 card.
FAULT
1. Check the status of the Green LED 12 on digital input card MDIP16
ISOLATION
in slot No. 9.
2. If the Green LED is not glowing,
A. Then the status of the SANDR Relay.
B. If the relay is in de-energized position, check the voltage across
the relay coil terminals.
a) If the voltage is zero, MLSD16 card is defective. Replace the
MLSD16 card.
b) If the voltage is more than 65V, relay is defective. Replace
the relay and check up.
3. Once again perform the Auto test for relays and ensure correct
operation of the SANDR relay.
PARAMETER
DESCRIPTION
FAULT CODE
2554
FAULT MESSAGE
SR Relay circuit Open in Auto Test
RESTRICTIONS
--
ALARM BELL
--
RESET LEVEL
--
FAULT
--
RECOVERY
PROBABLE
1. Defective SR relay
CAUSES
2. Defective MLSD16 card.
FAULT
1. Check the status of the Green LED 11 on digital input card MDIP16
ISOLATION
in slot No. 9.
2. If the Green LED is not glowing,
A. Then the status of the SR Relay.
B. If the relay is in de-energized position, check the voltage across
the relay coil terminals.
a) If the voltage is zero, MLSD16 card is defective. Replace the
MLSD16 card.
b) If the voltage is more than 65V, relay is defective. Replace
the relay and check up.
3. Once again perform the Auto test for relays and ensure correct
operation of the SR relay.
275
PARAMETER
DESCRIPTION
FAULT CODE
2556
FAULT MESSAGE
FSR / FS21 to FS26 Contactor Stuck Open in Auto Test
RESTRICTIONS
--
ALARM BELL
--
RESET LEVEL
--
FAULT
--
RECOVERY
PROBABLE
Refer fault code 1075
CAUSES
FAULT
Refer fault code 1075
ISOLATION
PARAMETER
DESCRIPTION
FAULT CODE
2557
FAULT MESSAGE
VCD Relay circuit Open in Auto Test
RESTRICTIONS
--
ALARM BELL
--
RESET LEVEL
--
FAULT
--
RECOVERY
PROBABLE
Refer fault code 1150
CAUSES
FAULT
Refer fault code 1150
ISOLATION
PARAMETER
DESCRIPTION
FAULT CODE
2558
FAULT MESSAGE
AFLR Relay circuit Open in Auto Test
RESTRICTIONS
--
ALARM BELL
--
RESET LEVEL
--
FAULT
--
RECOVERY
PROBABLE
Refer fault code 1152
CAUSES
FAULT
Refer fault code 1152
ISOLATION
276
PARAMETER
DESCRIPTION
FAULT CODE
2560
FAULT MESSAGE
SLBR circuit Open in Auto Test.
RESTRICTIONS
--
ALARM BELL
--
RESET LEVEL
--
FAULT
--
RECOVERY
PROBABLE
Refer fault code 1057
CAUSES
FAULT
Refer fault code 1057
ISOLATION
PARAMETER
DESCRIPTION
FAULT CODE
2570
FAULT MESSAGE
Communication failed.
RESTRICTIONS
--
ALARM BELL
--
RESET LEVEL
--
FAULT
--
RECOVERY
PROBABLE
Serial Communication Link between Main Control unit and Display unit
CAUSES
has failed.
FAULT
Manual fault clearing through Lap Top/ PC only.
ISOLATION
As the communication has failed the fault can’t be cleared from Display
unit.
As and when the communication works, parameter display starts and
performance of Display Unit will be normal, even though the fault is not
cleared
277
PARAMETER
DESCRIPTION
FAULT CODE
2581
FAULT MESSAGE
VCD Applied Penalty Brake
Move master controller Handle to IDLE
Press Reset to release Brake.
RESTRICTIONS
--
ALARM BELL
--
RESET LEVEL
--
FAULT
--
RECOVERY
PROBABLE
Refer fault code 1153
CAUSES
FAULT
Refer fault code 1153
ISOLATION
PARAMETER
DESCRIPTION
FAULT CODE
2582
FAULT MESSAGE
High Wheel Slip Occured.
RESTRICTIONS
--
ALARM BELL
--
RESET LEVEL
--
FAULT
--
RECOVERY
PROBABLE
After reduction of 40% of excitation to that particular notch, if wheel
CAUSES
slip not arrested then system will log this message.
FAULT
Automatic when RPM of slipping wheel comes to with in range.
ISOLATION
278
PARAMETER
DESCRIPTION
FAULT CODE
2583
FAULT MESSAGE
Engine Shut Down Unexpectedly.
RESTRICTIONS
--
ALARM BELL
--
RESET LEVEL
--
FAULT
No fault recovery.
RECOVERY
PROBABLE
1.
Engine RPM suddenly drops below
200 rpm, due to external
CAUSES
reasons like OSTA, rack jam, LLOB trip etc.
2.
Engine RPM signal not received by MEP 660 due to
A. Incorrect air gap between cam gear teeth and sensor tip.
B. ESS defective
C. ESS cable defective
D. ESS cable connector slack
E. SSI unit defective.
FAULT
1.
Crank the engine and check for engine RPM signal on the Display.
ISOLATION
If RPM signal is steady then the fault is due to external reasons.
Check the mechanical side, for sudden engine RPM dropping.
2.
If RPM signal is zero,
A. Check ESS1 weld nut and ensure proper welding.
B. Check ESS1 fitment
C. Check for slackness of the ESS1 sensor cable connector at the
ESS and RDB unit.
D. Check continuity of the ESS1 cable from pin to pin, if no
continuity replace the cable.
E. Remove the ESS and check for physical damages on the sensor
tip. If damage replace the sensor.
F. Fit the sensor, as per Maintenance Instructions Document No.
IM-46.
G. Check once again the RPM signal after cranking. If RPM signal
is not coming and ESS is not changed earlier, change ESS with
new one.
H. Recheck the RPM signal. If RPM signal is not coming change SSI
unit.
279
Annexure - 1
Classification and reset procedure of Fault Messages
The faults are classified into three levels such as high, medium and low priority, based on
the severity of the effect of the fault on locomotive operation.
High Priority faults: The faults that can cause damage to engine, total restriction of
loco operation or damage to electrical equipments are classified as high priority faults.
The order of priority of these faults is assigned based on the restrictions imposed on the
locomotive operations due to occurrence of those faults. The faults, which lead to engine
shut down, or prohibition of motoring and dynamic braking etc. are treated as first in
priority faults. The faults leading to reducing power of locomotive are next in priority. The
faults resulting in cutting out of traction motor are next in priority. In case of these
faults,the Alarm Gong (ALG) and the display buzzer will be energised either continuously
or for 30 second The driver can silence the Alarm Gong and buzzer by pressing
the acknowledge switch provided on the display unit. Even otherwise, in case of
most of the faults, the Alarm Gong and buzzer will go OFF after 30 second automatically.
Medium Priority Faults: The faults resulting in reduction of power, prohibition of
dynamic braking, prohibition of battery charging etc. are treated as medium Level faults.
In these cases, the Alarm Gong will be energised for 5 seconds and the display of fault
message and buzzer will continue for 15 seconds.
Low Priority Faults: The faults for which fault tolerance is built in the system and other
faults are treated as low priority faults. In these cases, Alarm Gong will not be energised
but the fault message is displayed and the buzzer in the display unit is energised for 15
seconds.
In case of any fault, the fault is recorded in the error log along with 8 data packs
irrespective of its priority level. It is recommended to down load this error log to and
analyse the fault data packs before going for actual investigation.
Fault reset:
For most of the faults, automatic recognition of fault recovery is provided. When a fault
occurs, the MEP 660 system identifies the fault recovery conditions and announces
recovery for the fault through a display message and automatically removes all
restrictions imposed on the loco operation due to that fault. For some of the faults, the
philosophy of automatic reset of fault when the master controller handle is brought to
idle is used. In this type of faults, the fault is reset three times automatically within an
hour and if the fault repeats the 4th time, it will not be reset. After that this can only be
reset manually. For very few faults, fault clearing is restricted to manual resetting only.
For any fault, it is possible to manually clear the fault through the display unit, after
attending to it. However, three levels of access are defined for this purpose.
Access level LOW: These faults (irrespective of their priority level) are permitted to be
cleared by the driver. By pressing the “MENU” key, he can select “Faults” menu and from
the options under that menu, he can select “Clear Active Faults” menu and navigate
280
through the faults active at that point of time, which will be displayed one by one based
on their priority, and he can clear any fault by pressing “0” key, when that fault is on
display. If it is an access level-LOW fault, the system clears the fault immediately and
informs the same on the display unit, simultaneously removing any restrictions in loco
operation imposed by that fault.
Access Level Medium: These faults are meant for clearing only by maintenance staff of
the locomotive shed. Clearing of these faults requires higher level of knowledge about
the locomotive. Clearing of these faults can be done only by entering a pass code, which
the system requests to enter, when “0” key is pressed against such fault in “Clear Active
Faults” menu.
Access Level High: The access level is only for very few faults where, in depth
knowledge of locomotive equipment as well as knowledge of MEP
660 system is
necessary. These faults can be cleared only through a LAPTOP PC connected to the MEP
660 system and they cannot be cleared through display unit.
281
Annexure - 2
Control Unit Type MEP 660 {Slot 1 to slot 19 (L to R)}
Slot 1
Analog input card
Type - MAIP8_AU
Slot 2
Analog input card
Type - MIAI
Slot 3
Control card
Type - MAUCC
Slot 4
Control card
Type - MWSCC
Slot 5
Frequency input card
Type - MFIP 16
Slot 6
Analog input card
Type - MAIP8_WS
Slot 7
Analog input card
Type - MAIP8_EP
Slot 8
Control card type
Type - MEPCC
Slot 9
Digital input card
Type - MDIP 16
Slot 10
Digital input card
Type - MDIP 16
Slot 11
Digital input card
Type - MDIP 16
Slot 12
Digital input card
Type - MDIP 16
Slot 13
Digital input card
Type - MDIP 16
Slot 14
Digital output card
Type - MLSD 16
Slot 15
Digital output card
Type - MLSD 16
Slot 16
Digital output card
Type - MHSD 16
Slot 17
Spare dummy
-
Slot 18
PWM control card
Type - MPWM2
Slot 19
Power supply card
Type - MEPPS
282
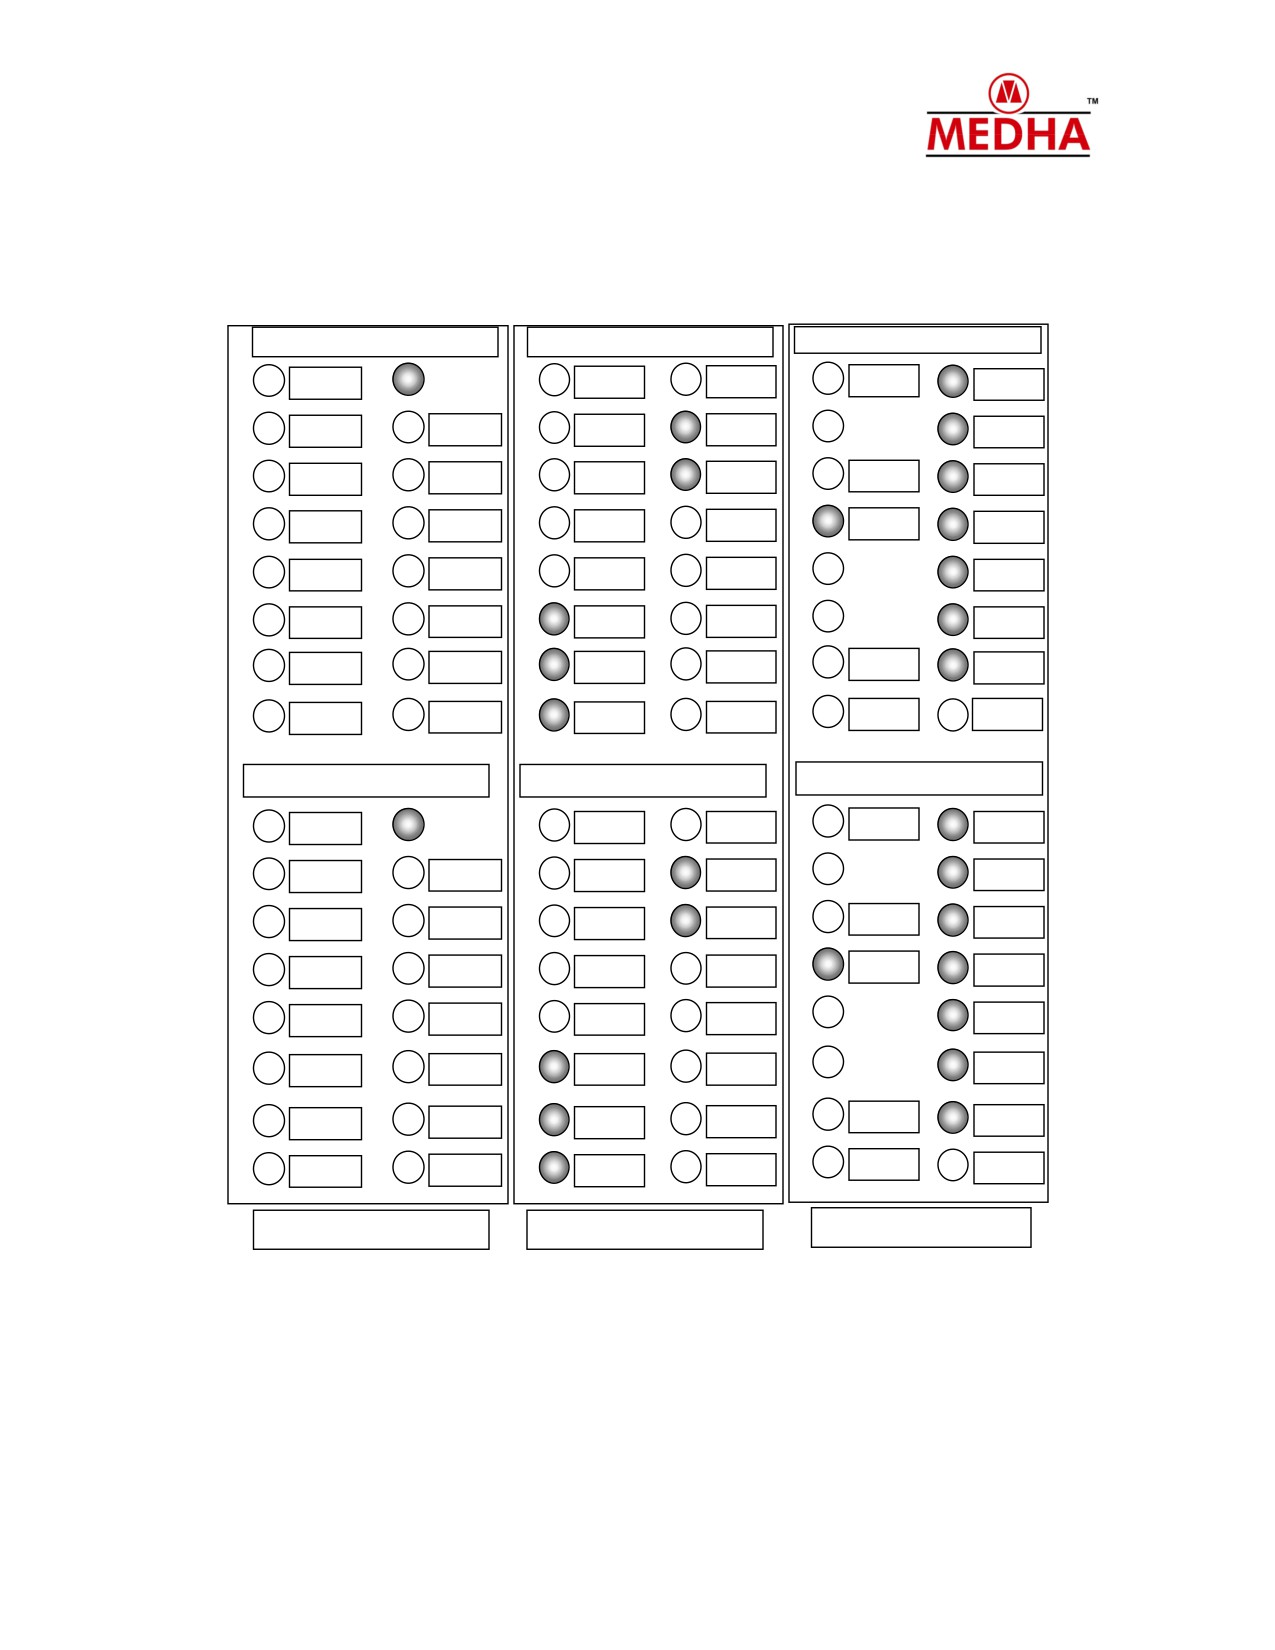
Annexure - 3
Digital input status shown with all breakers ON and master handles in IDLE, BKT in
motoring and Reverser in Forward and air brake system working normal. - PCS and PCS1
Status depend on Air brake. Rect. Blo Fail & Rect. Hot status depends on type of rectifier.
Card level input status LEDS
Card level input status LEDS
Card level input status LEDS
7
15
7
15
REV-OFF
7
P22FB
15
REVRFB
MCOS6
TL6
STOP
6
6
14
14
6
14
REVFFB
ALARM
MCOS5
TL16
TL25
P2FB
FB
5
13
5
13
5
P31FB
13
BKTMFB
OPS FB
MCOS4
TL3
TL64
4
12
4
12
4
P21FB
12
BKTBFB
LWSFB
MCOS3
TL7
TL10
3
3
11
11
3
11
S31FB
AGPR FB
MCOS2
TL12
TL2
P1FB
2
2
10
10
2
CK3FB
10
S21FB
EXPR FB
MCOS1
TL15
TL23
1
1
9
1
CK2FB
9
S1FB
ECSRUN
TL0
9
TL17
RFCBB
0
0
8
8
0
CK1FB
8
P32FB
START
TL8
TL13
GFFB
Loco input status LEDS
Loco input status LEDS
Loco input status LEDS
7
15
7
15
REVRFB
MCOS6
15
7
STOP
TL6
REV-OFF
P22FB
6
14
6
14
REVFFB
ALARM
MCOS5
TL16
14
TL25
6
P2FB
FB
5
13
5
13
BKTMFB
OPS FB
MCOS4
TL3
13
TL64
5
P31FB
4
12
4
12
BKTBFB
LWSFB
MCOS3
TL7
12
TL10
4
P21FB
3
11
3
11
AGPR FB
MCOS2
TL12
11
TL2
3
P1FB
S31FB
2
10
2
10
2
10
EXPR FB
MCOS1
TL15
TL23
CK3F
S21FB
B
1
9
1
9
9
1
RFCB
ECSRUN
TL0
TL17
CK2F
S1FB
0
8
0
0
8
8
GFFB
START
TL8
TL13
CK1F
P32FB
Slot-9
Slot-10
Slot-11
283
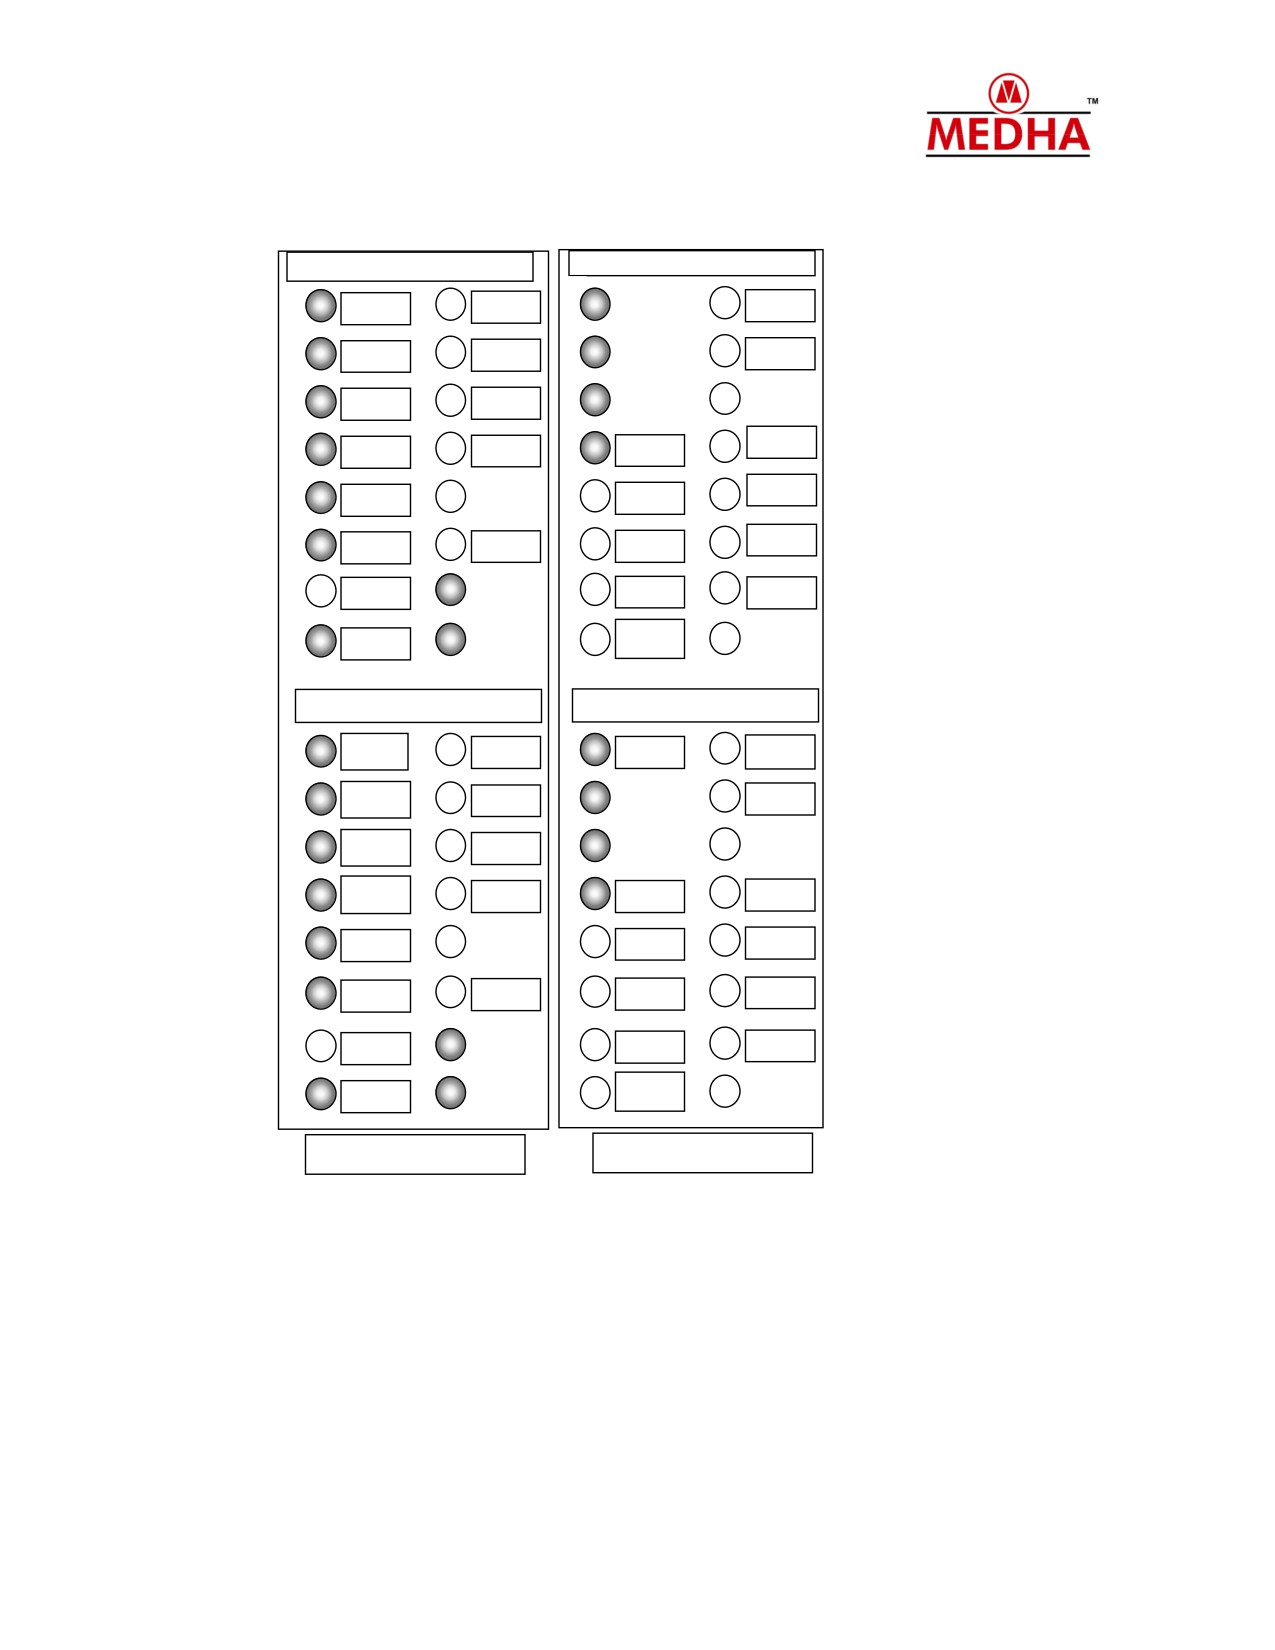
Annexure - 3
Card level input status LEDS
Card level input status LEDS
7
15
7
15
PSH4
AFLRST
CEB FB
SPAR
6
14
6
14
PSH1
DEB-Car.
AFL
SPAR
FB
P2
SLBC FB
5
13
5
13
PSH2
DEB-Eng.
AFL
FB
4
4
12
PSH3
12
AFLRFB
HL
PCS1
3
11
ALRTRB
3
11
HL Dim
AGFB
W171
FB
2
10
2
10
FL FB
PCSF
FSFB
HOR
1
9
Rect. Blo.
1
9
MMF FB
GFFB
Fail
IBPS
0
8
Rect.
0
8
Altr.Dsbl
FPFB
HOT
ALRT
SW
Loco input status LEDS
Loco input status LEDS
7
PSH4
15
7
15
AFLRST
CEB-FB
SPAR
E
6
PSH1
14
6
DEB-Car.
14
AFL P2
FB
SPAR
E
5
5
DEB-Eng.
13
PSH2
13
AFL P1
SLBC FB
FB
4
PSH3
12
4
12
AFLRFB
PCS1
HL
3
3
11
11
ALRTRB
HL Dim
AGFB
W171
FB
2
10
2
10
PCSF
FSFB
HOR
FL FB
1
9
1
N
9
MMF FB
GFFB
IBPS
Rect.
0
0
8
8
Rect.
ALRTR
Altr.Dsbl
FPFB
HOT
RST
SW
Slot-12
Slot-13
284
Annexure - 4
List Digital output Cable IDs and Pin connections.
No.
Out put device
D.O.
Wire
D.O Card
Slot
Cable
Connect
Chann
No.
ID
or on CU
el
P1 Coil
DO 00
P1CL
A
P21 Coil
DO 01
P21CL
B
P31 Coil
DO 02
P31CL
C
P2 Coil
DO 03
P2CL
D
P22 Coil
DO 04
P22CL
E
P32 Coil
DO 05
P32CL
F
S1 Coil
DO 06
S1CL
G
S21 Coil
DO 07
S21CL
H
S31 Coil
DO 08
S31CL
MDLS 16
14
AY
J
BKTM Coil
DO 09
BKMCL
K
BKTB Coil
DO 10
BKBCL
L
REVF Coil
DO 11
RVFCL
M
REVR Coil
DO 12
RVRCL
N
GF Coil
DO 13
GFCL1
P
CKC Coil
DO 14
CKCCL
R
EXPR Coil
DO 15
EXPRC
S
L
R1 Coil
DO 16
R1CL
A
R2 Coil
DO 17
R2CL
B
GF Coil
DO 18
GFCL2
C
AGPR Coil
DO 19
AGPRC
D
L
SANDR Coil
DO 20
SNDRC
E
L
BKIV Coil
DO 21
23D
F
SR Coil
DO 22
SRCL
G
DMR Coil
DO 23
DMRCL
MDLS 16
15
AZ
H
FSR Coil
DO 24
FSRCL
J
ALRTRB coil
DO 25
ALRR
K
AFLR Coil
DO 26
RVRCL
L
CMR Coil
DO 27
AFRCL
M
SLBR Coil
DO 28
SLBRC
N
L
PLPC Coil
DO 29
PLPCCL
P
Spare
DO 30
R
Spare
DO 31
S
AV
DO 32
15A
MHSD 16
16
BA
A
BV
DO 33
12A
B
CV
DO 34
7C
C
DV
DO 35
3A
D
Hot Eng. LED
DO 36
16L
E
CK TIP WELD
DO 37
73
F
LED
Ground LED
DO 38
35
G
285
No.
Out put device
D.O.
Wire
D.O Card
Slot
Cable
Connect
Chann
No.
ID
or on CU
el
Over load LED
DO 39
RL2
H
AFL LED
DO 40
133
J
ALERTER LED
DO 41
ALR
K
MMF LED
DO 42
MFL
L
Spare
M
Spare
N
Spare
P
Spare
R
Spare
S
286
Revesion sheet
1.
Document changes from Rev. 1 to Rev.2
a. Fault messages changed from Rev. 1:
1118, 1119, 1120, 1121, 1122 and 1123 - Text message “Traction Motor 1 HOT.
Maximum TM Current LIMITED.” is changed to ‘Excess Traction Motor x Current.
Maximum TM current limited.’
1004, 1005 - Text message “Low Oil Pressure in Governor” is changed to ‘LLOB
Trip. Reset Plunger.’
1019 - Text message “CEB Breaker OFF. Restrictions: Engine Shut Down” is
changed ‘CEB Breaker OFF’. Restrictions removed for this fault.
1155 - Text Message “DEB Engine Breaker Off. Restrictions: Power Limited To 4th
Notch” is changed to ‘DEB ENGINE Breaker OFF’. Restrictions removed for this
fault.
1156 - Text Message “DEB Car Body Breaker Off.Restrictions: Power Limited to
4th Notch” is Changed to ‘DEB CAR BODY Breaker OFF’. Restrictions removed for
this fault.
b. New messages added:
1030, 1064, 1071, 1073, 1097, 1102, 1103, 1104, 1105, 1106, 1107, 1157,
1158, 1159, 1160, 1165, 1166, 1167, 1168, 1169, 1170, 1255, 1260, 1261,
1262, 1263, 1264, 2524, 2525, 2526, 2528, 2556, 2557, 2558, 2560, 2581,
2582, 2583.
c. Revision sheet added.
287