Peugeot 308 SW BL (2013 year). Manual - part 18
271
07
MEDIA
2
ABC
3
DEF
5
JKL
4
GHI
6
MNO
8
TUV
7
PQRS
9
WXYZ
0
*
#
1
RADIO
MEDIA
NAV
ESC
TRAFFIC
SETUP
ADDR
BOOK
2
ABC
3
DEF
5
JKL
4
GHI
6
MNO
8
TUV
7
PQRS
9
WXYZ
0
*
#
1
RADIO
MEDIA
NAV
ESC
TRAFFIC
SETUP
ADDR
BOOK
2
ABC
3
DEF
5
JKL
4
GHI
6
MNO
8
TUV
7
PQRS
9
WXYZ
0
*
#
1
RADIO
MEDIA
NAV
ESC
TRAFFIC
SETUP
ADDR
BOOK
2
ABC
3
DEF
5
JKL
4
GHI
6
MNO
8
TUV
7
PQRS
9
WXYZ
0
*
#
1
RADIO
MEDIA
NAV
ESC
TRAFFIC
SETUP
ADDR
BOOK
2
ABC
3
DEF
5
JKL
4
GHI
6
MNO
8
TUV
7
PQRS
9
WXYZ
0
*
#
1
RADIO
MEDIA
NAV
ESC
TRAFFIC
SETUP
ADDR
BOOK
2
ABC
3
DEF
5
JKL
4
GHI
6
MNO
8
TUV
7
PQRS
9
WXYZ
0
*
#
1
RADIO
MEDIA
NAV
ESC
TRAFFIC
SETUP
ADDR
BOOK
RADIO
NAV
ESC
TRAFFIC
MEDIA
SELECTING / PLAYING
CD, MP3 / WMA CD, MP3 / WMA SD
CARD / USB PLAYER
The playing and displaying of an MP3/WMA compilation may
depend on the recording programme and/or the parameters used.
We recommend the ISO 9660 recording standard.
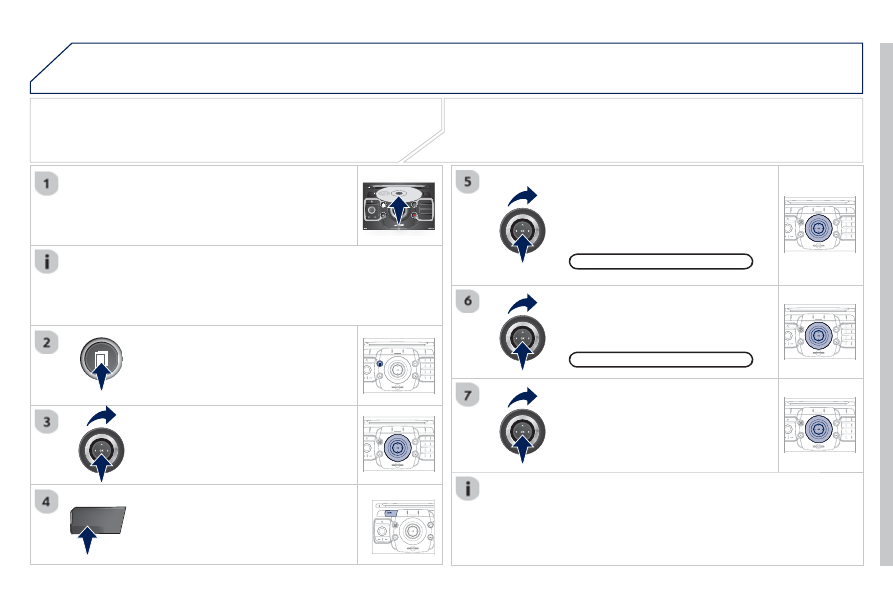
Press the MEDIA button.
Select the "Select media" function
and press OK to confi rm.
Press this button.
Select the music source required.
Press OK to confi rm. Play begins.
Select media
Press the MEDIA button again or
select the "Media" Menu function and
press OK to confi rm.
When the "MEDIA" screen is
displayed, turn the ring up or down to
select the previous or next compatible
source.
"Media" Menu
The list of tracks or MP3/WMA fi les appears under "Media" Menu.
Insert the audio or MP3 CD in the player, the SD
card in the card reader or the USB peripheral in the
USB port. Play begins automatically.
MP3 CDs, SD cards or USB peripherals are the compatible sources.
MUSIC MEDIA PLAYERS