Nissan Qashqai (2007-2010). Manual - part 621


  Index      Nissan     Nissan Qashqai - service and repair manual 2007 - 2010 year


Search            copyright infringement  


Content   ..  619  620  621  622   ..


Nissan Qashqai (2007-2010). Manual - part 621


4WD CONTROL UNIT

DLN-57

< ON-VEHICLE REPAIR >

[TRANSFER: TY30A]

C

E

F

G

H

I

J

K

L

M

A

B

DLN

N

O

P

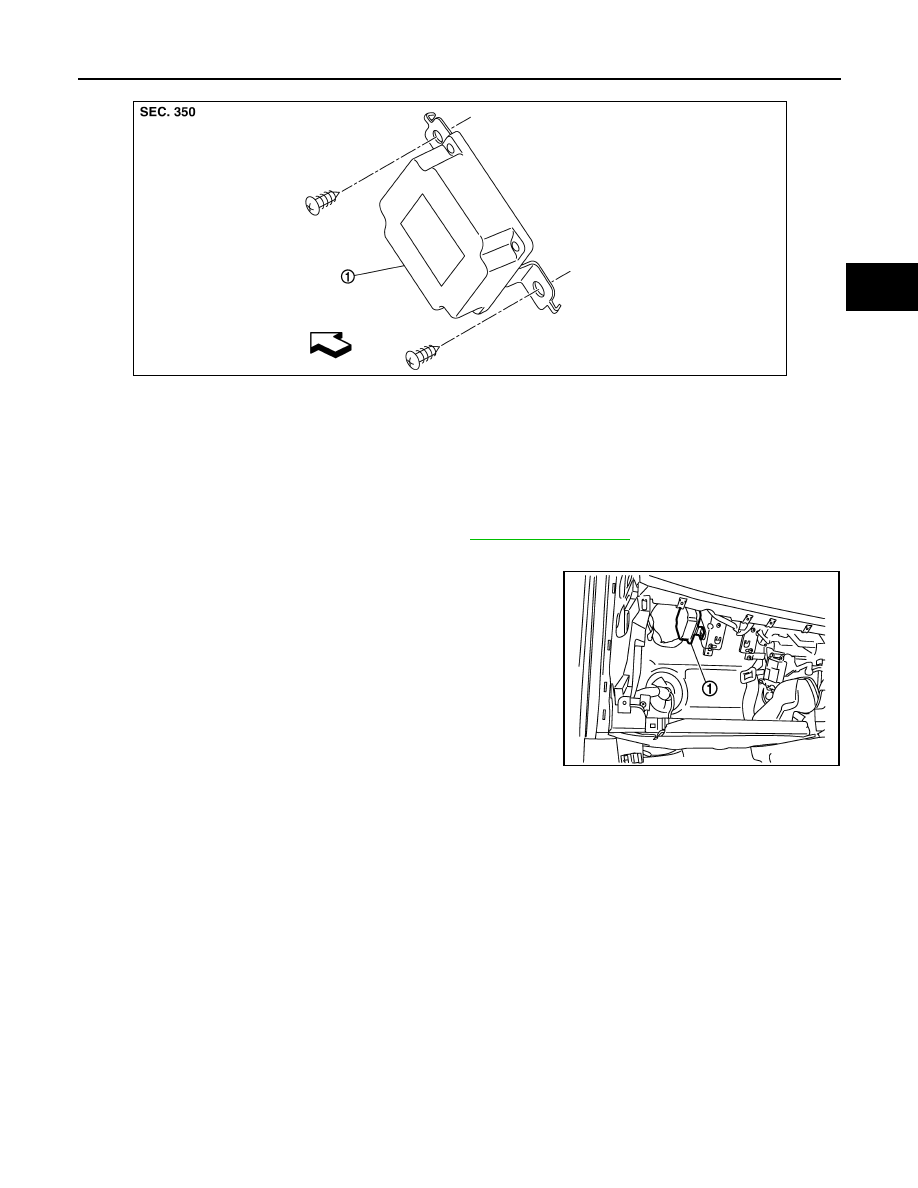
RHD : Removal and Installation

INFOID:0000000000972130

REMOVAL

1.

Remove the instrument assist lower panel. Refer to 

IP-11, "Exploded View"

.

2.

Disconnect 4WD control unit harness connector.

3.

Remove 4WD control unit (1) mounting screws.

4.

Remove 4WD control unit.

INSTALLATION

Install is the reverse order of removal.

1.

4WD control unit

: Vehicle front

JSDIA0239ZZ

JSDIA0240ZZ

DLN-58

< REMOVAL AND INSTALLATION >

[TRANSFER: TY30A]

TRANSFER ASSEMBLY

REMOVAL AND INSTALLATION

TRANSFER ASSEMBLY

M/T

M/T : Exploded View

INFOID:0000000001055585

M/T : Removal and Installation

INFOID:0000000001055586

REMOVAL

1.

Remove the exhaust front tube. Refer to 

EX-10, "Exploded View"

.

2.

Remove the exhaust manifold. Refer to 

EM-149, "Exploded View"

.

3.

Separate the rear propeller shaft. Refer to 

DLN-110, "Exploded View"

.

4.

Remove right side drive shaft and support bearing bracket. Refer to 

FAX-55, "Exploded View"

.

5.

Remove the mounting bolts (

) of transaxle assembly and

transfer assembly.

CAUTION:

Never remove the mounting bolts (

) of adapter case.

6.

Remove transfer assembly from the vehicle.

CAUTION:

• Never damage ring gear shaft.
• Never damage air breather hose.

7.

Remove O-ring (outer) from the transfer assembly.

INSTALLATION

Note the following, and install in the reverse order of removal.
• Apply multi-purpose grease lightly and evenly onto an O-ring (outer), and install it to the transfer assembly.

CAUTION:

Never reuse O-ring (outer).

1.

Transfer assembly

2.

O-ring (outer)

: Vehicle front

Refer to 

GI-4, "Components"

 for symbols in the figure.

JSDIA0210GB

SDIA3225J

TRANSFER ASSEMBLY

DLN-59

< REMOVAL AND INSTALLATION >

[TRANSFER: TY30A]

C

E

F

G

H

I

J

K

L

M

A

B

DLN

N

O

P

• Install mounting bolts according to the standard below when install-

ing transfer assembly to the transaxle assembly.

• Check oil level and check for oil leakage after installation. Refer to

DLN-55, "Inspection"

.

CVT

CVT : Exploded View

INFOID:0000000000972135

CVT : Removal and Installation

INFOID:0000000000972136

REMOVAL

1.

Remove the exhaust front tube. Refer to 

EX-10, "Exploded View"

.

2.

Remove the exhaust manifold. Refer to 

EM-149, "Exploded View"

.

3.

Separate the rear propeller shaft. Refer to 

DLN-110, "Exploded View"

.

4.

Remove right side drive shaft and support bearing bracket. Refer to 

FAX-55, "Exploded View"

.

5.

Remove the mounting bolts (

) of transaxle assembly and

transfer assembly.

CAUTION:

Never remove the mounting bolts (

) of adapter case.

6.

Remove transfer assembly from the vehicle.

CAUTION:

• Never damage ring gear shaft.
• Never damage air breather hose.

Bolt symbol

A

B

Installation direction

Transfer 

 Transaxle

Transaxle 

 Transfer

SDIA3070J

1.

Transfer assembly

: Vehicle front

Refer to 

GI-4, "Components"

 for symbols in the figure.

JSDIA0209GB

SDIA3225J

DLN-60

< REMOVAL AND INSTALLATION >

[TRANSFER: TY30A]

TRANSFER ASSEMBLY

INSTALLATION

Note the following, and install in the reverse order of removal.
• Install mounting bolts according to the standard below when install-

ing transfer assembly to the transaxle assembly.

CAUTION:

Replace side oil seal (transfer joint) of transaxle assembly
when installing transfer assembly to the transaxle assembly.
Never damage oil seal. Refer to 

TM-342, "4WD : Exploded

View"

.

• Check oil level and check for oil leakage after installation. Refer to

DLN-55, "Inspection"

.

Bolt symbol

A

B

Installation direction

Transfer 

 Transaxle

Transaxle 

 Transfer

SDIA3070J


Content   ..  619  620  621  622   ..