Nissan Qashqai (2007-2010). Manual - part 620
PREPARATION
DLN-53
< PREPARATION >
[TRANSFER: TY30A]
C
E
F
G
H
I
J
K
L
M
A
B
DLN
N
O
P
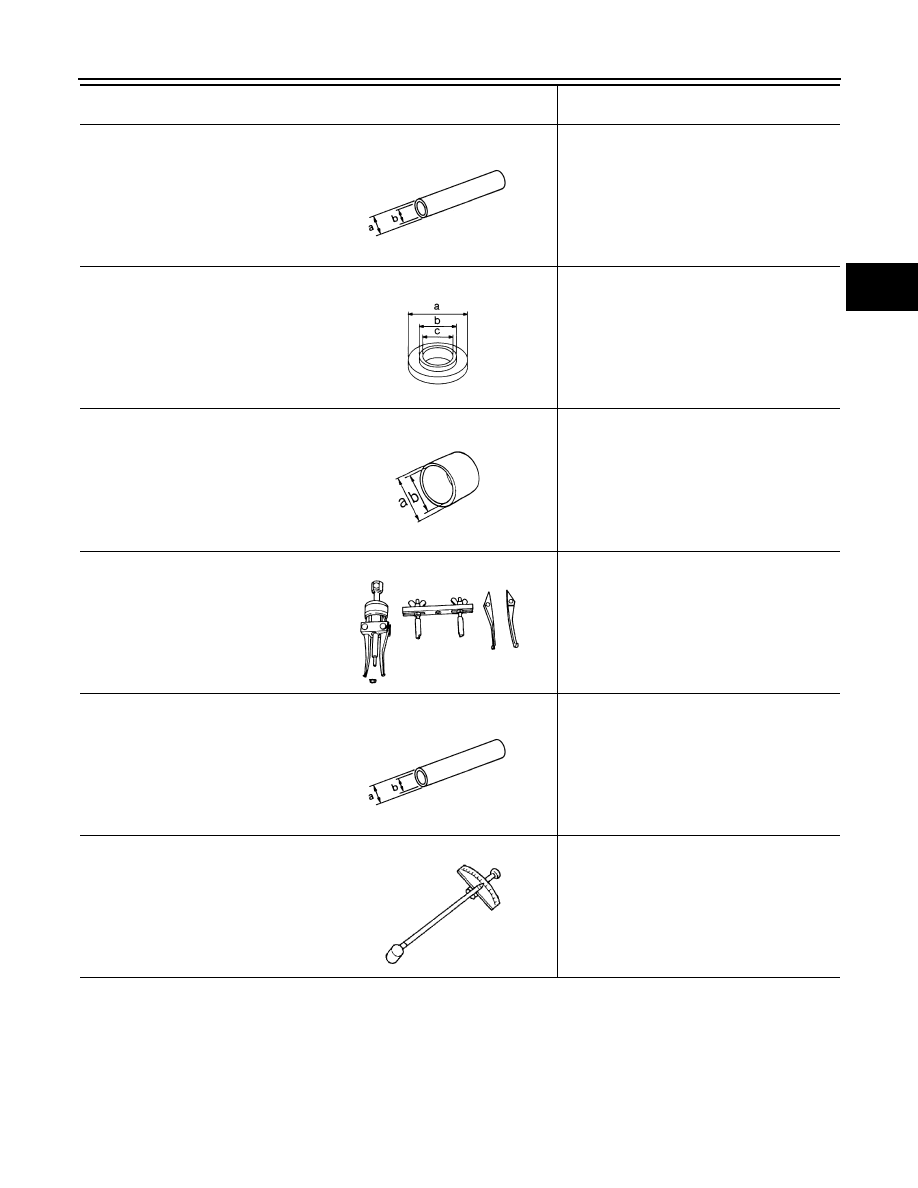
ST01530000
Drift
a:
φ
48 mm (1.89 in) dia.
b:
φ
41 mm (1.61 in) dia.
Installing ring gear
ST35272000
Drift
a:
φ
72 mm (2.83 in) dia.
b:
φ
40 mm (1.57 in) dia.
c:
φ
35.5 mm (1.398 in) dia.
• Installing ring gear
• Installing outer race of drive pinion bearing
(front side)
KV10111400
Drift
a:
φ
25 mm (0.98 in) dia.
b:
φ
20.8 mm (0.819 in) dia.
Installing inner race of ring gear shaft bearing
(transfer case side)
KV381054S0
Puller
Removing drive pinion oil seal
ST23860000
Drift
a:
φ
38 mm (1.50 in) dia.
b:
φ
33 mm (1.30 in) dia.
Installing inner race of drive pinion bearing
(front side)
ST3127S000
Preload gauge
Measuring preload torque
Tool number
Tool name
Description
ZZA0534D
NT107
ZZA1003D
ZZA0601D
ZZA0534D
ZZA0503D