Suzki Burgman AN400. Manual - part 73


  Index      Motorcycles     Suzki Burgman AN400 - service and repair manual 2002 year


Search            


Content   ..  71  72  73  74   ..


Suzki Burgman AN400. Manual - part 73


8-14     ELECTRICAL SYSTEM

Step3
1) Measure the starter relay voltage at the starter relay connectors (between Y/G 


+

 and B/W 


-

) when the 

starter button is pushed.
Is a voltage OK?

Step4
1) Inspect the starter relay. (

!

8-18)

Is the starter relay OK?

Engine does not turn though the starter motor runs.

• Faulty starter clutch.

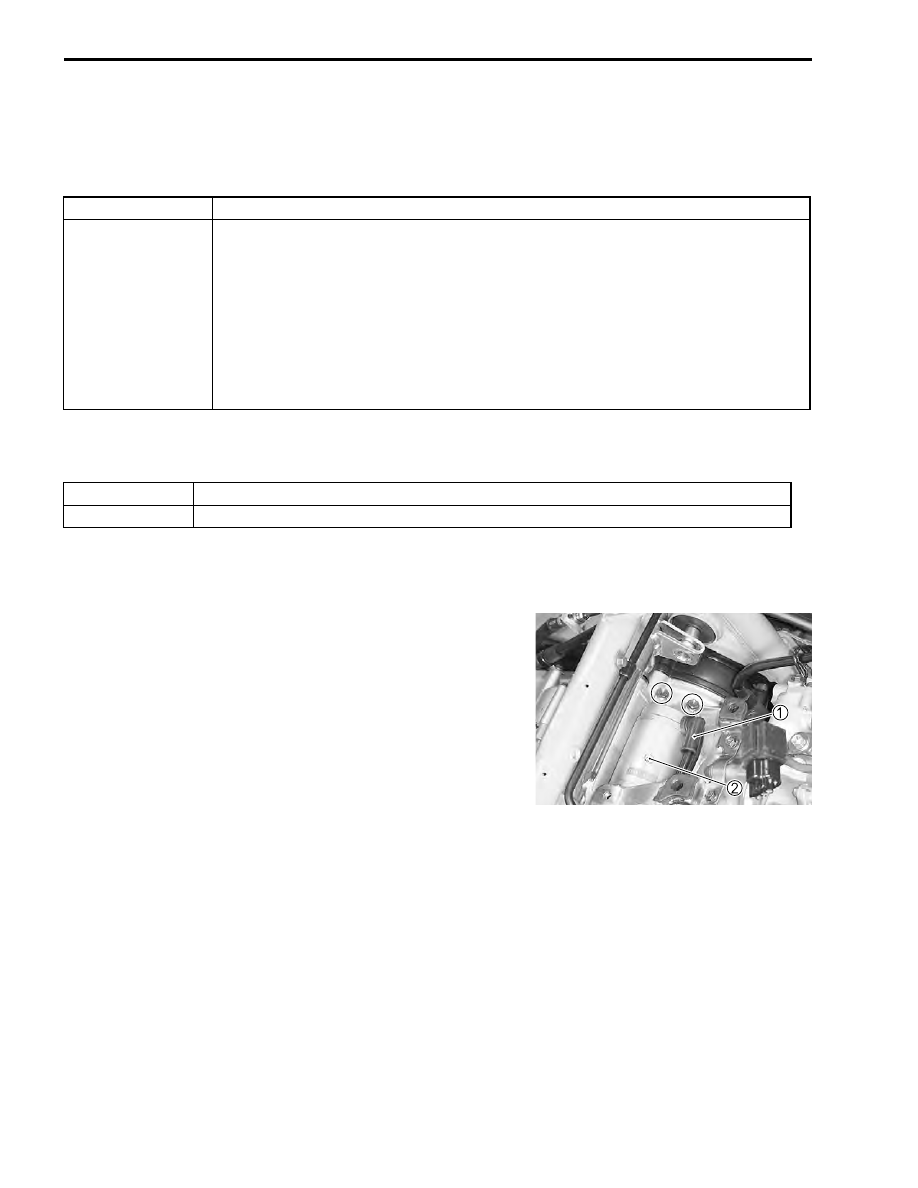
STARTER MOTOR REMOVAL AND DISAS-
SEMBLY

• Remove the trunk box. (

!

7-18)

• Remove the air cleaner box. (

!

3-4)

• Disconnect the starter motor lead wire 


1

.

• Remove the starter motor 


2

.

YES

Go to Step4.

NO

• Faulty safety relay.
• Faulty starter button.
• Faulty engine stop switch.
• Faulty turn signal/side-stand relay.
• Faulty ignition switch.
• Faulty front brake switch and rear brake switch.
• Faulty side-stand switch.
• Improper connector contact.
• Open circuit in wire harness.

YES

Poor starter relay connection.

NO

Faulty starter relay.

ELECTRICAL SYSTEM     8-15

• Disassembly the starter motor, as shown.

STARTER MOTOR INSPECTION

CARBON BRUSHES INSPECTION

• Inspect the carbon brushes for abnormal wear, cracks, or

smoothness in the brush holder.

• If any damages are found, replace the brush assembly with a

new one.

COMMUTATOR INSPECTION

• Inspect the commutator for discoloration, abnormal wear or

undercut 


A

.

• If abnormal wear is found, replace the armature with a new

one.

• If the commutator surfaced is discolored, polish it with #400

sandpaper and wipe it using a clean, dry cloth.

• If there is no undercut, scrape out the insulator 


1

 with saw

blade.

1

  Housing end (outside)

2

  O-ring

3

  Starter motor case

4

  Armature

5

  Hausing end (inside)

6

  O-ring

7

  Oil seal

8

  Washer

9

  Shim

A

  Starter motor lead wire bolt

B

  Starter motor housing bolt

C

  Starter motor mounting bolt

ITEM

    N·m

       kgf-m           Ib-ft

A

   2.7

       0.27            1.95

B

   3.7

       0.37            2.7

C

   7

       0.7            5.0

8-16     ELECTRICAL SYSTEM

ARMATURE COIL INSPECTION

• Check for continuity between each segment and between

each segment and the armature shaft using the multi circuit
tester.

• If there is no continuity between the segments or there is con-

tinuity between the segments and shaft, replace the armature
with a new one.

#

09900-25008: Multi circuit tester set

+

Tester knob indication: Continuity test (

,

)

OIL SEAL INSPECTION

• Check the oil seal lip for damage or leakage.
• If any damage is found, replace the housing end.

BEARING INSPECTION

• Check the bearing of housing end for damage.
• If any damage is found, replace the housing end.

STARTER MOTOR REASSEMBLY AND 
INSTALLATION

Reassemble the starter motor in the reverse order of disassem-
bly .Pay attention to the following points:

• Apply SUZUKI SUPER GREASE to the lip of the oil seal.

-

99000-25010: SUZUKI SUPER GREASE “A” (Others)
99000-25030: SUZUKI SUPER GREASE “A” (USA)

• Apply a little SUZUKI MOLY PASTE to the armature shaft

end.

.

99000-25140: SUZUKI MOLY PASTE

ELECTRICAL SYSTEM     8-17

"

• Apply SUZUKI SUPER GREASE to the O-ring.

-

99000-25010: SUZUKI SUPER GREASE “A” (Others)
99000-25030: SUZUKI SUPER GREASE “A” (USA)

• Fit the washer 


1

 to the housing end with the tab aligned with

the housing end cutaway, position the shim 


2

 and assemble

the starter motor.

• Align the mark 


A

 on the housing with the line 


B

 on the hous-

ing end.

• Fit the O-rings to the starter motor housing bolts and tighten

the bolts.

/

Starter motor housing bolt: 3.7 N·m (0.37 kgf-m, 2.7 lb-ft)

• Apply SUZUKI SUPER GREASE to the O-ring 


3

.

-

99000-25010: SUZUKI SUPER GREASE “A” (Others)
99000-25030: SUZUKI SUPER GREASE “A” (USA)

• Install the starter motor.

/

Starter motor mounting bolt: 7 N·m (0.7 Kgf-m, 5.0 lb-ft)

To prevent oil or water from entering into the motor
inside, the O-rings must be replaced with new ones.


Content   ..  71  72  73  74   ..