Subaru Forester (2019). Instruction - part 6
(45,1)
reclined seatback. Refer to “Car-
go area cover” FP285.
Pull the strap and adjust the seatback to
the desired position.
Then release the strap and make sure the
seatback is securely locked into place.
1-3. Head restraints
WARNING
The front seat head restraints are
designed to be installed into the
front seats only. The rear seat head
restraints are designed to be in-
stalled into the rear seats only. Do
not attempt to install the front seat
head restraints into the rear seats, or
the rear seat head restraints into the
front seats.
NOTE
It is possible to adjust the angle of the
front seat head restraints only. When
installing the front seat head restraints,
make sure that the angle of the head
restraints can be adjusted.
&
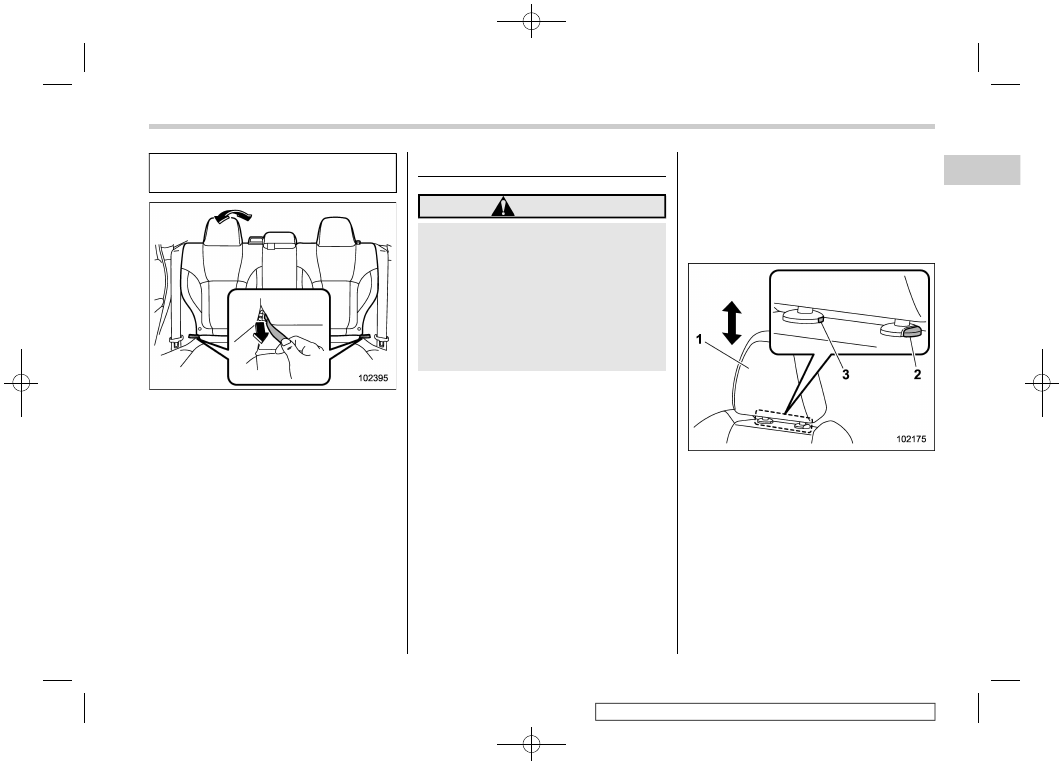
Front seats
Both the driver’s seat and the front
passenger’s seat are equipped with head
restraints. Both head restraints are adjus-
table in the following ways.
!
Height adjustment
1)
Head restraint
2)
Release button
3)
Remove button
To release:
.
Lowermost to the 1st step
Pull the head restraint up to the 1st step.
To raise:
.
1st step to the 3rd step
Pull the head restraint up while pressing
the release button on the top of the
seatback.
– CONTINUED –
Head restraints
43
1
Seat,
seatbelt
and
SRS
airbags