SsangYong Rexton. Service manual - part 440


  Index      SsangYong     SsangYong Rexton - service and repair manual


Search            


Content   ..  438  439  440  441   ..


SsangYong Rexton. Service manual - part 440


SSANGYONG  Y200

1F2-86  M161 ENGINE CONTROLS

YAA1F550

YAA1F190

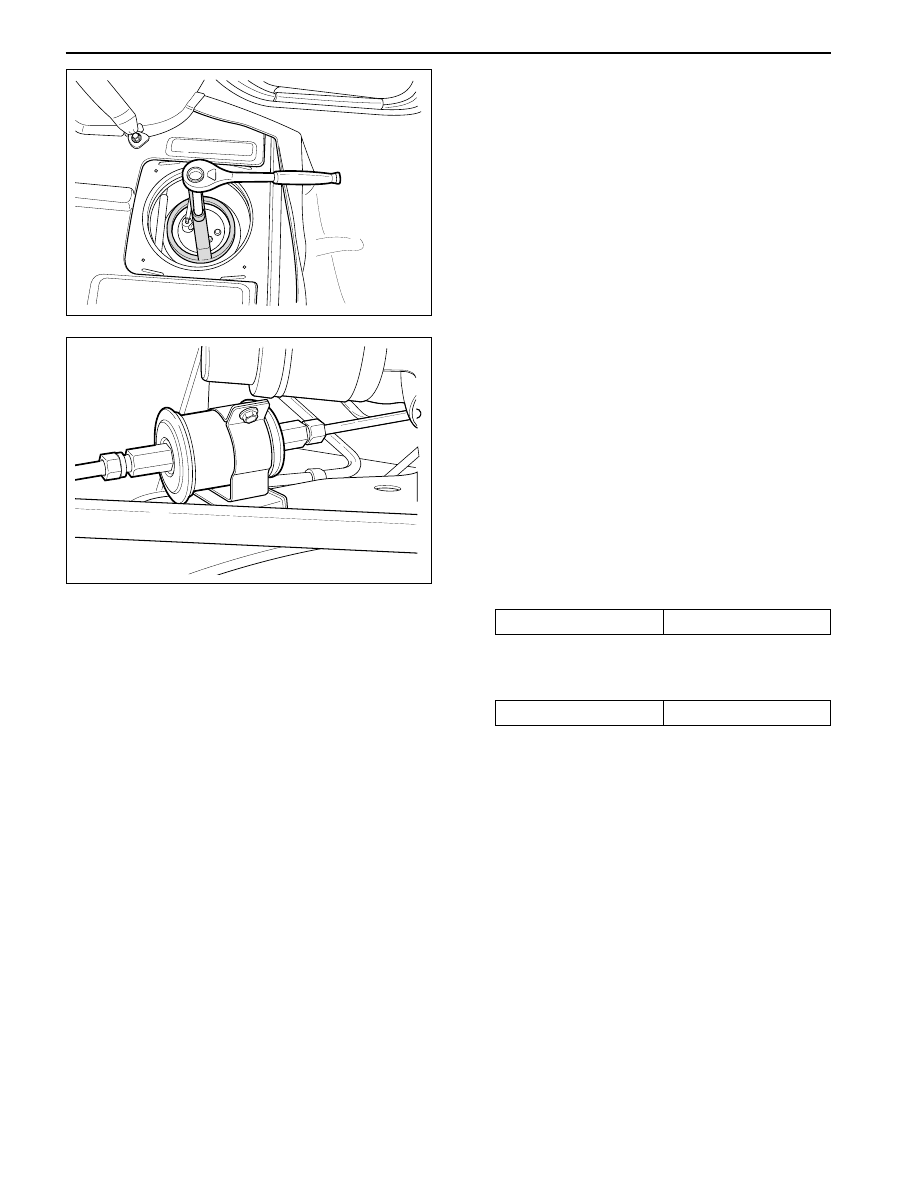
8. Using the fuel tank cap wrench 661 589 00 46 00,

remove the locking cap.

9. Remove the pump from the fuel tank.

Notice:  Check the condition of the seal and
replace if  necessary. Drain the fuel before
removing the pump.

10. Perform an operational check of the fuel pump.

11. Installation should follow the removal procedure

in the reverse order.

FUEL FILTER

Removal and Installation Procedure

1. Disconnect the negative battery cable.

Caution: The fuel system is under pressure. To
avoid fuel spillage and the risk of personal injury
or fire, it is necessary to relieve the fuel system
pressure before disconnecting the fuel lines.

2. Relieve the fuel system pressure. Refer to “Dis-

charging the Pressure in Fuel System” in this sec-
tion.

3. Disconnect the fuel lines from the fuel filter.

Installation Notice

Tightening Torque

28 N•m (21 lb-ft)

4. Remove the fuel filter mounting bracket bolt .

Installation Notice

Tightening Torque

6 N•m (53 lb-in)

Notice: Place the fuel pump pad. There may be
acorrosion due to the contact between the fuel filter
and the bracket.

5. Remove the fuel filter.

6. Install the fuel filter.

7. Perform a leak test of the fuel filter.

8. Installation should follow the removal procedure

in the reverse order.

M161 ENGINE CONTROLS  1F2-87

SSANGYONG  Y200

FUEL TANK

Removal and Installation Procedure

Caution: The fuel system is under pressure. To avoid
fuel spillage and the risk of personal injury or fire,
it is necessary to relieve the fuel system pressure
before disconnecting the fuel lines.

1. Relieve the fuel pressure. Refer to “Discharging

the Pressure in Fuel System” in this section.

2. Disconnect the negative battery cable.

3. Drain the fuel tank.

4. Put aside the floor carpet to remove the fuel pump

access cover.

5. Remove the fuel pump access cover.

KAA1F370

YAA1F170

YAA1F160

6. Disconnect the return line.

7. Disconnect the supply line.

8. Disconnect the fuel tank-to-canister hose from the

fuel tank.

9. Disconnect the fuel pump wiring connector.

10. Disconnect thefuel filler hoseand air vent hosefrom

the fuel tank.

11. Support the fuel tank.

12. Remove the fuel tank retaining nuts.

Installation Notice

Tightening Torque

38 N•m (28 lb-ft)

13. Carefully lower the fuel tank.

SSANGYONG  Y200

1F2-88  M161 ENGINE CONTROLS

14. Turn the rollover valves counterclockwise at an

angle of 90 degrees.

15. Turn the lock ring counterclockwise.

16. Remove and discard the gasket.

17. Installation should follow the removal procedure

in the reverse order.

YAA1F180

YAA1F720

YAA1F730

Caution: The fuel system is under pressure. To avoid
fuel spillage and the risk of personal injury or fire,
it is necessary to relieve the fuel system pressure
before disconnecting the fuel lines.

3. Relieve the fuel pressure in fuel supply systemby

pressing the service valve.

4. Disconnect the vacuum hose.

5. Disconnect the circlip and remove the fuel

pressure regulator.

6. Apply the oil to O-ring lightly and then replace it.

7. Perform a leak test of the fuel pressure regulator

with the engine off and the ignition on.

8. Installation should follow the removal procedure

in the reverse order.

YAA1F700

FUEL PRESSURE REGULATOR

Removal and Installation Procedure

1. Disconnect the negative battery cable.

2. Remove the fuel pressure test connector.

Installation Notice

Tightening Torque

25 N•m (18 lb-ft)

M161 ENGINE CONTROLS  1F2-89

SSANGYONG  Y200

FUEL RAIL AND INJECTORS

Removal and Installation Procedure

Caution: The fuel system is under pressure. To avoid
fuel spillage and the risk of personal injury or fire,
it is necessary to relieve the fuel system pressure
before disconnecting the fuel lines.

1. Discharge the fuel pressure from the fuel pressure

test connector.

2. Disconnect the negative battery cable.

3. Disconnect the vacuumhose from the fuel pressure

regulator.

YAA1F710

YAA1F750

YAA1F760

9. Remove the fuel return and supply line.

Notice: For removal, cover around parts with cloths
not to be stained by fuel. In case of checking the
injector  only, do not remove the fuel return and
supply line.

Installation Notice

11. Remove the two left and two right bolts and one

center bolt of the fuel rail assembly from the intake
manifold.

Installation Notice

YAA1F740

4. Remove the cable guide.

5. Disconnect the Hot Film Air Mass (HFM) sensor

connector.

6. Remove the intake air duct mounting bolts.

Installation Notice

Tightening Torque

9 N•m (80 lb-in)

Tightening Torque

23 N•m (17 lb-ft)

Tightening Torque

25 N•m (18 lb-ft)

7. Remove the intake air duct clamps.

8. Remove the intake air duct.

10. Remove the six injector connectors.


Content   ..  438  439  440  441   ..