Renault Grand Scenic (2016 year). Manual - part 11
3.28
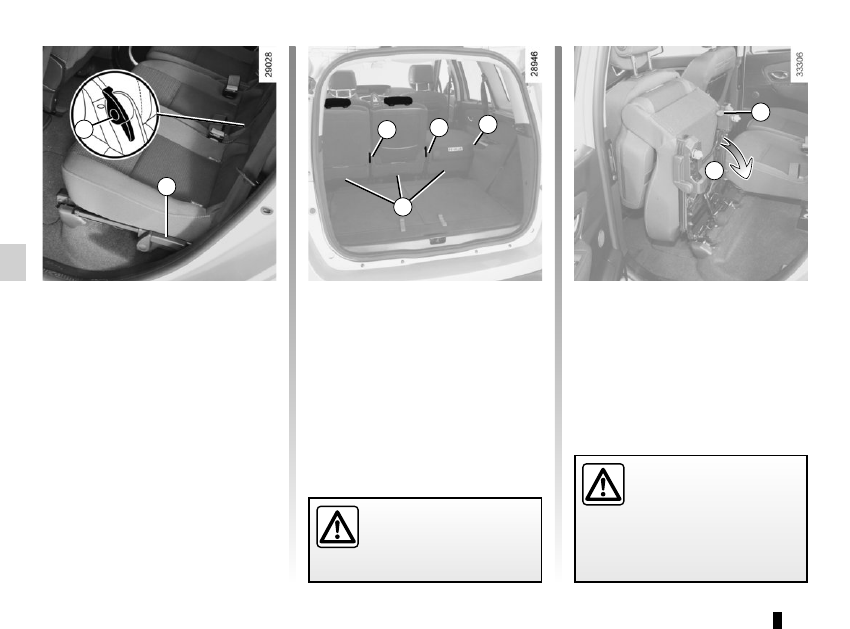
Folding up a seat
Lower the headrest.
Seat with control 2
Lift the control 2, the seatback is lowe-
red and lift the seat as far forwards as
possible.
Seat without control 2
Lift control 1 or pull belt 3 and tilt the
seatback into the table position. Then,
lift control 4 or pull belt 5 and lift the
seat as far forwards as possible.
REAR SEAT FUNCTIONS
(1/2)
Returning a seat to its normal
position
Lower the seat until it locks in place at
floor level (movement A).
Check that it is correctly locked.
When moving the rear
seats, ensure that nothing
obstructs the anchorage
points (passenger’s arm or
leg, a pet, gravel, cloth, toys, etc.).
2
1
3
4
Note: it may be necessary to move
the passenger and/or driver’s seats
forwards and to lower the seatback in
order to tilt the seat as far forwards as
possible.
The seats can be folded down from the
rear of the vehicle on 7-seater vehicles.
Pull control 1 or belt 3 to tilt the seat-
backs, then tilt the seat by pulling belt 4.
1
1
For safety reasons, carry
out any adjustments when
the vehicle is stationary.
A
5