Renault Grand Scenic (2016 year). Manual - part 10
3.12
ELECTRIC WINDOWS/ELECTRIC SUNROOF
(1/3)
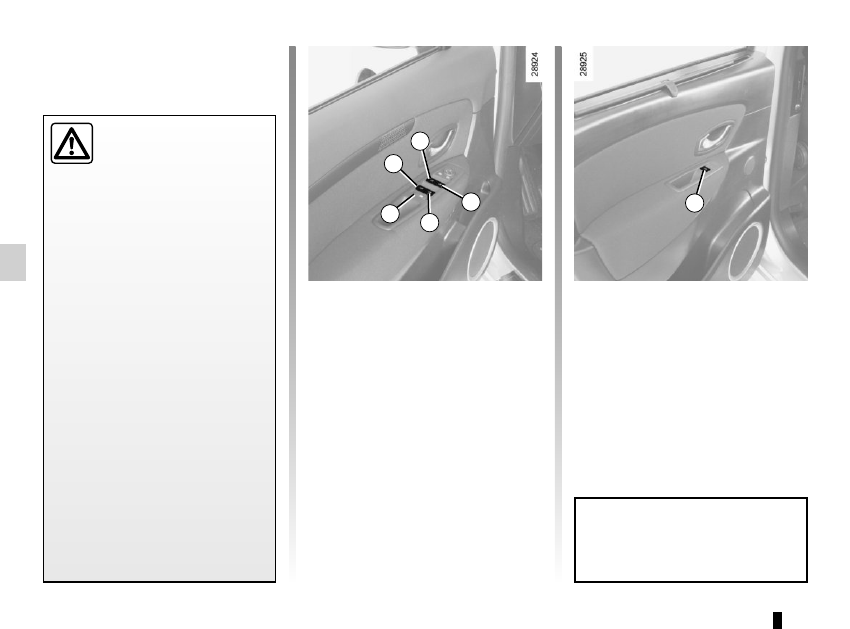
1
2
3
4
5
6
These systems operate with the igni-
tion on or off, until one of the front doors
is opened (limited to about 3 minutes).
From the driver’s seat, use switch:
1 for the driver’s side;
2 for the front passenger’s side;
3 and 5 for the rear passenger win-
dows.
From the passenger seats, use
switch 6.
Note: if the window detects resistance
when closing (e.g.: fingers, branch of
a tree, etc.) it stops and then lowers
again by a few centimetres.
Electric windows
Press or pull the switch to raise or lower
a window to the desired height (the rear
windows do not open fully);
One-touch mode
This mode works in addition to the
operation of the electric windows de-
scribed previously.
Briefly press or pull the window switch
fully: the window is fully lowered or
raised. Pressing the switch again stops
the window moving.
Avoid resting any objects against a
half-open window: there is a risk that
the electric window winder could be
damaged.
Safety of rear occupants
The driver can disable op-
eration of the electric win-
dows and, depending on
the vehicle, the rear doors, by
pressing switch 4. The indicator
light integrated in the switch lights
up to confirm that the locks have
been activated.
Driver’s responsibility
Never leave your vehicle with the
RENAULT card inside and never
leave a child (or a pet) unsuper-
vised, even for a short while. They
may pose a risk to themselves or to
others by starting the engine, acti-
vating equipment such as the elec-
tric windows or by locking the doors.
If any part of the body becomes
trapped, reverse the direction of the
window immediately by pressing the
relevant switch.
Risk of serious injury.