Renault Clio (2017 year). Manual - part 11
3.29
TRANSPORTING OBJECTS: Luggage net
(1/2)
Luggage net A
On equipped vehicles, this can be used
when transporting animals or luggage,
to separate them from the passenger
section.
It can be positioned:
– behind the front seats;
– behind the rear bench seat.
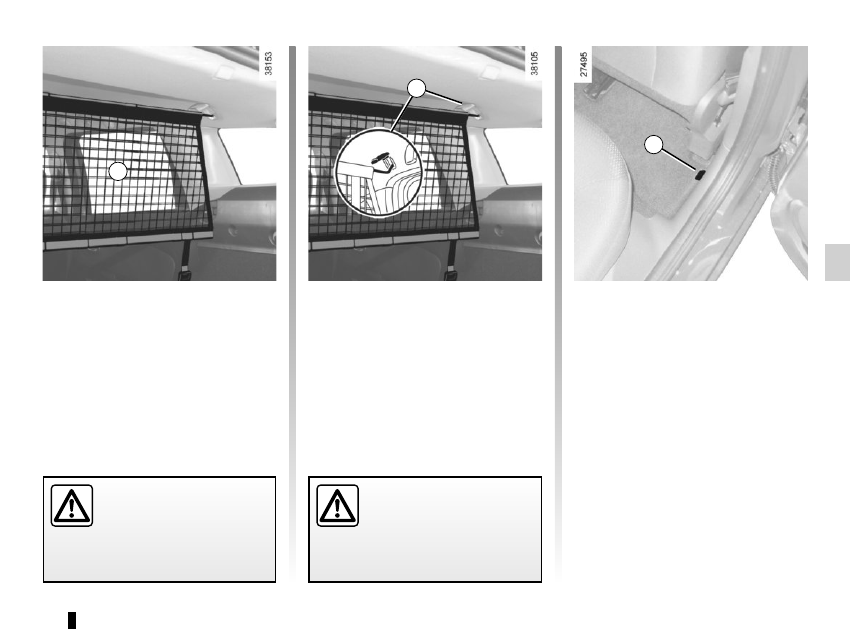
Fitting the luggage net
behind the front seats
Inside the vehicle on each side:
– lift the cover 1 to access the upper
mounting ring of the net;
– fix the net strap hook onto the ring;
– to access the lower net ring 2 the
first time you use it, please contact
an authorised dealer;
– once you have accessed the lower
ring attachment, attach the hook of
the net strap to the ring 2;
– adjust the net strap so that it is taut.
2
The luggage net is de-
signed to retain a maximum
weight of 10 kg.
Risk of injury.
Do not install the luggage
net in this position when a
passenger is occupying a
rear seat
1
A