Dacia Pick-Up 1304/1305/1307. Service manual - part 60


  Index      Dacia     Dacia Pick-Up 1304/1305/1307 (Engine F8Q) - service and repair manual 2004 year


Search            


Content   ..  58  59  60  61   ..


Dacia Pick-Up 1304/1305/1307. Service manual - part 60


MANUAL GEARBOX

21

21 - 46

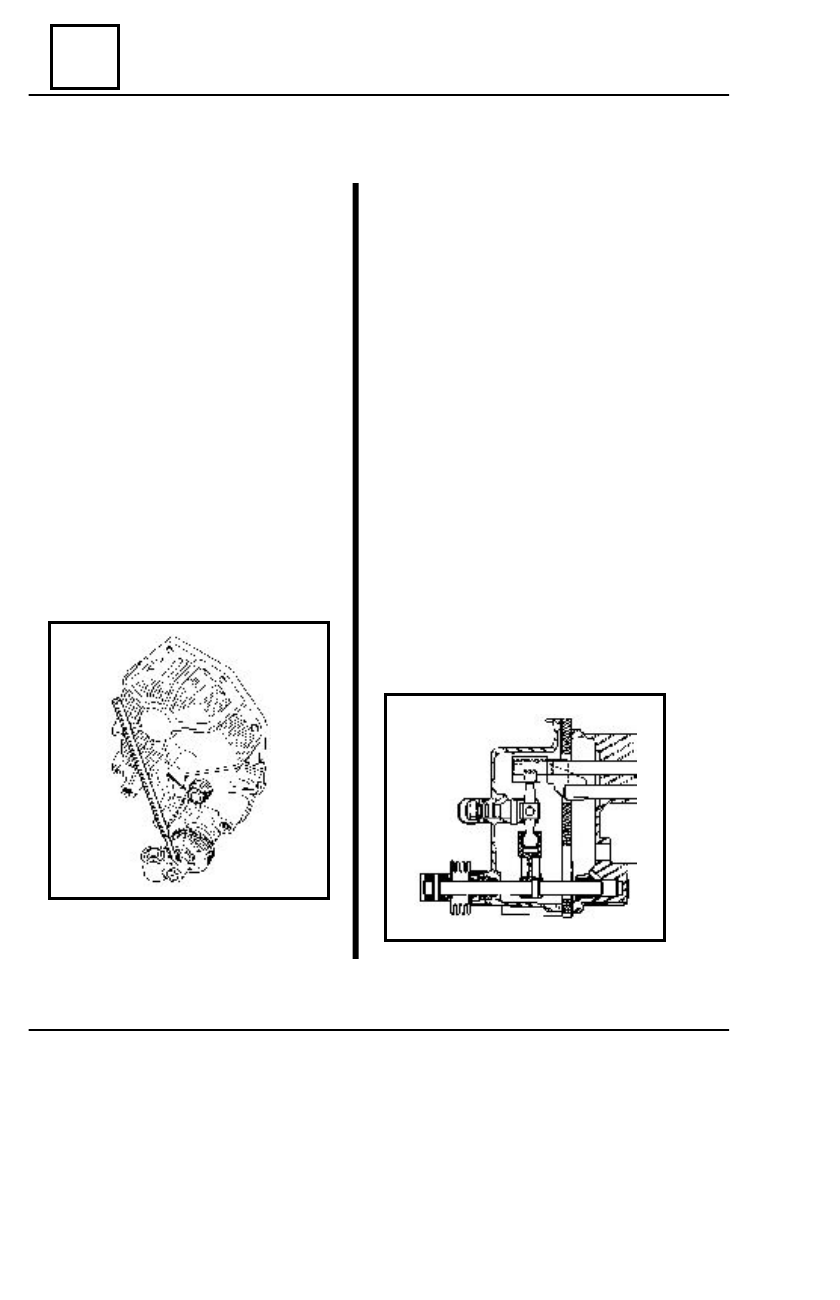
CONTROL  SHAFT ANNULAR OIL SEAL REPLACEMENT

Lift the car on the elevator.
Drain the oil from the gearbox.
Dismount the back crossbar of the

gearbox.

For G.B. 50C and G.B.51 C:

- disengage  the cardan transmission;

   - dismount the flange of secondary

shaft.

Dismount the back cap.
Unscrew the nut from the end of the

rocking lever shaft.

Dismount the elastic pin from the control

shaft end.

Dismount together :

- the control shaft;
- the rocking lever and shaft.

Dismount the worm annular oil seal.

D

ISMO UNTING

R

EMOUNTING

Mount the new annular oil seal,after it was

immersed in  80W90 oil.

Mount together :

- the rocking lever shaft;

    - the control shaft.
Tighten the attachment nut of the rocking le-

ver shaft, at the required couple (4 - 4,5 daNm).

Mount the rubber protection.
Mount on the control shaft :

- the protection bellow;
- the control shaft end;
- the elastic pin.

Mount the back cap with a new lubricated

gasket.

Mount the back crossbar of the gearbox.
Mount the flange of secondary shaft and

connect the cardan transmission  (G.B.50C,G.B.
51C)

Check the velocity steps control mechanism.
Fill up  the gearbox  with 80W90 oil.
Lower the vehicle from the elevator.

(on vehicle )

MANUAL GEARBOX

21

21 - 47


SPEEDOMETER  ENDLESS SCREW PINION REPLACEMENT

D

ISMO UNTING

Lift the car on the elevator
Drain the oil from the gearbox.
Disconnect:

- the speedometer cable;
- the velocity steps control.

 Disconnect the  cardan transmission and

dismount the secondary shaft flange
(G.B.50C;51).

Dismount the back crossbar.
Dismount the back cap.
Dismount the speedometer  endless pinion

from the back cap.

Replace the speedometer endless

(G.B.50C,51C).

Engage velocity step I and draw the hand

brake.

Dismount the speedometer endless screw

by means of the CV 204 wrench.

R

EMOUNTING

Mount the speedometer new endless

screw by means of the wrench  CV 204
and tighten at the required moment
(10-12 daNm) and secure it by straining.
(G.B. 365).

 Mount the new speedometer pinion in

the back cap.

NOTE:

Before mounting, the speedometer

pinion  shall be immersed in  80W/90.

Mount the back cap with a new gasket.

Mount the back crossbar.
Connect:

- the speedometer cable;
- the velocity steps control.

Mount the flange, tighten its nut at the

required moment (10 - 12daNm) and connect
cardan transmission (G.B.50C,51C).

Check the velocity steps control.
Fill up  the gearbox  with 80W90 oil.

(on vehicle )

MANUAL GEARBOX

21

21 - 48

VELOCITY STEP V SYNCHRONIZER  REPLACEMENT

D

ISMO UNTING

Lift the car on the elevator
Drain the oil from the gearbox.
Disconnect :

 - the speedometer cable;
 - the velocity steps control.

Disconnect the cardan transmission and

dismount the flange (G.B. 50C,G.B.51C).

Dismount the back crossbar of the

gearbox.

Dismount the back cap.
Engage the velocity step V and the

reverse driving.

Dismount the primary shaft nut.
Dismount the elastic pin of the velocity

step  V  fork by means of the CV 31  B
mandrel.

Dismount the velocity step V fork

together with the tooth sliding mechanism
and velocity step  V hub.

NOTE:

The velocity step V shaft shall not be

dismounted because the interlocking
ball and the attachment ball may fall;
their mountin g implies complete
dismounting of the
gearbox.

R

EMOUNTING

Place the fork on the gear tooth gear sliding

mechanism;

  Mount the velocity step V  synchronizer

assembly together with the fork, on the primary
shaft.

Mount the fork elastic pin by means of the

31 B mandrel.

Mount the primary shaft nut ant tighten at the

required moment (6 daNm).

Connect :

 - the speedometer cable;
 - the velocity step control.

Mount the flange, tighten at the required

moment (10 - 12daNm) its nut, and connect the
cardan transmission (G.B.50C,G.B.51C).

Check the velocity steps control   mechanism.
 Fill up  the gearbox  with 80W/90 oil.

(on vehicle )

MANUAL GEARBOX

21

21 - 49

 CLUTCH SHAFT ANNULAR OIL SEAL REPLACEMENT

D

ISMO UNTING

Clutch annular oil seal replacement requires gearbox dismounting from the vehicle.
Dismount the gearbox from the vehicle.
Dismount the pressure bearing.
Dismount the clutch casing.
Dismount the annular oil seal clutch shaft.

R

EMOUNTING

NOTE: Before mounting ,the annular oil seal shall be immersed in 80W/90 oil.

Mount the new annular oil seal by means of

the CV 488 device, composed of:
         - a pipe (1) for mounting the annular seal
oil.

 - a pipe (2) for protection of the annular

seal oil.

Clean the assembling surface clutch casing

with the half crankcases and apply a layer of
sealing paste LOCTITE 518.

 Mount the clutch casing ,using the

protector (2) for protection of the annular seal
oil.

Tighten the screws at the required moment:

 M8 : 2-2,8 daNm;
 M10 : 3,2-4 daNm

.

Mount the pressure bearing.
Mount the gearbox on the vehicle.
Adjust the clutch stroke (2,5 - 3,5 mm at the declutching lever end).

(on vehicle )


Content   ..  58  59  60  61   ..