Peugeot 3008 (2017 year). Manual - part 18
6
Driving
271
3008-2_en_Chap06_conduite_ed01-2016
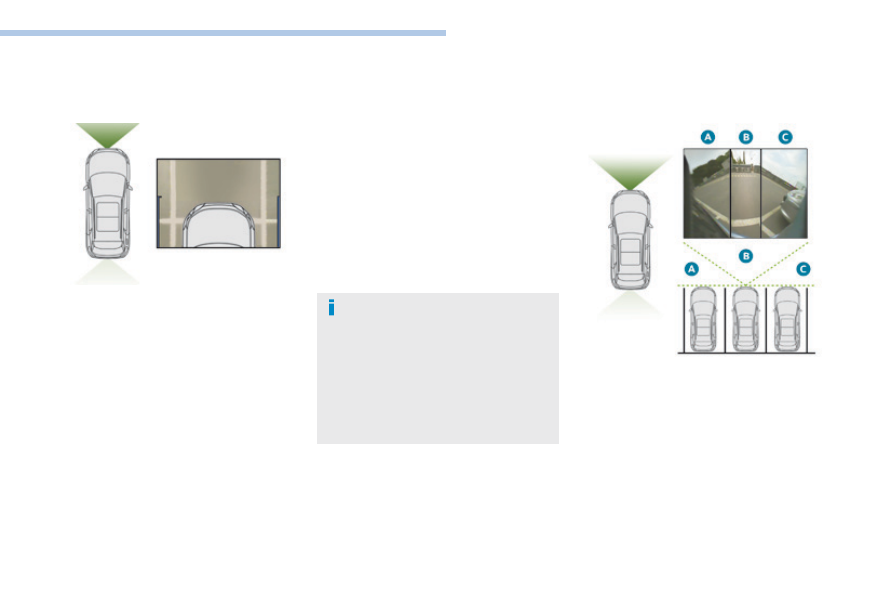
Zoom view
The camera records the vehicle's surroundings
during the manoeuvre in order to reconstruct
a view from above the front of the vehicle in its
near surroundings, allowing the vehicle to be
manoeuvred around obstacles nearby.
This view is available with AUTO mode or in the
view selection menu.
180° view
The 180° view facilitates the exit from of a
parking bay in forward gear, making it possible
to see the approach of vehicles, pedestrians
and cyclists.
This view is not recommended for carrying out
a complete manoeuvre.
It is made up of 3 areas: left A, centre B and
right C.
This view is available only from the view
selection menu.
The rear vision views are similar to those for
the Visiopark 1.
For more information on Visiopark 1, refer to
the corresponding section.
Obstacles may appear further away
than they actually are in reality.
It is important to check the sides of the
vehicle during the manoeuvre, using the
mirrors.
The front and rear parking sensors also
provide information on the vehicle's
surroundings.