Peugeot 307 Break Dag (2007 year). Manual - part 6


  Index      Peugeot     Peugeot 307 Break Dag - service manual 2007 year in english


Search            


Content   ..  4  5  6  7   ..


Peugeot 307 Break Dag (2007 year). Manual - part 6


72

Automatic switching on of the 

lights

Side  lights  and  dipped  beam  head-

lamps  switch  on  automatically  if  the 

light  is  poor,  or  during  operation  of 

the  windscreen  wipers.  They  switch 

off  as  soon  as  the  light  becomes 

bright enough or the windscreen wip-

ers stop.

Note:  in  foggy  weather  or  in  snow, 

the brightness sensor can detect suf-

ficient  light.  As  a  consequence,  the 

lights will not come on automatically.

Deactivation

 Turn  ring 

A  to  a  position  other 

than 

"AUTO". Switching off is ac-

companied by a message on the 

multifunction display.

If  the  brightness  sensor  does  not 

function  correctly,  the  lights  come 

on accompanied by the service warn-

ing light, an audible signal and a mes-

sage on the multifunction display.

Contact a PEUGEOT dealer.

Manual "Follow-me-home" 

lighting

When the automatic switching on of 

the lights function is deactivated, the 

side  lights  and  dipped  headlamps  re-

main on for the duration selected for the 

automatic "follow-me-home" lighting.

If  the  vehicle  is  not  fitted  with  the 

automatic switching on of the lights 

function, when you leave your vehicle, 

the side lights and dipped headlamps 

remain on for thirty seconds.

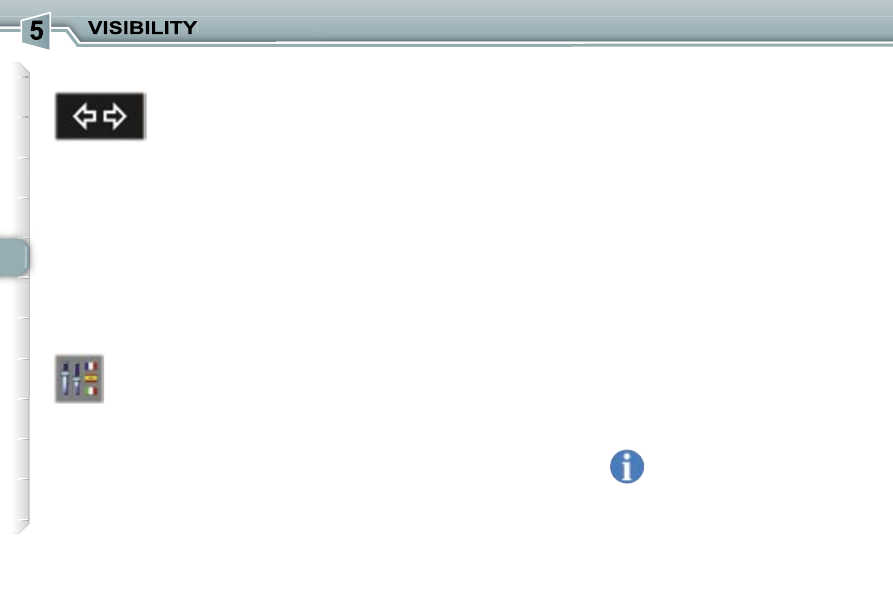
Direction indicators (flashers)

Left: downwards.

Right: upwards.

Note:  if  you  forget  to  cancel  the  di-

rection  indicator,  the  volume  of  the 

audible  signal  will  increase,  if  you 

are  driving  at  a  speed  greater  than 

50 mph (80 km/h).

Automatic "Follow me home" 

lighting

With the ignition off, when you leave 

your  vehicle  with  the 

automatic 

switching on of the lights function 

activated, the side lights and dipped 

headlamps remain on for the select-

ed duration.

Activation:

 switch off the engine,

 "flash" the headlamps,

 get out of the vehicle and lock it.

Deactivation:

 "flash" the headlamps again,

 get out of the vehicle and lock it.

To  deactivate  or  activate 

this function, go to the mul-

tifunction display configura-

tion menu.

The  duration  of  the  timed 

period  must  also  be  set  (15,  30, 

60  seconds),  via  the  multifunction 

display  configuration  menu,  except 

in  the  case  of  the 

monochrome 

screen A for which it is pre-set.

Cancelling:

 "flash" the headlamps,

 get out of the vehicle and lock it.

Activation

 Turn  ring 

A to the "AUTO" posi-

tion. The automatic lighting is ac-

companied by a message on the 

multifunction display.

Do  not  cover  the  brightness 

sensor, coupled with the rain 

sensor, located in the centre 

of  the  windscreen,  behind 

the  interior  mirror.  It  is  used  for  the 

automatic switching on of the lights.

73

For  vehicles  fitted  with  halogen 

bulbs, depending on the load in your 

vehicle,  adjusting  the  beam  of  your 

headlamps is recommended.

0.   1 or 2 people in the front seats.

-.   3 people.

1.  5 people.

2.  5 people + maximum authorised 

loads.

3.  Driver + maximum authorised 

loads.

Initial setting is position 0.

On vehicles with xenon bulbs:

when  stationary,  the  system  auto-

matically  corrects  the  height  of  the 

beam, whatever the load of the vehi-

cle. The driver is then assured of hav-

ing optimum lighting and not causing 

a nuisance to other road users.

In  cases  of  malfunction,

the  service  warning  light 

comes on on the instrument 

panel,  accompanied  by  an 

audible  signal  and  a  mes-

sage  on  the  multifunction  display. 

The  system  places  your  headlamps 

to the low position.

Do not touch the xenon bulbs. Con-

tact a PEUGEOT dealer.

Daytime lights*

On vehicles which are equipped with 

daytime lights, the dipped headlamps 

come on when the vehicle is started.

*  According to country.

The  instruments  and  controls 

(instrument  panel,  multifunc-

tion  display,  air  conditioning 

control panel, ...) are only lit on 

switching to the automatic switching on 

of the lights mode or when the lights are 

switched on manually.

This  warning  light  comes 

on on the instrument panel.

MANUAL ADJUSTMENT OF 

THE HEADLAMPS

AUTOMATIC HEADLAMP 

ADJUSTMENT

74

Special position of the front 

windscreen wiper

In the minute following switching off 

of the ignition, any action on the stalk 

positions the wipers in the centre of 

the windscreen.

This  action  enables  you  to  position 

the  wiper  blades  for  winter  parking, 

cleaning  or  replacement  (See  sec-

tion  "Practical  information  -  Chang-

ing a wiper blade").

To park the wipers after this has been 

done, switch on the ignition and op-

erate the stalk.

Windscreen and headlamp wash

Pull  the  windscreen  wiper  stalk  to-

wards  you.  The  windscreen  wash 

then  the  windscreen  wipers  operate 

for a fixed period.

The  headlamp  wash  is  also  activat-

ed, 

if the headlamps are on.

WINDSCREEN WIPER STALK

2 

Fast wipe (heavy rain).

1 

Normal wipe 

(moderate rain).

I 

Intermittent wipe.

0 

Off.

AUTO  Automatic or single wipe 

(press downwards).

In the 

Intermittent position, the wiping 

speed is in proportion to the speed of 

the vehicle.

In 

AUTO mode, the wiping speed is 

in  proportion  to  the  intensity  of  the 

rainfall.  The  first  press  of  the  stalk 

downwards  activates  the  automatic 

wipe.

Subsequent presses trigger a single 

wipe.

Front windscreen wiper with 

intermittent wipe 

2  Fast wipe (heavy rain).

1  Normal wipe (moderate rain).

l 

Intermittent wipe.

0  Off.

  Single wipe (press downwards).

In the 

Intermittent position, the wiping 

speed  is  in  proportion  to  the  vehicle 

speed.

Front windscreen wiper with 

automatic wipe

75

Automatic windscreen 

wipers 

In 

AUTO mode, the windscreen wip-

ers operate automatically and 

adapt 

their speed to the intensity of the 

rainfall.

Do not cover the rain sensor 

located  on  the  windscreen 

behind the interior mirror.

When using an automatic car 

wash, switch off the ignition.

In winter, it is advisable to wait for the 

windscreen to completely clear of ice 

before operating the automatic wipe.

Activation

Activation  of  the  function  is  accom-

panied  by  a  message  on  the  multi-

function display.

Rear windscreen wiper

To  activate  or  deactivate 

this function, go to the multi-

function  display  configura-

tion menu.

If there is a significant accumulation 

of snow or ice and when using a bi-

cycle carrier on the tailgate (estate), 

deactivate  the  automatic  rear  wiper 

by going to the multifunction display 

configuration menu.

Rear windscreen wash

Deactivation

Deactivation  of  the  function  is  ac-

companied  by  a  message  on  the 

multifunction display.

The function is deactivated when the 

windscreen wipers stalk is moved to 

position

 I1 or 2.

In  the  event  of  malfunction  of  the 

automatic  windscreen  wipers,  the 

windscreen wipers will operate in in-

termittent mode.

Contact a PEUGEOT dealer to have 

the system checked.

Turn  ring 

A  past  the  first 

A

A

notch; the windscreen wash 

then  the  windscreen  wiper 

operate for a fixed period.

Turn ring

 A to the first notch 

for intermittent wiping.

When  reverse  gear  is  en-

gaged,  if  the  windscreen 

wipers are in operation, the 

rear wiper starts.

The automatic windscreen 

wipers  function  must  be 

reactivated  if  the  ignition 

has  been  switched  off  for 

more  than  one  minute,  by  press-

ing the stalk downwards.

76

1.  Front courtesy light

2.  Map reading lights

Permanently off.

Permanently on.

It switches off gradually:

-  when the vehicle is locked,

-  when the ignition is switched on,

-  with  the  ignition  off,  30  seconds

after the last door is closed.

In this position, the courtesy 

light  comes  on  automati-

cally:

-  when the vehicle is unlocked,

-  when the key is removed from the 

ignition,

-  when a door is opened,

-  when  the  vehicle  location  function 

is used.

Different lighting times are available:

-  with the ignition off or on, approxi-

mately 10 minutes,

-  in  economy  mode,  approximately 

30 seconds,

-  when the engine is running, no limit.

With  the  ignition  on,  press 

the corresponding switch.

COURTESY LIGHTS

77

3.  Rear courtesy light

Note: on the saloon, the front cour-

tesy  light  (in  the  "permanently  on" 

position)  forces  the  switching  on  of 

the rear courtesy light if the switch is 

in the central position.

To switch off the rear courtesy light, 

place the switch in the "permanently 

off" position.

In this position, the courtesy 

light  comes  on  automati-

cally:

-  when the vehicle is unlocked,

-  when the key is removed from the 

ignition,

-  when a door is opened,

-  when  the  vehicle  location  function 

is used.

Permanently off.

Permanently  on  when  the 

ignition  is  on  (function  not 

available in economy mode).

It switches off gradually:

-  when the vehicle is locked,

-  when the ignition is switched on,

-  with the ignition off, 30 seconds af-

ter the last door is closed.

4.  Rear reading lights (estate)

The reading light comes on:

-  when the vehicle is unlocked,

-  when the key is removed from the 

ignition,

-  when a door is opened,

-  when  the  vehicle  location  function 

is used.

It switches off gradually:

-  when the vehicle is locked,

-  when the ignition is switched on,

-  with the ignition off, 30 seconds af-

ter the last door is closed.

With the ignition on (function not avail-

able  in  economy  mode),  press  the 

switch to obtain permanent lighting.

Press the switch again to switch the 

reading light off.

78

With  the  ignition  on,  the  mirror  is 

automatically  lit  up  when  the  flap  is 

opened.

The front courtesy light and a spec-

tacles  holder  are  fitted  in  the  roof 

console.

To  open  or  close  the  spectacles 

holder,  press  the  recess  in  the 

cover.

The  athermic  windscreen  has  two 

non-reflective  zones  located  either 

side of the base of the interior mirror.

They  are  intended  for  affixing  toll 

cards and/or car park tickets. 

SUN VISOR WITH ILLUMINATED 

COURTESY MIRROR

THE ROOF CONSOLE

AREAS FOR TOLL CARDS/

CAR PARK TICKETS

79

INTERIOR LAYOUT

2.  Front ashtray

Pull the lid to open the ashtray.

To empty it after opening, press the 

tab and remove the ashtray.

3.  Storage

4.  12 volt socket (100 W max)

This  is  a  lighter  type  socket,  fitted 

with a cap. It is supplied with current 

from the running position.

5.  Door tray

6.  Storage/Can holder

7.  Coin storage

8.  Waste container

To empty this, open it fully (past the 

point  of  resistance)  then  pull  on  the 

receptacle to remove it.

To refit, lock it in place on the cover.

It  contains  three  sockets* 

B  for 

connecting video equipment.

The layout allows storage of a water 

bottle, a pen, the vehicle handbook, 

a pair of spectacles, tokens, etc.

*  With colour screen only. 

1.  Glove box with cooling facility

This is fitted with a lock.

To open the glove box, lift the handle.

The glove box lights when the lid is 

opened.

It  has  a  ventilation  nozzle  that  can 

be  closed 

A,  distributing  the  same 

cooled  air  as  the  vents  of  the  pas-

senger compartment.

80

When fitting the mat for the first time, 

use  only  the  fixings  supplied  in  the 

wallet attached.

When removing the mat on the driver’s 

side:

-  push  the  seat  as  far  back  as 

possible,

-  unscrew the fixings fully,

-  remove the fixings, then the mat.

FITTING/REMOVING THE MAT

When  refitting,  position  the 

mat correctly and replace the 

fixings by pressing them in.

Ensure  that  the  mat  is  secured  cor-

rectly.

To  prevent  the  mat  from  becoming 

caught under the pedals:

-  only  use  mats  which  are  suited  to 

the  fixings  already  present  in  the 

vehicle.  It  is  imperative  that  these 

fixings are used.

-  never fit one mat on top of another.

 

Lower  the  armrest  to  access  the 

storage shelf on the seat back.

 

Lift  the  lid.  It  contains  a  storage 

tray  as  well  as  two  can  holders 

and two pen holders.

REAR ARMREST

(SALOON AND ESTATE)

81

For further details, refer to the 

operating manuals "Video kit 

operation"  and  "VMA8582 

7 inch LCD colour monitor".

ENTERTAINMENT SCREEN 

KIT

This  video  assembly  will  enable  the 

rear  passengers  to  pass  the  time 

pleasantly  while  watching  their  fa-

vourite film or playing their favourite 

game, by means, in particular, of the 

connection of a DVD player or games 

console to the central support, fitted 

between the front seats.

The  entertainment  screen  kit  con-

sists of:

-  a  16/9ths,  7  inch,  LCD  colour 

monitor with direction adjustment in 

the three axes,

-  two high frequency, wireless, stereo

headphones,

-  a removable support,

-  three  audio/video  sockets  on  the 

fixed  base  and  in  the  glove  com-

partment.

The monitor and the support can be 

removed  and  stored,  each  in  their 

own protective cover.

The entertainment screen kit accepts 

all types of audio/video source, PAL/

NTSC  compatible,  such  as:  DVD 

player, camcorder, games console, ...

These sources are connected to the 

three audio/video sockets, 

AV1 in the 

glove  compartment  or 

AV2  on  the 

fixed base.

82

83

1.  Rear parcel shelf

To remove the shelf:

-  unhook the two strings,

-  slightly raise the shelf, then remove it.

The shelf can be stored:

-  either behind the front seats,

-  or behind the rear seat.

2.  Hooks

3.  Stowing rings

4.  Luggage retaining net

Hooked  onto  the  stowing  rings,  this 

enables your luggage to be secured.

5.  Open storage trays

6.  12 volt socket (100 W max)

This is a lighter type socket, installed 

on  the  left-hand  side  of  the  parcel 

shelf.

It  is  supplied  from  the  "Running" 

position.

BOOT LAYOUT (SALOON)

84

85

BOOT LAYOUT (ESTATE)

4.  Boot floor and pillar stowing 

rings

5.  Rear seat stowing rings

6.  Luggage retaining net

Secure the net hooks in the stowing 

rings  on  the  floor  or  on  the  folded 

rear  seat  (two  horizontal  positions) 

or secure the net hooks in the stow-

ing rings on the boot pillars and in the 

floor rings at the rear of the boot (one 

vertical position).

7.  12 volt socket (100 W max)

This is a lighter type socket, installed 

on the load space cover left support.

It  is  supplied  from  the  "Running" 

position.

8.  High load retaining net fixings

The  high  load  retaining  net  can  be 

installed  behind  the  front  or  rear 

seats.

Open the covers of the corresponding 

upper fixings.

Fit the ends of the metal bar in these 

fixings.

To install the high load retaining net:

-  behind the front seats, lift the rear 

seat  cushion,  hook  the  net  straps 

on  the  fixings  then  fold  the  rear 

seat;

-  behind the rear seat, hook the net 

straps  in  the  stowing  rings  on  the 

floor.

The rings are located directly below 

the corresponding upper fixings.

Pull the two straps taut.

9.  Grab handles and coat hooks

1.  Load space cover

To install it:

-  position the front ends of the cover 

on  its  support  and  press  gently  to 

put it in place,

-  unfold the cover fully,

-  position the rear ends of the cover 

on  its  support  and  press  gently  to 

put it in place.

To remove it:

-  unclip the rear ends,

-  fold the cover fully,

-  unclip  the  front  ends  and  remove 

the cover.

To  store  it,  slide  it  under  the  rear 

seats (location 

A).

2.  Floor storage trays (2/3 - 1/3)

3.  Storage nets

One  of  them  contains  the  luggage 

retaining net.

86

Press the button, the direction indica-

tors flash.

They  can  operate  with  the  ignition 

off.

Press  one  of  the  spokes  of  the 

steering wheel.

Automatic lighting of hazard 

warning lights*

When  braking  in  an  emergency, 

depending  on  the  deceleration,  the 

hazard warning lights come on auto-

matically.  They  switch  off  automati-

cally the first time you accelerate.

It is also possible to switch them off 

by pressing the button.

* According to country.

HORN

HAZARD WARNING LIGHTS


Content   ..  4  5  6  7   ..