Nissan Versa Sedan. Instruction - part 514
INL-52
< REMOVAL AND INSTALLATION >
INTERIOR ROOM LAMP
INTERIOR ROOM LAMP
Removal and Installation
INFOID:0000000009269262
ROOM LAMP
WARNING:
Do not touch bulb with your hand while it is on or right after being turned off. Burning may result.
CAUTION:
Do not touch the glass surface of the bulb with bare hands or allow oil or grease to get on it to prevent
damage to the bulb.
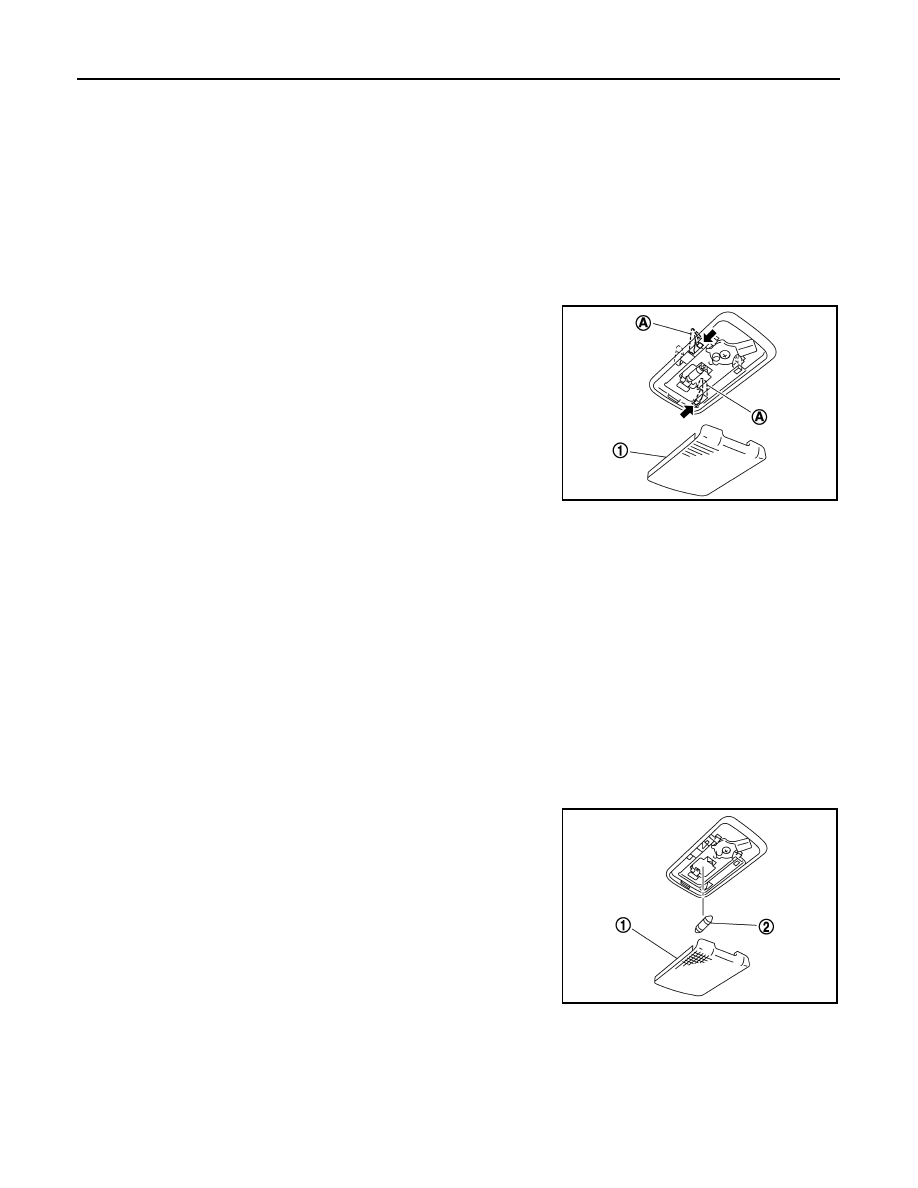
REMOVAL
1. Remove lens (1) and remove the room lamp by pulling down to
release the room lamp metal clips (A).
2. Disconnect the harness connector from the room lamp and
remove.
INSTALLATION
Installation is in the reverse order of removal.
Bulb Replacement
INFOID:0000000009269263
ROOM LAMP
WARNING:
Do not touch bulb with your hand while it is on or right after being turned off. Burning may result.
CAUTION:
• Do not touch the glass surface of the bulb with bare hands or allow oil or grease to get on it to pre-
vent damage to the bulb.
• Leaving the bulb removed from housing for a long period of time can deteriorate performance of the
lens and reflector (causing dirt or clouding). Always prepare a new bulb and have it on hand when
replacing the bulb.
Removal
1. Remove lens (1) by inserting suitable tool and releasing LH
(switch side first).
2. Remove bulb (2).
Installation
Installation is in the reverse order of removal.
NOTE:
Insert the lens hook end RH side first to install lens.
PKIC1049E
PKIC1048E