Nissan Versa Sedan. Instruction - part 474
FRONT REGULATOR
GW-23
< REMOVAL AND INSTALLATION >
C
D
E
F
G
H
I
J
L
M
A
B
GW
N
O
P
FRONT REGULATOR
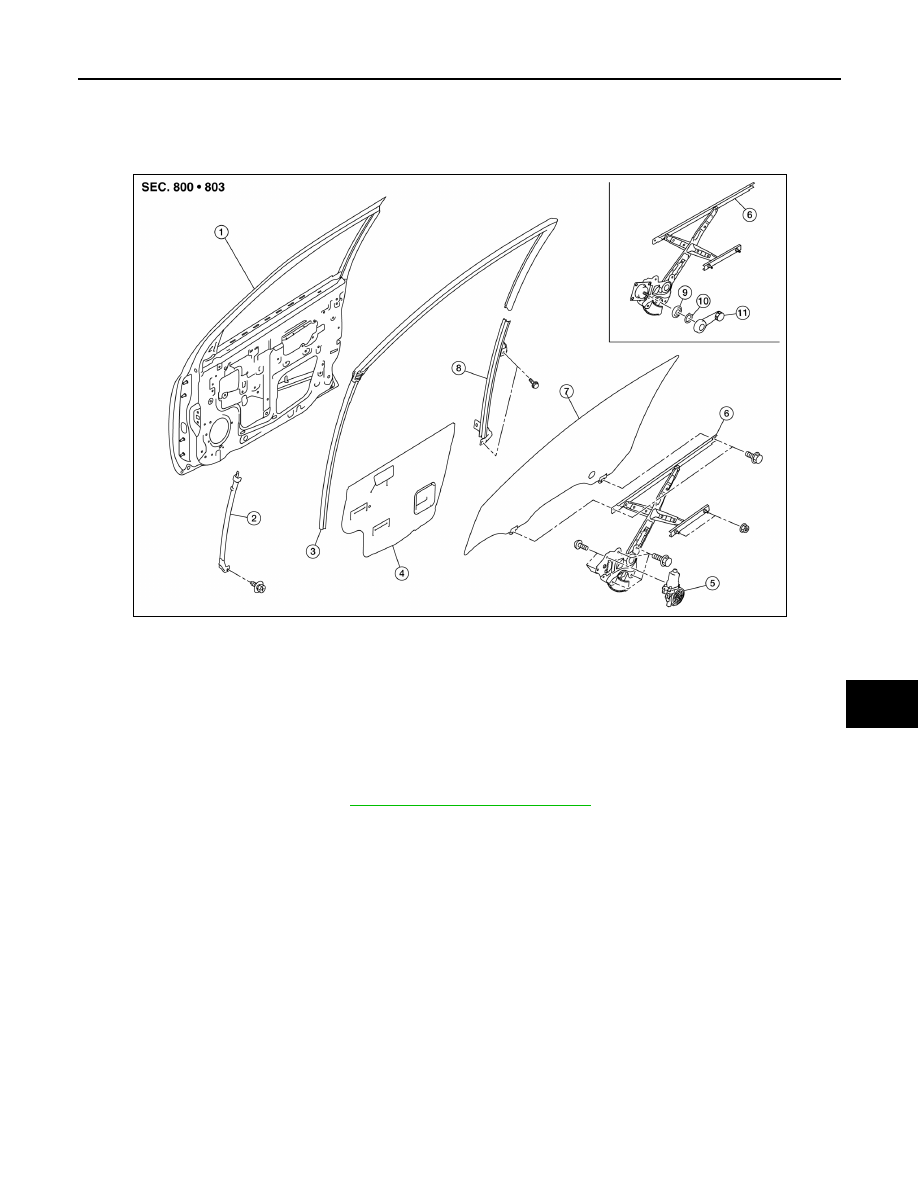
Exploded View
INFOID:0000000009267758
Removal and Installation
INFOID:0000000009267759
REMOVAL
1. Remove front door glass. Refer to
GW-21, "Removal and Installation"
2. Disconnect the harness connector from front door power window motor.
3. Remove front door regulator assembly bolts and nuts.
4. Remove front door regulator assembly from front door panel.
INSTALLATION
Installation is in the reverse order of removal.
Disassembly and Assembly
INFOID:0000000009267760
DISASSEMBLY
Remove the power window motor from the regulator assembly.
INSPECTION AFTER REMOVAL
Check the regulator assembly for the following items. Replace or grease it if a malfunction is detected.
1.
Front door panel
2.
Front door lower sash (front)
3.
Front door glass run
4.
Front door sealing screen
5.
Front door power window motor
6.
Front door regulator
7.
Front door glass
8.
Front door lower sash (rear)
9.
Regulator seal (instruction window)
10. Snap pin (instruction window)
11. Regulator handle (instruction window)
AWKIA1881ZZ