Mazda B-Series (2010 year). Manual - part 13
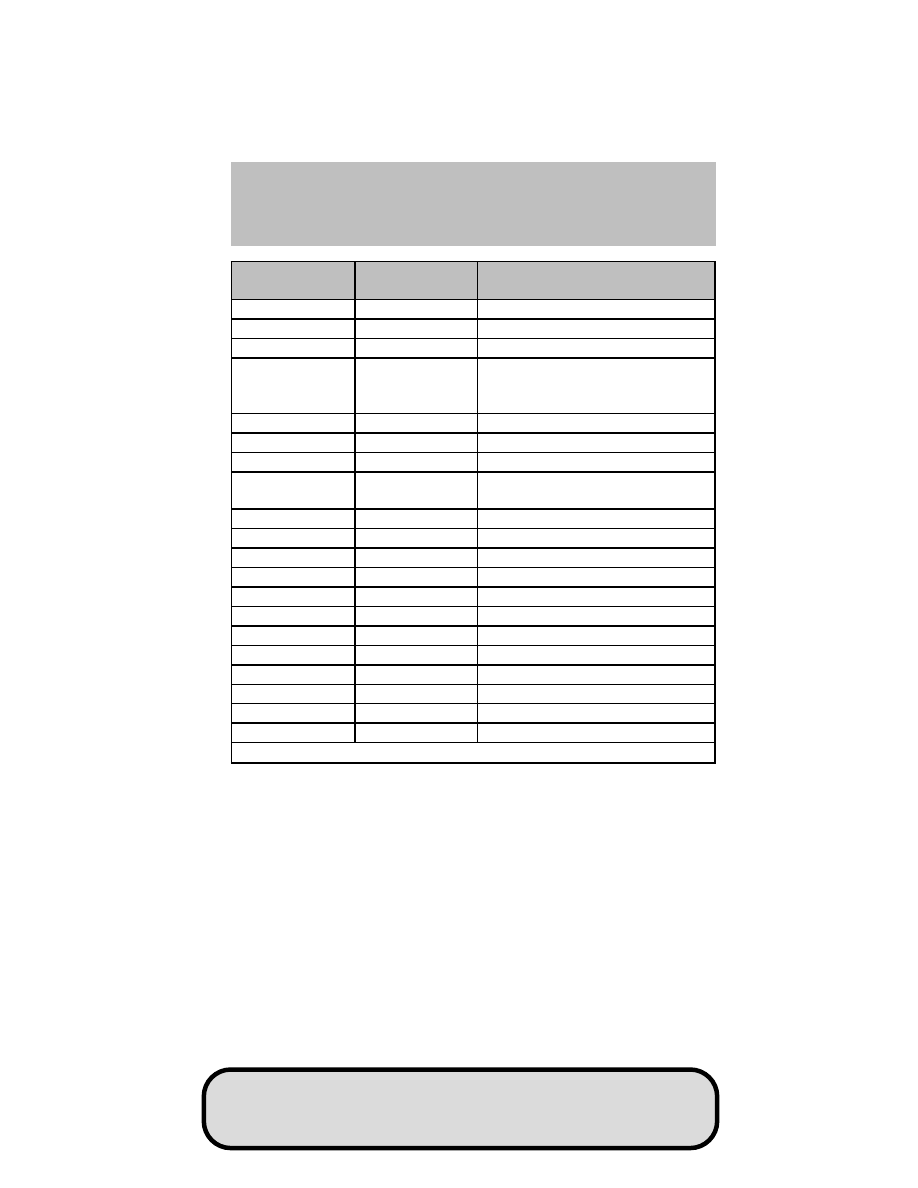
Fuse/Relay
Location
Fuse Amp
Rating
Power Distribution Box
Description
40
—
Not used
41
10A*
Automatic transmission
42
7.5A*
Trailer tow (left turn)
43
20A*
Engine fan relay coil, A/C relay,
Engine sensors, Vapor
management valve solenoid
44
15A*
Ignition coil, Capacitor
45A
—
Not used
45B
—
Not used
46A
—
Fuel pump relay, Fuel injectors
relay
46B
—
Not used
47
—
Engine fan relay
48
—
Starter relay
49
—
Not used
50
—
Not used
51
—
Not used
52
—
Not used
53
—
Not used
54
—
PCM relay
55
—
Blower relay
56A
—
A/C clutch solenoid relay
56B
—
Not used
* Mini Fuses ** Maxi Fuses
Roadside Emergencies
202
REVIEW COPY ——
2010 B-Series (mbs), Owners Guide (own2002), 1st Printing, Market:
Canadian_French (fr_can)