Mazda B4000 Truck (2007 year). Manual - part 12
2.3L engine (if equipped)
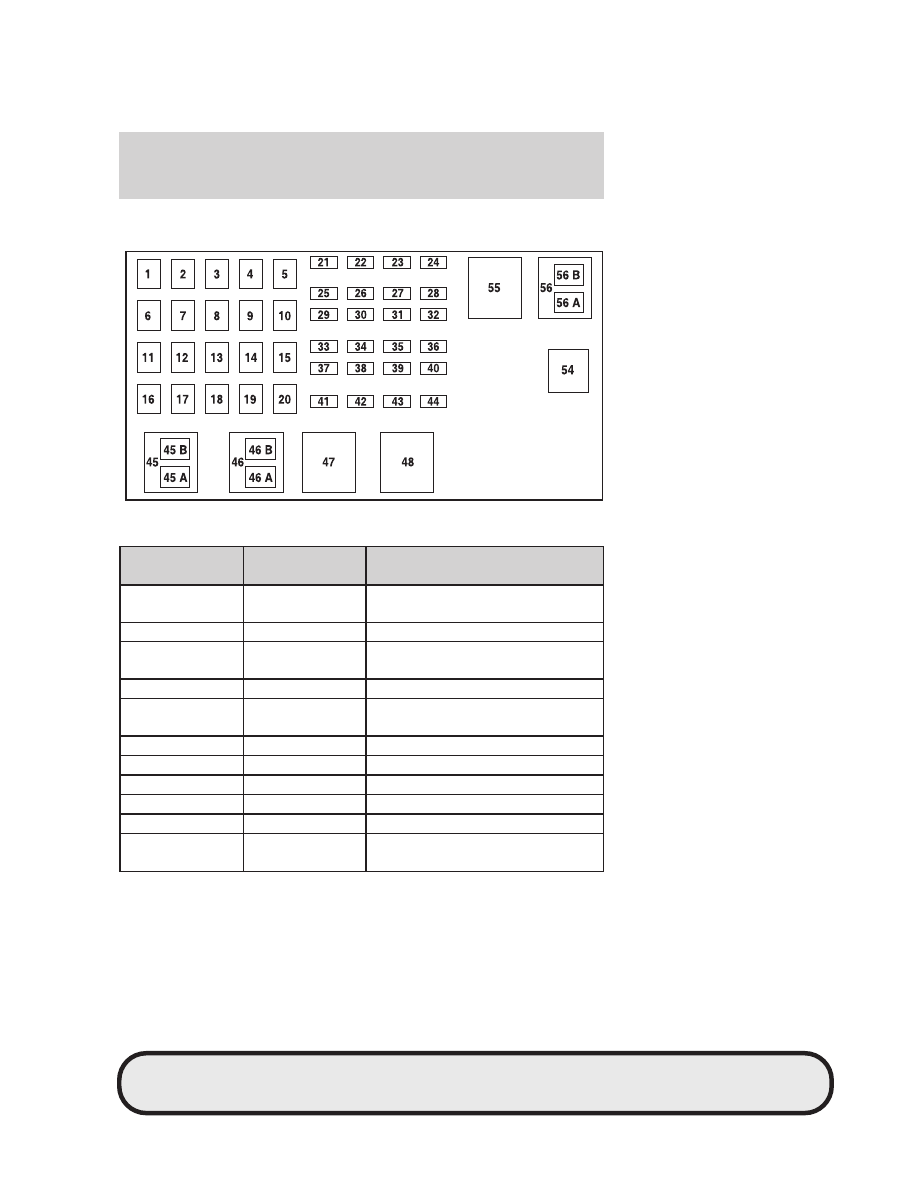
The high-current fuses are coded as follows:
Fuse/Relay
Location
Fuse Amp
Rating
Power Distribution Box
Description
1
40A**
Passenger compartment fuse
panel
2
—
Not used
3
40A**
Passenger compartment fuse
panel
4
—
Not used
5
50A**
Passenger compartment fuse
panel
6
—
Not used
7
40A**
Starter solenoid
8
—
Not used
9
40A**
Ignition switch
10
—
Not used
11
30A**
Powertrain Control Module (PCM)
relay
CIMS #708397
com_power-box-mbs.23l
itdseq=220
art=raner512_b
REVIEW COPY ——
2007 B-Series (mbs), Owners Guide (post-2002-fmt) (own2002), Market: USA (fus)
PAGE: 181 OP: root EDIT SESSION: 1 DATE: AUG 3 2006 at 11:45 JOB: @ibm2/ford_pdm/CLS_ford/GRP_own2002/JOB_mbs/DIV_og
Roadside Emergencies
181