Isuzu N-Series. Service manual - part 139
3C-4 FRONT SUSPENSION
ON-VEHICLE SERVICIE
Front Suspension (Rigid Suspension)
Leaf Spring
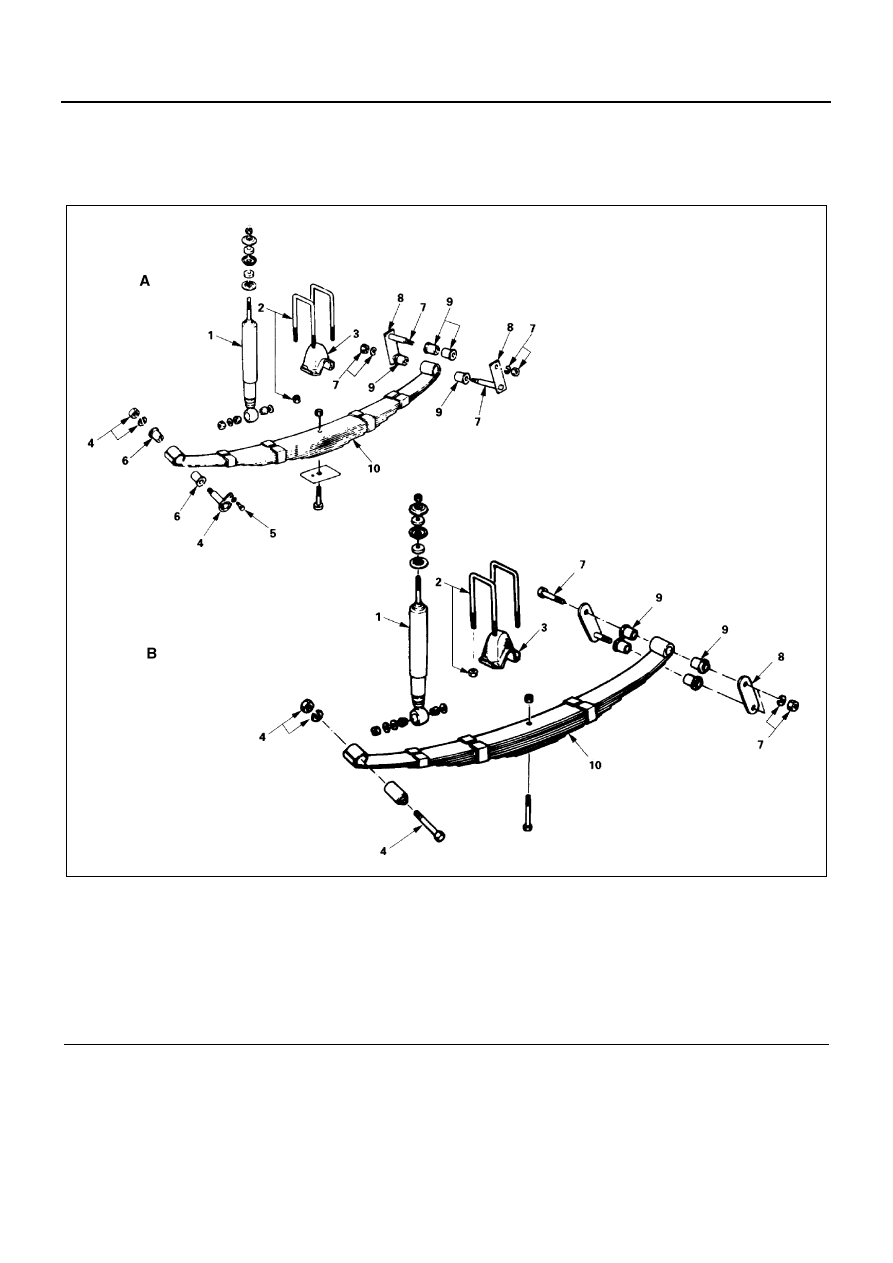
Legend
A. NHR and NKR
5. Bolt
B. NPR, NQR and NPS
6. Rubber bushing
1. Shock absorber
7. Shackle pin, nut and washer
2. U-bolt and nut
8. Shackle
3. Helper rubber
9. Rubber bushing
4. Spring pin, nut and washer
10. Leaf spring
N3A0446E