Honda Accord Coupe L4 (2011 year). Manual - part 23
Fluid Locations
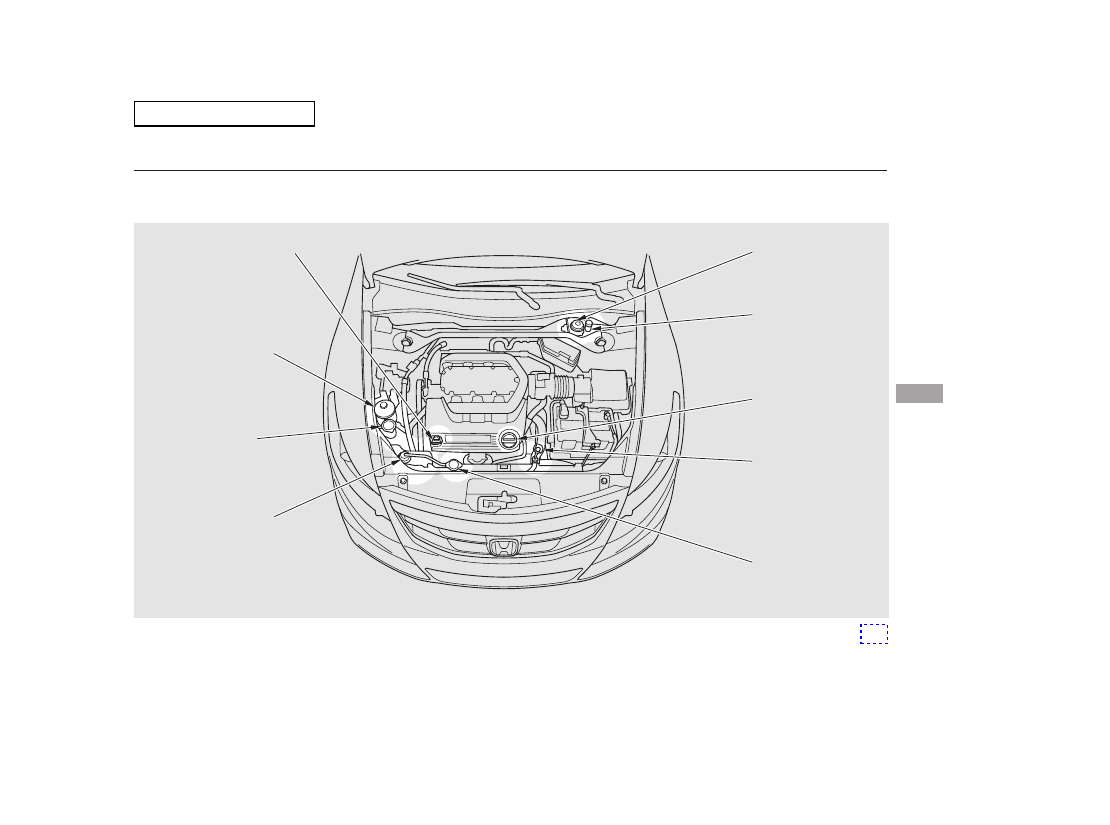
V6 models
Ma
int
e
na
nce
ENGINE COOLANT
RESERVOIR
RADIATOR CAP
ENGINE OIL DIPSTICK
(Orange loop)
WASHER FLUID
(Blue cap)
BRAKE FLUID
(Black cap)
CLUTCH FLUID
(Manual
Transmission only)
(Light gray cap)
ENGINE OIL FILL CAP
AUTOMATIC
TRANSMISSION
FLUID DIPSTICK
(Yellow loop)
POWER STEERING
FLUID
(Red cap)
Main Menu