Ford Mondeo (petrol engines). Manual - part 73
General
1 A routine preventive maintenance
programme for the battery in your vehicle is
the only way to ensure quick and reliable
starts. Before performing any battery
maintenance, make sure that you have the
proper equipment necessary to work safely
around the battery (see illustration).
2 There are also several precautions that
should be taken whenever battery
maintenance is performed. Before servicing
the battery, always turn the engine and all
accessories off, and disconnect the lead from
the negative terminal of the battery - see
Chapter 5, Section 1.
3 The battery produces hydrogen gas, which
is both flammable and explosive. Never create
a spark, smoke, or light a match around the
battery. Always charge the battery in a well-
ventilated area.
4 Electrolyte contains poisonous and
corrosive sulphuric acid. Do not allow it to get
in your eyes, on your skin, or on your clothes.
Never ingest it. Wear protective safety glasses
when working near the battery. Keep children
away from the battery.
5 Note the external condition of the battery. If
the positive terminal and lead clamp on your
vehicle’s battery is equipped with a plastic
cover or rubber protector, make sure that it’s
not torn or damaged. It should completely
cover the terminal. Look for any corroded or
loose connections, cracks in the case or
cover, or loose hold-down clamps. Also check
the entire length of each lead for cracks and
frayed conductors.
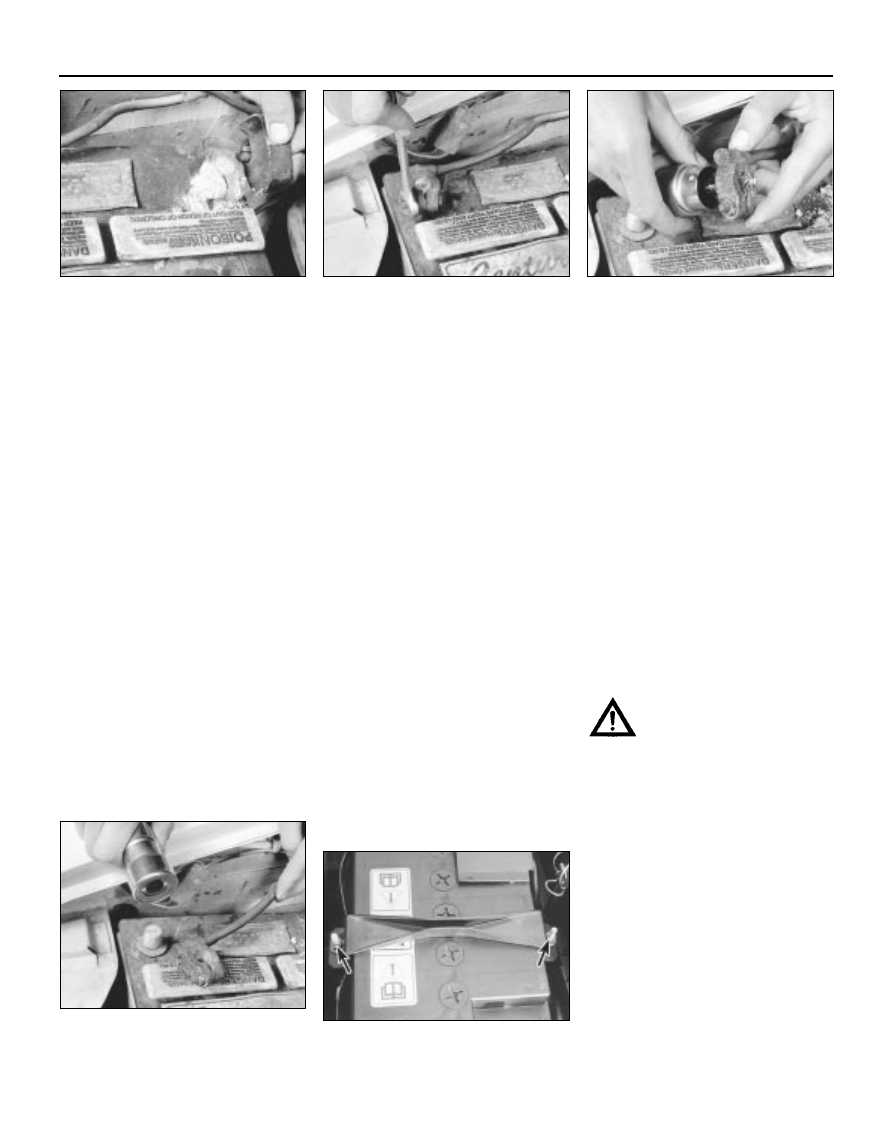
6 If corrosion, which looks like white, fluffy
deposits (see illustration)
is evident,
particularly around the terminals, the battery
should be removed for cleaning. Slacken the
lead clamp nuts with a spanner, being careful
to remove the negative (earth) lead first, and
slide them off the terminals (see illustration).
Then unscrew the hold-down clamp nuts,
remove the clamp, and lift the battery from the
engine compartment.
7 Clean the lead clamps thoroughly, using a
soft wire brush or a terminal cleaner, with a
solution of warm water and baking soda.
Wash the terminals and the top of the battery
case with the same solution, but make sure
that the solution doesn’t get into the battery.
When cleaning the leads, terminals and
battery top, wear safety goggles and rubber
gloves, to prevent any solution from coming in
contact with your eyes or hands. Wear old
clothes too - even when diluted, sulphuric
acid splashed onto clothes will burn holes in
them. If the terminals have been extensively
corroded, clean them up with a terminal
cleaner (see illustrations). Thoroughly wash
all cleaned areas with plain water.
8 Make sure that the battery tray is in good
condition and the hold-down clamp nuts are
tight (see illustration). If the battery is
removed from the tray, make sure no parts
remain in the bottom of the tray when the
battery is refitted. When refitting the
hold-down clamp nuts, do not overtighten
them.
9 Information on removing and installing the
battery can be found in Chapter 5. Information
on jump starting can be found at the front of
this manual. For more detailed battery
checking procedures, refer to the Haynes
Automobile Electrical and Electronic Systems
Manual.
Cleaning
10 Corrosion on the hold-down components,
battery case and surrounding areas can be
removed with a solution of water and baking
soda. Thoroughly rinse all cleaned areas with
plain water.
11 Any metal parts of the vehicle damaged
by corrosion should be covered with a
zinc-based primer, then painted.
Charging
Warning: When batteries are
being charged, hydrogen gas,
which is very explosive and
flammable, is produced. Do not
smoke, or allow open flames, near a
charging or a recently-charged battery.
Wear eye protection when near the battery
during charging. Also, make sure the
charger is unplugged before connecting or
disconnecting the battery from the
charger.
12 Slow-rate charging is the best way to
restore a battery that’s discharged to the
point where it will not start the engine. It’s also
a good way to maintain the battery charge in a
vehicle that’s only driven a few miles between
starts. Maintaining the battery charge is
particularly important in winter, when the
battery must work harder to start the engine,
and electrical accessories that drain the
battery are in greater use.
13 It’s best to use a one- or two-amp battery
charger (sometimes called a “trickle” charger).
They are the safest, and put the least strain on
the battery. They are also the least expensive.
For a faster charge, you can use a higher-
1•12
9.6A Battery terminal corrosion usually
appears as light, fluffy powder
9.6B Removing a lead from the battery
terminal - always remove the earth lead
first, and connect it last!
9.7A When cleaning the lead clamps, all
corrosion must be removed - the inside of
the clamp is tapered to match the terminal,
so don’t remove too much material
9.7B Regardless of the method used to
clean the terminals, a clean, shiny surface
should result
9.8 Make sure the battery hold-down nuts
(arrowed) are tight
Every 10 000 miles