Seat Alhambra. Instruction - part 13


  Index      Seat     Seat Alhambra. Instruction


Search            copyright infringement  


Content      ..     11      12      13      14     ..


Seat Alhambra. Instruction - part 13


-------------------------------------------------------------------------------------------------------------------------------------------------------------
Driving

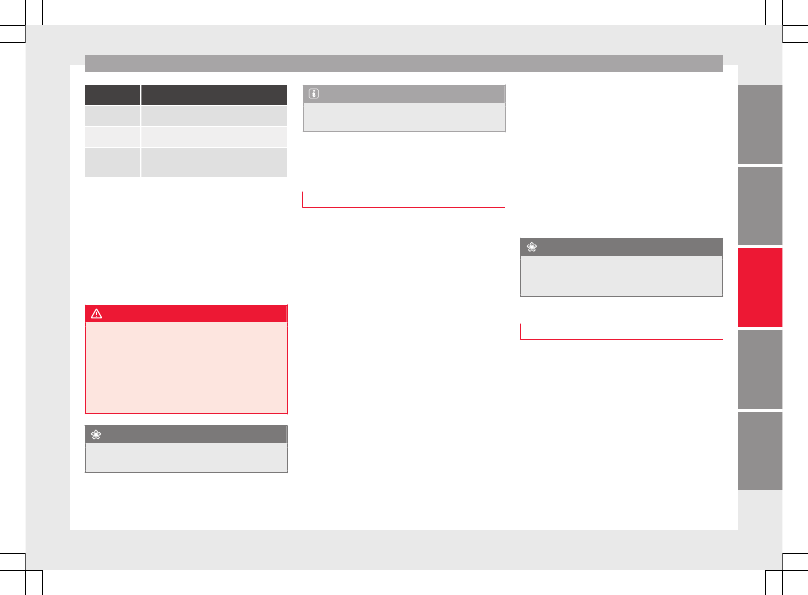
Display

Meaning

Optimum gear.

Recommendation to change up a gear.

Recommendation to change down a
gear.

Information for “cleaning” the diesel partic-
ulate filter
The exhaust gas system control recognises
when the diesel particulate filter is blocked,
and helps to clean it by recommending a spe-
cific gear for driving. It may therefore be nec-
essary to drive with the engine at an excep-
tionally high speed 

››› 

page 200

.

WARNING

The recommended gear display is intended as
a guideline only; it should never replace the
driver's attention to driving carefully.

Responsibility for selecting the correct gear

for each situation continues to lie with the
driver, for example when overtaking, climb-
ing a hill or towing a trailer.

For the sake of the environment

Selecting the most appropriate gear for the
situation will help you to save fuel.

Note

The recommended gear display is switched
off when the clutch pedal is pressed.

Run-in and economical driving

Running in

Please observe the instructions for running-in
new components.

Running-in the engine
The engine needs to be run-in over the first
1500 km (1000 miles). During its first few
hours of running, the internal friction in the
engine is greater than later on when all the
moving parts have bedded down.

How the vehicle is driven for the first
1500 km (1000 miles) influences the future
engine performance. Throughout the life of
the vehicle, it should be driven at a moderate
speed – especially when the engine is cold –
this will reduce engine wear and increase its
useful life. Never drive at extremely low en-
gine speeds. Always engage a lower gear
when the engine works “irregularly”. 

For the

first 1000 km or 600 miles, please note:

Do not use full throttle.

Do not force the engine above two thirds of

its maximum speed.

Do not tow a trailer.

Between 1000 and 1500 kilometres (600 to
1000 miles)
gradually increase power until
reaching the maximum speed and high en-
gine speeds.

Running in new tyres and brake pads

Replacement of wheel rims and new tyres

››› 

page 284

Notes on the brakes 

››› 

page 190

For the sake of the environment

If the engine is run in gently, the life of the
engine will be increased and the engine oil
consumption reduced.

Environmental compatibility

Environmental protection is a top priority in
the design, choice of materials and manufac-
ture of your new SEAT.

Constructive measures to encourage recy-
cling

Joints and connections designed for easy

dismantling

Modular construction to facilitate disman-

tling

Increased use of single-grade materials.

»

197

Tec

hnic

al

 d

at

a

Adv

ic

e

Oper

ation

Emer

genc

ie

s

Saf

ety

-------------------------------------------------------------------------------------------------------------------------------------------------------------

-------------------------------------------------------------------------------------------------------------------------------------------------------------

Operation

Plastic parts and elastomers are marked in

accordance with ISO 1043, ISO 11469 and
ISO 1629.

Choice of materials

Use of recycled materials.

Use of compatible plastics in the same part

if its components are not easily separated.

Use of recycled materials and/or materials

originating from renewable sources.

Reduction of volatile components, includ-

ing odour, in plastic materials.

Use of CFC-free coolants.

Ban on heavy metals, with the exceptions
dictated by law (Annex II of ELV Directive
2000/53/EC):
 cadmium, lead, mercury, hexa-
valent chromium.

Manufacturing methods

Reduction of the quantity of thinner in the

protective wax for cavities.

Use of plastic film as protection during ve-

hicle transport.

Use of solvent-free adhesives.

Use of CFC-free coolants in cooling sys-

tems.

Recycling and energy recovery from resi-

dues (RDF).

Improvement in the quality of waste water.

Use of systems for the recovery of residual

heat (thermal recovery, enthalpy wheels,
etc.).

The use of water-soluble paints.

Economical and environmentally
friendly driving

Fuel consumption, environmental impact and
engine, brake and tyre wear depend largely
on three factors:

Personal driving style.

Conditions of use (weather, road surface).

Technical requirements.

Savings of up to 25% in fuel consumption
are possible with an appropriate driving style
and the adoption of certain simple tips.

Changing gear early
General instructions: The highest gear is al-
ways the most economical. As a guideline,
for the majority of vehicles: at a speed of
30 km/h (19 mph), drive in third gear, at
40 km/h (25 mph) in fourth gear and at
50 km/h (31 mph) in fifth gear.

In addition, “skipping” gears when shifting
up helps to save fuel, weather and traffic
conditions permitting.

Do not wait until the last moment before
changing gear. Only use first gear when you
move off and change to second gear quickly.
Avoid the kick-down function in vehicles with
automatic gearbox.

Vehicles with a gear display help to achieve
an economical driving style as the display in-
dicates the best moment to change gear.

Let the vehicle roll
If you take your foot off the accelerator, the
fuel supply is stopped and consumption is
reduced.

Allow the vehicle to roll without accelerating,
for example when approaching a red traffic
light. However, if the vehicle is rolling too
slowly or the distance is too long, the clutch
pedal should be pressed to declutch. The en-
gine will then operate at idle speed.

If the vehicle is going to be at a standstill for
a period of time, switch off the engine; for ex-
ample, while waiting at a level crossing. In
vehicles which have the Start-Stop function
on, the engine switches off automatically
when the vehicle is not moving.

Think ahead and “flow” with the traffic
Frequent acceleration and braking considera-
bly increase fuel consumption. If you think
ahead as you drive and keep a safe distance
from the vehicle in front, it is possible to slow
down by simply lifting your foot off the

198

-------------------------------------------------------------------------------------------------------------------------------------------------------------

-------------------------------------------------------------------------------------------------------------------------------------------------------------

Driving

accelerator. This eliminates the need for con-
stant braking and acceleration.

Calm and steady driving
Constancy is more important than speed: The
more you drive at a constant speed, the lower
the fuel consumption.

When driving on the motorway, it is more effi-
cient to drive at a constant and more moder-
ate speed than to be continuously accelerat-
ing and braking. As a general rule, you will
reach your destination just as quickly when
you drive at a constant speed.

The cruise control function helps you to ach-
ieve a constant style of driving.

Moderate use of additional devices
It is important to travel in comfort, but con-
venience systems should be used ecological-
ly.

Some equipment, when connected, increase
fuel consumption considerably, for example:

Air conditioning cooling system: If the air

conditioning system is required to cool to
significantly lower temperatures than the true
outside temperature, it will require a large
amount of energy from the engine. Therefore,
we recommend that the selected temperature
for the vehicle is not too different to the out-
side temperature. It is a good idea to air the
vehicle before starting your journey and to

drive a short distance with all the windows
open. Only then should you close all the win-
dows and switch on the air conditioning.
Keep windows closed when travelling at high
speeds. Driving with the windows open in-
creases fuel consumption.

Switch off the seat heating when the seats

have warmed up.

Switch off the heated rear window and the

windscreen heating when the windows have
demisted and are free of ice.

Do not leave the auxiliary heater switched

on when the vehicle is moving 

››› 

page 177

.

Avoid short journeys
Fuel consumption is much higher when the
engine is cold, immediately after it has been
started. It takes a few kilometres of driving
for the engine to warm up and to normalise
consumption.

The engine and catalytic converter need to
reach their proper 

working temperature in or-

der to minimise fuel consumption and emis-
sions. The 

ambient temperature has a deci-

sive influence.

Therefore, unnecessary short journeys
should be avoided. Try to combine trips.

The vehicle uses more fuel in winter than in
summer, even when other conditions are the
same.

The engine takes a long time to warm up
when it is idling. Mechanical wear and pollu-
tant emissions are also especially high dur-
ing this initial warm-up phase. It is therefore
best to drive off immediately after starting
the engine. Avoid running the engine at high
speed.

Adjusting type pressures.
Having the correct pressure in your tyres
helps to reduce rolling resistance and, as a
result reduces fuel consumption. Increasing
the tyre pressure slightly (+0.2 bar
[2.9 psi/20 kPa]) can help to save fuel.

If you are prepared to accept a slight reduc-
tion in comfort, the tyres may be filled to the
pressures recommended for a fully-loaded
vehicle. This is also valid when driving alone
without luggage.

When you buy new tyres, make sure they are
optimised for minimum rolling resistance.

Avoid carrying unnecessary loads
The lighter the vehicle, the more economical
and ecological the driving style. For example,
an additional weight of 100 kg will increase
fuel consumption up to 0.3 l/100 km.

Remove any unnecessary objects or loads
from the vehicle.

»

199

Tec

hnic

al

 d

at

a

Adv

ic

e

Oper

ation

Emer

genc

ie

s

Saf

ety

-------------------------------------------------------------------------------------------------------------------------------------------------------------

-------------------------------------------------------------------------------------------------------------------------------------------------------------

Operation

Remove optional equipment and unnecessa-
ry accessories
The more aerodynamic the vehicle, the lower
the fuel consumption. Optional equipment
and accessories (such as roof racks or bike
carriers) reduce the aerodynamic benefits of
the vehicle.

Therefore, we recommend you remove all op-
tional and unnecessary equipment and racks,
especially if you intend to drive at high
speeds.

Other factors which increase fuel consump-
tion (examples):

Fault in engine management.

Driving on hills.

Trailer towing.

WARNING

Always adapt your speed and the distance to
the vehicles ahead in line with visibility,
weather conditions, the condition of the road
and the traffic situation.

Engine management and ex-
haust gas purification system

Introduction

WARNING

The components of the exhaust system reach
very high temperatures. This could cause a
fire.

Always park your vehicle so that no part of

the exhaust system can come in contact with
flammable materials (such as dried grass).

Do not apply additional underseal or anti-

corrosion coatings to the exhaust pipes, cata-
lytic converter, heat shields or the diesel par-
ticulate filter.

Control lamps



It lights up

fault in the petrol
engine manage-
ment.

Take the vehicle to a specialised
workshop as soon as possible
and have the engine checked.

It lights up

Diesel engine glow
plug system.

The engine glow plug system has
been activated. The engine can
be started straight away when
the lamp switches off.

Flashes

Fault in the diesel
engine manage-
ment.

If the lamp flashes while you are
driving, have the engine checked
by a specialised workshop as
soon as possible.

It lights up

Fault in the emis-
sion control system.

Reduce speed and drive carefully
to the nearest specialised work-
shop to have the engine
checked.

Flashes

Combustion fault
which could dam-
age the catalytic
converter.

Reduce speed and drive carefully
to the nearest specialised work-
shop to have the engine
checked.

It lights up

Diesel particulate
filter blocked

››› 

page 201

Several warning and control lamps light up
for a few seconds when the ignition is switch-
ed on, signalling that the function is being
verified. They will switch off after a few sec-
onds.

WARNING

Observe traffic regulations when cleaning the
diesel particulate filter while driving.

200

-------------------------------------------------------------------------------------------------------------------------------------------------------------

-------------------------------------------------------------------------------------------------------------------------------------------------------------

Driving

Only carry on driving if visibility, weather,

road and traffic conditions so permit.

Never endanger your safety or that of other

road users.

CAUTION

Always pay attention to any lit control lamps
and to the corresponding descriptions and in-
structions to avoid damage to the vehicle.

Note

While the control lamps  or  re-
main lit, there may be engine problems, fuel
consumption may increase and the engine
may lose power.

Catalytic converter

The catalytic converter permits the subse-
quent treatment of the exhaust gases thus
reducing contaminating gas emissions. To
ensure a longer working life for the exhaust
system and catalytic converter in a petrol en-
gine:

Always use unleaded petrol.

Never run the fuel tank completely dry.

Do not top up with too much engine oil

››› 

page 271

.

Do not tow-start the vehicle; use the starter

cables 

››› 

page 51

.

If you should notice misfiring, uneven run-
ning or loss of power when the car is moving,
reduce speed immediately. Have the car in-
spected by a specialised workshop. If this
happens, unburnt fuel can enter the exhaust
system and escape into the atmosphere. The
catalytic converter can also be damaged by
overheating.

For the sake of the environment

Even when the emission control system is
working perfectly, there may be a smell of
sulphur under certain conditions. This de-
pends on the sulphur content of the fuel be-
ing used.

Diesel particulate filter

The diesel particulate filter removes soot par-
ticulates from the exhaust gas, retains and
burns them. To assist the combustion proc-
ess, SEAT recommends you avoid frequent
short trips.

Always use diesel with a low sulphur con-

tent 

››› 

page 264

.

Never use petrol or fuel oil.

Never use biodiesel. However, a blend pre-

pared by the diesel manufacturer containing
biodiesel within the limits established by the
EN 590 standard may be used 

››› 

page 264

.

Never run the fuel tank completely dry.

Do not top up with too much engine oil

››› 

page 271

.

Do not tow-start the vehicle; use the starter

cables 

››› 

page 51

.

In order to reduce blocking of the diesel par-
ticulate filter, some vehicles with an automat-
ic gearbox may increase the engine speed
slightly to start cleaning the filter automati-
cally. The control lamp will not light up in this
case .

Control lamp 
If the control lamp  lights up you should
help the filter clean itself by driving in the ap-
propriate manner.

To do this, drive about 15 minutes in fourth
or fifth gear (automatic gearbox: 

S gear

range) at a minimum speed of 60 km/h
(37 mph), with the engine running at approxi-
mately 2,000 rpm. In this way, the soot build
up in the filter is burned. When cleaning is
successful, the control lamp turns off.

If the lamp  does not turn off, or the three
lamps turn on (particulate filter , fault in
the emission control system  and glow
plugs ), drive the vehicle to a specialised
workshop and have the fault repaired at the
earliest opportunity.

»

201

Tec

hnic

al

 d

at

a

Adv

ic

e

Oper

ation

Emer

genc

ie

s

Saf

ety

-------------------------------------------------------------------------------------------------------------------------------------------------------------

-------------------------------------------------------------------------------------------------------------------------------------------------------------

Operation

WARNING

Always drive according to the road weather

conditions, the terrain and traffic. Driving rec-
ommendations should never lead to illegal
manoeuvres in surrounding traffic.

For the sake of the environment

Even when the emission control system is
working perfectly, there may be a smell of
sulphur under certain conditions. This de-
pends on the sulphur content of the fuel be-
ing used.

Driving tips

Driving abroad

In some countries, certain safety regulations
and requirements are in force relating to ex-
haust gas emissions, which differ from the
technical characteristics of the vehicle. Be-
fore travelling abroad, SEAT recommends you
consult a technical service about the legal re-
quirements and the following points:

Does the vehicle need technical modifica-

tions for driving abroad, for example, adjust-
ment of the headlamps?

Does the vehicle have all the tools, diag-

nostics equipment and spare parts required
for inspections and repairs?

Are there any SEAT dealers in the destina-

tion country?

For petrol vehicles: Is unleaded petrol avail-

able at the right octane rating?

For diesel engines: Is diesel fuel available

with a low sulphur content?

Are a suitable engine oil (

››› 

page 271

) and

other engine fluids complying with SEAT
specifications available in the destination
country?

Will the navigation system fitted at the fac-

tory operate correctly in the destination coun-
try with the available navigation data?

Are special tyres required in the destination

country?

CAUTION

SEAT does not accept liability for any damage
to the vehicle due to the use of a lower quali-
ty fuel, an inadequate service or the non-
availability of genuine spare parts.

Driving along flooded roadways

To prevent damage to the vehicle when driv-
ing through water, for example, along a floo-
ded road, please observe the following:

Check the depth of the water before enter-

ing the flooded zone. The water should 

never

come above the lower edge of the bodywork

››› 

.

Do not drive faster than a pedestrian.

Do not stop in the water, use reverse gear

or switch off the engine.

Oncoming traffic will cause waves which

raise the level of the water, making it difficult
to cross the water.

The Start/Stop system must be deactivated
when driving through flooded areas

WARNING

When driving through water, mud, melted
snow, etc., please remember that due to
damp or frozen brake discs and shoes in win-
ter, the braking effect may be delayed, there-
fore the required braking distance is greater.

“Dry the brakes and remove ice” by braking

carefully. Ensure that you are not endanger-
ing other road-users or breaking traffic regu-
lations in the process.

After driving through water, avoid sudden

sharp manoeuvres.

CAUTION

Driving through flooded areas may severely

damage vehicle components such as the en-
gine, transmission, drive train or electrical
system.

Never drive through salt water as salt cau-

ses corrosion. Always rinse any parts of the
vehicle which have been in contact with salt
water.

202

-------------------------------------------------------------------------------------------------------------------------------------------------------------

-------------------------------------------------------------------------------------------------------------------------------------------------------------

Driver assistance systems

Driver assistance systems

Braking and stability systems

Brake assist systems

The brake assist systems ESC, ABS, BAS, ASR
and EDL only operate when the ignition is
switched on. They contribute significantly to
increasing active safety.

Electronic Stability Control (ESC)
ESC reduces the risk of skidding and increa-
ses the vehicle stability by braking individual
wheels under specific driving conditions. ESC
detects critical handling situations, such as
understeer, oversteer and wheelspin on the
driven wheels. The system stabilises the ve-
hicle by braking individual wheels or by re-
ducing the engine torque.

The ESC has limits. It is important to realise
that the ESC is also subject to the laws of
physics. ESC will not be able to deal with all
situations with which drivers may be faced.
For example, if the road surface changes sud-
denly then ESC will not be useful in all cases.
If the vehicle suddenly enters a section cov-
ered by water, mud or snow then ESC will not
provide assistance in the same way as on dry
ground. If the vehicle loses its grip on the
ground and moves on a film of water (“aqua-
planing”), the ESC will not be able to assist

the driver to control the vehicle as the loss of
adherence with the road surface will prevent-
ing braking and steering. If the vehicle is
driven through series of bends at high
speed, the ESC will not always be as effec-
tive: the vehicle reaction to aggressive driv-
ing is not the same as at reduced speeds.
When driving with a trailer, ESC does not pro-
vide the same amount of vehicle control as
without a trailer.

Adjust your speed and driving style to road,
traffic and weather conditions. ESC cannot
push the limits of the laws of physics; im-
prove the transmission available or maintain
the vehicle on the road if a lack of driver at-
tention creates an inevitable situation. Other-
wise, ESC assists in maintaining vehicle con-
trol in extreme situations and uses the move-
ments of the steering made by the driver to
maintain the vehicle moving in the desired
direction. If the vehicle is driven at such a
speed that it will leave the road before ESC
can intervene then the system cannot pro-
vide assistance.

The ABS, BAS, ASR and EDL systems are in-
corporated into the ESC. The ESC is always
on. The ESC should only be turned off using
the ASR button 

››› 

Fig. 205

 when traction is

insufficient. Always remember to turn on the
ASR once more when the vehicle has traction
again.

Anti-lock system (ABS)
ABS can prevent the wheels from locking dur-
ing braking until just before the vehicle stops
thus helping the driver to steer the vehicle
and maintain control. This means that, even
during full braking, the risk of skidding is re-
duced:

Press and hold the brake pedal fully. Do not

remove your foot from the brake pedal or re-
duce braking force!

Do not “pump” the brake pedal, or reduce

braking force!

Maintain vehicle direction when braking

fully.

When the brake pedal is released or when

the brake force is reduced, ABS is turned off.

ABS control can be observed by 

vibration of

the brake pedal and noise. You should never
expect the ABS to reduce the braking dis-
tance under any circumstances. This distance
will increase when driving on gravel, recent
snow or on icy and slippery ground.

When driving on loose ground, the all-terrain
configuration of the ABS is automatically
turned on. When ABS is activated, the front
wheels may lock briefly. This shortens the
braking distance in off-road situations as the
wheels are prevented from digging into loose
surfaces. All-terrain ABS only intervenes
when driving in a straight line. When the

»

203

Tec

hnic

al

 d

at

a

Adv

ic

e

Oper

ation

Emer

genc

ie

s

Saf

ety

-------------------------------------------------------------------------------------------------------------------------------------------------------------

-------------------------------------------------------------------------------------------------------------------------------------------------------------

Operation

front wheels are turned, the normal ABS is
activated.

Brake assist system (BAS)
The brake assist system may reduce the re-
quired braking distance. The brake assist
system boosts the braking force if you press
the brake pedal quickly in an emergency. As
a result, the braking pressure increases rap-
idly, the braking force is multiplied and the
braking distance is reduced. This enables the
ABS to be activated more quickly and effec-
tively.

¡Do 

not lift your foot off the brake pedal!

When the brake pedal is released or when
the brake force is reduced, braking assist au-
tomatically turns off the brake servo.

Traction control when accelerating (ASR)
In the event of wheelspin, the traction control
system reduces the engine torque to match
the amount of grip available. The ASR makes
some situations easier, for example, when
starting, accelerating or going uphill, even in
unfavourable road conditions.

The ASR can be switched on or off instructionly

››› 

page 205

.

Electronic differential lock system (EDS)
EDL is available when driving in straight lines
under normal conditions. When the EDL de-
tects wheelspin, it brakes the spinning wheel

and directs the power to the other drive
wheels. To prevent the disc brake of the
braked wheel from overheating, the EDL cuts
out automatically if subjected to excessive
loads. The EDL will switch on again automati-
cally when the brake has cooled down.

Electronic drive torque management (XDS)
When taking a curve, the driveshaft differen-
tial mechanism allows the outer wheel to turn
at a higher speed than the inner wheel. In
this way, the wheel that is turning faster (out-
er wheel) receives less drive torque than the
inner wheel. This may mean that in certain
situations the torque delivered to the inner
wheel is too high, causing the wheels to
spin. On the other hand, the outer wheel is
receiving a lower drive torque than it could
transmit. This causes an overall loss of lateral
grip on the front axle, resulting in understeer
or “lengthening” of the trajectory.

The XDS system can detect and correct this
effect via the sensors and signals of the ESC.

Via the ESC, the XDS will brake the inside
wheel and counter the excess driving torque
of that wheel. This means that the driver's
desired trajectory is much more precise.

The XDS system works in combination with
the ESC and is always active, even when ASR
traction control is disconnected.

WARNING

Driving at high speed on icy, slippery wet
ground can result in loss of vehicle control
and serious injury to the driver and passen-
gers.

Adjust your speed and driving style to visi-

bility, road, traffic and weather conditions.
Even though the brake assist systems, ABS,
BAS, EDL, ASR and ESC, provide more securi-
ty, do not take unnecessary risks while driv-
ing.

Brake assist systems can not overcome the

laws of physics. Even with ESC and other sys-
tems, slippery and wet roads will always be
dangerous.

Driving to quickly on wet ground can result

in the wheels losing contact with the ground
in an effect known as “aquaplaning”. Without
adherence, it is impossible to brake, steer or
control the vehicle.

Brake assist systems cannot avoid acci-

dents if, for example, the driver does not re-
spect safety distances or drives to quickly in
difficult conditions.

Even though brake assist systems are ex-

tremely effective and help control the vehicle
in difficult situations, remember that the ve-
hicle stability depends on tyre grip.

When accelerating on a slippery surface,

for example on ice or snow, press the acceler-
ator carefully. The wheels can still slip even
with brake assist systems resulting in loss of
vehicle control.

204

-------------------------------------------------------------------------------------------------------------------------------------------------------------

-------------------------------------------------------------------------------------------------------------------------------------------------------------

Driver assistance systems

WARNING

The effectiveness of the ESC can be consider-
ably reduced if other components and sys-
tems affecting driving dynamics are not main-
tained or are not functioning correctly. This
includes, among others, brakes, tyres and
other systems already mentioned.

Remember that changing and fitting other

components to the vehicle can affect opera-
tion of the ABS, BAS, ASL EDL and ESC.

Changes to the vehicle suspension or using

unapproved wheel/tyre combinations can af-
fect operation of the ABS, BAS, ASL EDL and
ESC, as well as their effectiveness.

Likewise, the effectiveness of ESC depends

on the use of suitable tyres 

››› 

page 284

.

Note

To ensure that the ESC and ASR work prop-

erly, all four wheels must be fitted with iden-
tical tyres. Any differences in the rolling radi-
us of the tyres can cause the system to re-
duce engine power when this is not desired.

If a malfunction should occur in the ABS,

the ESC, EDL and ASR will also be out of ac-
tion.

Noises may be heard while any of the

above systems are operating.

Switching ASR on and off

Fig. 205 

Detailed view of the centre console:

button used to switch ASR on and off (vehi-
cles with ESC)

The electronic stability control ESC consists
of ABS, EDL and ASR and only works when
the engine is running.

The ASR can be switched off while the engine
is running by pressing the 

 OFF


››› 

Fig. 205

button. The ASR (and similar) is only switch-
ed off when the required traction is not ob-
tained:

When driving through deep snow or on

loose ground (gravel, etc.).

When “freeing” a trapped vehicle.

Turn the ASR back on by pressing the but-
ton 

 OFF


››› 

Fig. 205

.

Start assist systems

Introduction

WARNING

The intelligent technology in the start assist
systems cannot change the laws of physics.
The improved comfort provided by start as-
sist systems should not prompt you to take
risks.

Unintentional movements of the vehicle

could cause serious injury.

The start assist systems are not a replace-

ment for driver awareness.

Always try to adapt the speed of the vehi-

cle and your style of driving to the condition
of the ground or the road and to weather and
traffic conditions.

The start assist system cannot keep the ve-

hicle stationary in all conditions on a gradi-
ent or cause it to brake on steep downhill
gradients, e.g. if the road is slippery or icy.

205

Tec

hnic

al

 d

at

a

Adv

ic

e

Oper

ation

Emer

genc

ie

s

Saf

ety

-------------------------------------------------------------------------------------------------------------------------------------------------------------

-------------------------------------------------------------------------------------------------------------------------------------------------------------

Operation

Auto Hold function*

Fig. 206 

Detailed view of the centre console:

Auto Hold button

The control lamp on the button switches on
when the Auto Hold function is on.

When the Auto Hold function is on, this helps
the driver if they must regularly stop the vehi-
cle or if they must stop with the engine run-
ning for prolonged periods, for example, on
hills, before a traffic light or in traffic jams
with continuous stopping and starting.

The Auto Hold function automatically pre-
vents the vehicle from rolling away acciden-
tally when at a standstill, without the driver
having to keep his/her foot on the brake ped-
al.

When the system that detects that the vehi-
cle has stopped, the Auto Hold keeps the ve-
hicle at a standstill. The brake pedal can be
released.

If the driver presses the brake pedal briefly or
the accelerator to start off, the Auto Hold
function releases the brake once more. The
vehicle moves according to the gradient.

If any of the conditions necessary for the Au-
to Hold function change while the vehicle
stopped, the system is turned off as is the in-
dicator on the button 

››› 

Fig. 206

The elec-

tronic parking brake engages where necessa-
ry to park the vehicle safely 

››› 

.

Conditions for keeping the vehicle at a
standstill with Auto Hold:

The driver door must be closed.

The driver seat belt must be buckled.

The engine must be running.

The ASR system is switched on

››› 

page 187

.

Automatically engaging and disengaging the
Auto Hold function
If the Auto Hold function was engaged with
the 

AUTO HOLD

 button before disengaging the

ignition, the function will automatically re-
main engaged after the ignition is re-engag-
ed.

If the Auto Hold function was not engaged, it
will automatically remain disengaged after
the ignition is engaged.

Permanent Auto Hold connection
The Auto Hold function must be switched on
every time the engine is started. However, to
switch the Auto Hold function on permanent-
ly, the 

mark

 must be switched on in the 

Set-

tings

 menu, “Autohold” submenu

››› 

page 26

.

Auto Hold works automatically under the fol-
lowing conditions:

All points must be fulfilled simultaneously

››› 

:


Manual gearbox

Automatic gearbox

1.

If the vehicle is kept at a 

standstill using the brake

pedal on a flat or a slope.

2.

The engine must be “running smoothly”.

3.

On a slope, the 1st gear
is engaged uphill or the
reverse gear is engaged
for a downhill. The
clutch must be held
down.

A gear for driving is se-
lected from 

RD or S.


Upon accelerating and
pressing in the clutch
simultaneously, the
brake releases gradual-
ly.

Upon accelerating, the
brake releases gradual-
ly.

206

-------------------------------------------------------------------------------------------------------------------------------------------------------------

-------------------------------------------------------------------------------------------------------------------------------------------------------------

Driver assistance systems

Auto Hold turns off automatically under the
following conditions:


Manual gearbox

Automatic gearbox

1.

If one of the conditions mentioned in 

table on

page 206

 changes.

2.

If the engine is “not running regularly” or if there is

a malfunction.

3.

When changing to idle
speed.

If the selector lever is
placed in neutral (

N).

4.

If the engine is turned
off or stalls.

If the engine is switch-
ed off.

5.

If the driver accelerates
while pressing the
clutch in.

If the vehicle is acceler-
ated.

6.


When one of the wheels
has minimal contact
with the ground (e.g. on
uneven ground).

WARNING

The Auto Hold technology is limited by the
laws of physics. The improved comfort provi-
ded by Auto Hold should never prompt you to
take risks.

Never leave the vehicle running and with

the Auto Hold function switched on.

Auto Hold cannot always stop the vehicle

uphill and downhill (e.g. if the ground is slip-
pery or frozen).

CAUTION

Before entering an automatic car wash, al-
ways switch the Auto Hold function off, as it
could be damaged when the electronic park-
ing brake automatically engages.

Start-Stop Function*

Fig. 207 

Detailed view of the centre console:

Start-Stop function button

With the Start-Stop system enabled, the en-
gine is automatically stopped when the vehi-
cle is at a standstill. The engine restarts auto-
matically when required.

The function is enabled automatically when-
ever the ignition is switched on. The instru-
ment panel displays information on the cur-
rent status.

Vehicles with a manual gearbox

When the vehicle is at a standstill, leave it

in neutral and take your foot off the clutch.
The engine switches off.

Simply depress the clutch pedal to move

off again.

Vehicles with an automatic gearbox

When the vehicle is at a standstill, depress

the brake or keep it pressed down. The en-
gine switches off.

The engine will start again as soon as you

release the brake pedal.

With the selector lever set to position 

P, the

engine will not start until a range of gears is
selected or the accelerator pedal is de-
pressed.

Important conditions for the engine to auto-
matically switch off

The driver seat belt must be buckled.

The driver door must be closed.

The bonnet must be closed.

The factory-fitted towing bracket must not

be electrically connected to a trailer.

A minimum engine temperature has been

reached.

The steering wheel must not be turned

more than 270 degrees.

The vehicle has moved since the last stop.

»

207

Tec

hnic

al

 d

at

a

Adv

ic

e

Oper

ation

Emer

genc

ie

s

Saf

ety

-------------------------------------------------------------------------------------------------------------------------------------------------------------

-------------------------------------------------------------------------------------------------------------------------------------------------------------

Operation

In vehicles with Climatronic: the tempera-

ture inside the vehicle is within the pre-set
temperature range.

The temperature set is neither very high nor

very low.

The air conditioning defrost function is not

switched on.

In vehicles with Climatronic: the blower has

not been manually set to a high speed.

The power level of the vehicle's battery is

sufficient.

The vehicle's battery temperature is neither

too high nor too low.

The vehicle is not on a steep gradient or

slope.

The front wheels are not overly turned.

The heated windscreen is not switched on.

Reverse gear is not engaged.

The park assist system is not switched on.

Conditions for automatically restarting the
engine
The engine may automatically restart under
the following conditions:

If the vehicle interior is too hot or too cold.

If the vehicle moves.

If the vehicle's battery voltage drops.

Conditions requiring the key to restart the
engine
The engine must be started manually under
the following conditions:

If the driver unbuckles his/her seat belt.

If the driver door is opened.

If the bonnet is opened.

In vehicles with a manual gearbox: if a gear

has been selected.

Switching Start-Stop mode on and off man-
ually

Press the 

 button on the centre console

››› 

Fig. 207

.

The button will light up when the Start-Stop

function is switched off.

The engine will start immediately if the vehi-
cle is in Stop mode when it is switched off
manually.

WARNING

The brake servo and the power steering do
not work when the engine is switched off.

Never allow the vehicle to move when the

engine is switched off.

CAUTION

Using the Start-Stop function for a long peri-
od at very high outside temperatures could
damage the vehicle's battery.

Note

In some cases, you may have to restart the

vehicle using the key. Observe the corre-
sponding message on the instrument panel
display.

If the steering wheel is turned more than

270°, Stop will not function; however, the an-
gle of steering wheel turn does not affect
starting the vehicle.

Parking distance warning sys-
tem*

Introduction

The parking distance warning system assists
the driver when parking. When the vehicle
approaches an obstacle, forwards or back-
wards, an intermittent audible warning will
be heard, higher or lower depending on the
distance. The shorter the distance, the short-
er the intervals between tones. If the vehicle
is too close to the obstacle, the audible warn-
ing becomes constant.

If you continue to approach an obstacle when
the sound is continuous, this means the sys-
tem can no longer measure the distance.

The sensor system on the bumpers transmit
and receive ultrasound. Using the ultrasound
signal (transmission, reflection from the ob-
stacle and reception), this system

208

-------------------------------------------------------------------------------------------------------------------------------------------------------------

-------------------------------------------------------------------------------------------------------------------------------------------------------------

Driver assistance systems

continuously calculates the distance be-
tween the bumper and the obstacle.

WARNING

The parking distance warning system and the
optical parking system cannot replace driver
awareness.

The sensors have blind spots in which ob-

stacles and people are not registered.

Always observe the area around the vehi-

cle, as the sensors do not always detect
small children, animals or objects.

The surface of certain objects and some

clothing do not reflect the ultrasound signals
from the parking distance system. The sys-
tem cannot detect or incorrectly detects
these objects and people wearing these
types of clothes.

External sound sources can affect the park-

ing distance aid signals. In this case, under
certain circumstances, people and objects
will not be detected.

CAUTION

The sensors may not always be able to de-

tect objects such as trailer draw bars, thin
rails, fences, posts, trees and open boots,
etc. This could result in damage to your car.

Although the parking distance warning sys-

tem detects and warns of the presence of an
obstacle, the obstacle could disappear from
the angle of measurement of the sensors if it
is too high or low and the system would no

longer show it. Therefore, it will not warn you
of these objects. Ignoring the warnings of the
parking sensor system could cause consider-
able damage to the vehicle.

The bumper sensors may become damaged

or misaligned, for example, when parking.

To ensure that the system works properly,

the bumper sensors must be kept clean, free
of ice and snow and uncovered.

When cleaning the sensors with high-pres-

sure or steam cleaning equipment, spray the
sensors briefly at a distance of no less than
10 cm (4 inches).

Note

Acoustic sources may lead to erroneous warn-
ings on the parking sensor system, e.g.
rough tarmac, cobbles or the noise of other
vehicles.

Parking distance warning system*

Fig. 208 

Detailed view of the centre console:

button for switching the parking distance
warning system on and off

Fig. 209 

Parking sensor system sensors on

the front bumper

The parking distance warning system assists
the driver when parking. If the vehicle is ap-
proaching an obstacle, an intermittent audi-
ble warning is emitted. The shorter the dis-
tance, the shorter the intervals between

»

209

Tec

hnic

al

 d

at

a

Adv

ic

e

Oper

ation

Emer

genc

ie

s

Saf

ety

-------------------------------------------------------------------------------------------------------------------------------------------------------------

-------------------------------------------------------------------------------------------------------------------------------------------------------------

Operation

tones. If the vehicle is too close to the obsta-
cle, the audible warning becomes constant.

Switching the parking distance warning sys-
tem on and off

Press the 

 button 

››› 

Fig. 208

 when the

ignition is switched on.

Automatic on: select reverse gear.

Automatic off: drive faster than 15 km/h

(9 mph).

The button lights up when the function is
switched on.

Things to note on the parking distance warn-
ing system

The parking distance warning system

sometimes registers water on the sensors as
an obstacle.

If the distance does not change, the warn-

ing signal will sound less loudly after a few
seconds. If the continuous signal sounds, the
volume will remain constant.

When the vehicle moves away from the ob-

stacle, the beeping sound automatically
switches off. On approaching the obstacle
again, the beeping sound will automatically
switch back on.

If the electronic parking brake is engaged

or the selector lever is set to 

Pno audible

warning will be emitted.

Your technical service centre can adjust the

volume of the warning signals.

Note

If the parking distance warning system is
faulty, a constant audible warning will be
emitted the first time it is switched on and
the button will flash. Switch the parking dis-
tance warning system off using the button
and take the vehicle to a specialised work-
shop to have the system checked as soon as
possible.

Optical parking system* (OPS)

Fig. 210 

On-screen OPS display: 

A

 has de-

tected an obstacle in the collision zone; 

B

has detected an obstacle in the segment; 

C

zone recorded behind the vehicle.

Fig. 211 

On-screen OPS display: 

A

 has de-

tected an obstacle in the segment; 

B

 restric-

ted area in front of the vehicle.

The optical parking system is an accessory to
the Parking distance warning system

››› 

page 209

 and the park assist system

››› 

page 211

.

The zone recorded by the sensors in front of
and behind the vehicle is displayed on the
factory-fitted radio or navigation system
screen. Any obstacles are displayed in rela-
tion to the vehicle 

››› 

.

Function

Necessary operations

Switching the
display on:

Switch on the parking distance
warning system 

››› 

page 209

 or the

park assist system 

››› 

page 211

. The

OPS switches on automatically.

210

-------------------------------------------------------------------------------------------------------------------------------------------------------------

-------------------------------------------------------------------------------------------------------------------------------------------------------------

Driver assistance systems

Function

Necessary operations

Switching the
display off man-
ually:

Press a zone selection button on the
factory-fitted radio or navigation
system
OR: briefly press the function button

 or 

RVC

 on the screen.

Switching the
display off man-
ually:

Drive forwards at more than about
10-15 km/h (6-9 mph).
Select the reverse gear on vehicles
with rear assist 

››› 

page 215

The

display changes to the image of the
camera.

Zones explored
The zone in which obstacles are recognised
runs to a distance of around 120 cm from the
front of the vehicle and up to 60 cm to the
side 

››› 

Fig. 211


B

. Behind the vehicle, the

zone analysed reaches a distance of up to
160 cm and around 60 cm to the sides

››› 

Fig. 210


C

.

Screen display
The image displayed represents the super-
vised zones in several segments. As the vehi-
cle moves closer to an obstacle, the segment
moves closer to the vehicle displayed

››› 

Fig. 210


B

 and 

››› 

Fig. 211


A

. When the

penultimate segment is displayed, this
means that the vehicle has reached the colli-
sion zone. 

Stop the vehicle!

Distance from the
vehicle to the ob-
stacle

Audible

warn-

ing

Displayed in

colour on the

screen: colour

of the segment

if an obstacle
is recognised

Front: approx. 

31 -

120 cm
Behind: approx. 

31 -

160 cm

Beeping

sound

Yellow

Approximately 

0 –

30 cm in front or be-
hind

a)

Perma-

nent

sound

Red

a)

The permanent sound starts at a somewhat greater distance

on vehicles with a factory-fitted towing bracket.

With towing bracket
A specific image is displayed on the screen of
vehicles with a factory-fitted towing bracket
and an electrically connected trailer. In this
case, the distances behind the vehicle are
not indicated.

Switching the parking sensor system sound
on and off
If the 

 button on the radio or navigation

system screen may mute the sound of OPS
warnings. To switch the warnings back on,
press the button again briefly.

When the OPS is switched off and back on
again, muting is cancelled. Error messages
cannot be switched off.

WARNING

Do not be distracted from the traffic when
looking at the screen.

Park Assist system* (Park As-
sist)

Introduction


››› 

table on page 2

The Park Assist system helps the driver to
find a suitable place to park, to insert the ve-
hicle into parallel and perpendicular parking
places and to leave parallel parking places.

The Park Assist system is limited to the sys-
tem abilities and requires that the driver is
especially attentive 

››› 

.

The parking sensor system is a component of
the Park Assist system that helps to park the
vehicle.

For vehicles with the optical parking system
(OPS), the radio navigation systems screen
displays the detected zones in front of and
behind the vehicle, indicating - within the
limits of the system - the position of obsta-
cles in relation to the vehicle.

The park assist system cannot be switched
on if the factory-fitted towing bracket is elec-
trically connected to a trailer.

»

211

Tec

hnic

al

 d

at

a

Adv

ic

e

Oper

ation

Emer

genc

ie

s

Saf

ety

-------------------------------------------------------------------------------------------------------------------------------------------------------------

-------------------------------------------------------------------------------------------------------------------------------------------------------------

Operation

WARNING

Despite the assistance provided by the park
assist system, do not run any risks when
parking. The system is not a replacement for
driver awareness.

Unintentional movements of the vehicle

could cause serious injury.

Adjust your speed and driving style to visi-

bility, road, traffic and weather conditions.

The surface of certain objects and items of

clothing and external sound sources may
have a negative affect on the park assist sig-
nals or on the system sensors or may not re-
flect its signals.

The sensors have blind spots in which ob-

stacles and people are not registered.

Always observe the area around the vehi-

cle, as the sensors do not always detect
small children, animals or objects.

CAUTION

The park assist system aims exclusively at

other parked vehicles, without taking curbs
or other circumstances into account. Make
sure you do not damage the tyres and wheel
rims when parking. Where necessary, stop
manoeuvring to avoid damaging the vehicle.

The sensors may not always be able to de-

tect objects such as trailer draw bars, thin
rails, fences, posts and trees, etc. This could
result in damage to your car.

Although the parking distance warning sys-

tem detects and warns of the presence of an
obstacle, the obstacle could disappear from
the angle of measurement of the sensors if it
is too high or low and the system would no
longer show it. Therefore, it will not warn you
of these objects. Ignoring the warnings of the
parking sensor system could cause consider-
able damage to the vehicle. This is also valid
when using the park assist (e.g. to park be-
hind a truck or motorcycle). Therefore, always
keep a close watch on the area in front of and
behind the vehicle while parking, and inter-
vene promptly if necessary.

To ensure that the system works properly,

the bumper sensors must be kept clean, free
of ice and snow and uncovered.

The bumper sensors may become damaged

or misaligned, for example, when parking.

When cleaning the sensors with high-pres-

sure or steam cleaning equipment, spray the
sensors briefly at a distance of no less than
10 cm.

Note

Contact a specialised workshop with any sys-
tem faults. SEAT recommends taking your car
in for technical service.

Parking using the park assist system

Fig. 212 

Detailed view of the centre console:

button to switch the park assist system on
manually

212

-------------------------------------------------------------------------------------------------------------------------------------------------------------


Content      ..     11      12      13      14     ..