Oldsmobile Alero (2004 year). Instruction - part 9


  Index      Oldsmobile     Oldsmobile Alero (2004 year) - instruction in english


Search            copyright infringement  


Content      ..     7      8      9      10     ..


Oldsmobile Alero (2004 year). Instruction - part 9


-------------------------------------------------------------------------------------------------------------------------------------------------------------

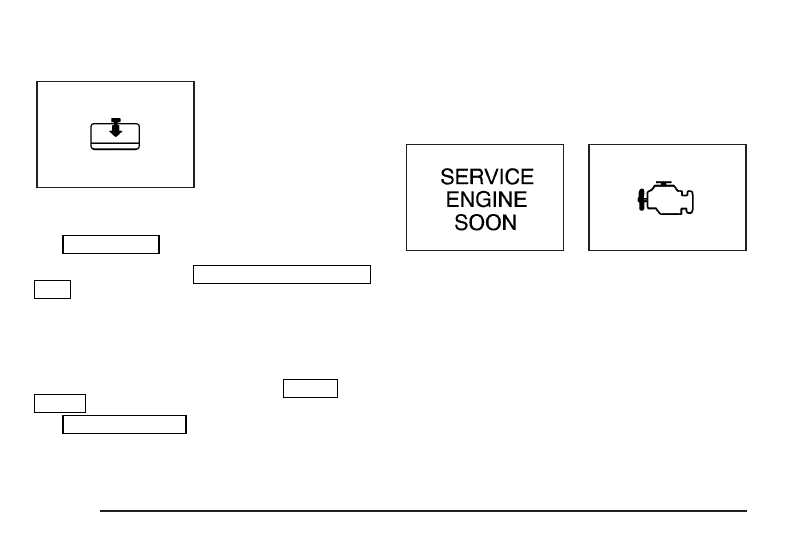
Low Coolant Warning Light

This light comes on
briefly when you turn your
ignition on.

If this light comes on and stays on and you hear a
chime, the coolant level in your vehicle is low.
See Engine Coolant on page 5-23. If the light is on
along with an overheat warning, you may have a serious
overheating problem. See Engine Coolant Temperature
Gage 
on page 3-31 listed previously.

Notice: If you operate the engine without coolant
or fail to maintain the cooling system properly,
you could damage the engine. The repairs would not
be covered by your warranty. Always follow the
maintenance schedule in this instruction for
maintaining your cooling system. See Cooling
System 
on page 5-29 for more information.

See Engine Overheating on page 5-26 for information
on what to do. Your vehicle should be serviced as soon
as possible.

Malfunction Indicator Lamp

Service Engine Soon Light in the
United States or Check Engine Light in
Canada

Your vehicle is equipped with a computer which
monitors operation of the fuel, ignition and emission
control systems.

United States

Canada

3-32

-------------------------------------------------------------------------------------------------------------------------------------------------------------

-------------------------------------------------------------------------------------------------------------------------------------------------------------

This system is called OBD II (On-Board
Diagnostics-Second Generation) and is intended to
assure that emissions are at acceptable levels for the life
of the vehicle, helping to produce a cleaner environment.
The SERVICE ENGINE SOON or CHECK ENGINE light
comes on to indicate that there is a problem and service
is required. Malfunctions often will be indicated by the
system before any problem is apparent. This may prevent
more serious damage to your vehicle. This system is also
designed to assist your service technician in correctly
diagnosing any malfunction.

Notice: If you keep driving your vehicle with this
light on, after a while, your emission controls may
not work as well, your fuel economy may not be as
good and your engine may not run as smoothly. This
could lead to costly repairs that may not be covered
by your warranty.

Notice: Modifications made to the engine, transaxle,
exhaust, intake or fuel system of your vehicle or the
replacement of the original tires with other than those
of the same Tire Performance Criteria (TPC) can
affect your vehicle’s emission controls and may
cause this light to come on. Modifications to these
systems could lead to costly repairs not covered by
your warranty. This may also result in a failure to
pass a required Emission Inspection/
Maintenance test.

This light should come on, as a check to show you it is
working, when the ignition is on and the engine is
not running. If the light does not come on, have it
repaired. This light will also come on during a
malfunction in one of two ways:

Light Flashing — A misfire condition has been
detected. A misfire increases vehicle emissions
and may damage the emission control system on
your vehicle. Diagnosis and service may be
required.

Light On Steady — An emission control system
malfunction has been detected on your vehicle.
Diagnosis and service may be required.

If the Light Is Flashing

The following may prevent more serious damage to
your vehicle:

Reducing vehicle speed.

Avoiding hard accelerations.

Avoiding steep uphill grades.

If you are towing a trailer, reduce the amount of
cargo being hauled as soon as it is possible.

3-33

-------------------------------------------------------------------------------------------------------------------------------------------------------------

-------------------------------------------------------------------------------------------------------------------------------------------------------------

If the light stops flashing and remains on steady, see “If
the Light Is On Steady” following.

If the light continues to flash, when it is safe to do so,
stop the vehicle. Find a safe place to park your vehicle.
Turn the key off, wait at least 10 seconds and restart
the engine. If the light remains on steady, see “If
the Light Is On Steady” following. If the light is still
flashing, follow the previous steps, and see your dealer
for service as soon as possible.

If the Light Is On Steady

You may be able to correct the emission system
malfunction by considering the following:

Did you recently put fuel into your vehicle?

If so, reinstall the fuel cap, making sure to fully install
the cap. See Filling Your Tank on page 5-6. The
diagnostic system can determine if the fuel cap has
been left off or improperly installed. A loose or missing
fuel cap will allow fuel to evaporate into the atmosphere.
A few driving trips with the cap properly installed
should turn the light off.

Did you just drive through a deep puddle of water?

If so, your electrical system may be wet. The condition
will usually be corrected when the electrical system
dries out. A few driving trips should turn the light off.

Have you recently changed brands of fuel?

If so, be sure to fuel your vehicle with quality fuel. See
Gasoline Octane on page 5-4. Poor fuel quality will cause
your engine not to run as efficiently as designed. You
may notice this as stalling after start-up, stalling when
you put the vehicle into gear, misfiring, hesitation on
acceleration or stumbling on acceleration. These
conditions may go away once the engine is warmed up.
This will be detected by the system and cause the light to
turn on.

If you experience one or more of these conditions,
change the fuel brand you use. It will require at least
one full tank of the proper fuel to turn the light off.

If none of the above steps have made the light turn off,
your dealer can check the vehicle. Your dealer has
the proper test equipment and diagnostic tools to fix any
mechanical or electrical problems that may have
developed.

3-34

-------------------------------------------------------------------------------------------------------------------------------------------------------------

-------------------------------------------------------------------------------------------------------------------------------------------------------------

Emissions Inspection and Maintenance
Programs

Some state/provincial and local governments have or
may begin programs to inspect the emission control
equipment on your vehicle. Failure to pass this
inspection could prevent you from getting a vehicle
registration.

Here are some things you need to know in order to help
your vehicle pass an inspection:

Your vehicle will not pass this inspection if the SERVICE
ENGINE SOON or CHECK ENGINE light is on or not
working properly.

Your vehicle will not pass this inspection if the OBD
(on-board diagnostic) system determines that critical
emission control systems have not been completely
diagnosed by the system. The vehicle would be
considered not ready for inspection. This can happen if
you have recently replaced your battery or if your
battery has run down. The diagnostic system is
designed to evaluate critical emission control systems
during normal driving. This may take several days
of routine driving. If you have done this and your vehicle
still does not pass the inspection for lack of OBD
system readiness, your GM dealer can prepare the
vehicle for inspection.

Oil Pressure Light

If you have a low engine
oil pressure problem, this
light will stay on after
you start your engine, or
come on and you will hear
a chime when you are
driving.

This indicates that your engine is not receiving enough
oil. The engine could be low on oil, or could have
some other oil problem. Have it fixed immediately.

3-35

-------------------------------------------------------------------------------------------------------------------------------------------------------------

-------------------------------------------------------------------------------------------------------------------------------------------------------------

When the ignition is on but the engine is not running,
the light will come on as a test to show you it is working,
but the light will go out when the engine is running. If
it doesn’t come on with the ignition on, you may have a
problem with the bulb. Have it fixed right away.

{

CAUTION:

Do not keep driving if the oil pressure is low. If
you do, your engine can become so hot that it
catches fire. You or others could be burned.
Check your oil as soon as possible and have
your vehicle serviced.

Notice: Lack of proper engine oil maintenance may
damage the engine. The repairs would not be
covered by your warranty. Always follow the
maintenance schedule in this instruction for changing
engine oil.

Change Engine Oil Light

The CHANGE OIL light
should come on briefly as
a bulb check when you
start the engine. If the light
doesn’t come on, have it
serviced.

If the CHANGE OIL light comes on and stays on after
you start the engine, have the oil changed.

To reset the CHANGE OIL light, see Engine Oil on
page 5-15
.

3-36

-------------------------------------------------------------------------------------------------------------------------------------------------------------

-------------------------------------------------------------------------------------------------------------------------------------------------------------

Security Light

This light will come on
when you turn the key to
ON and will stay on
until the vehicle starts.

If you’re driving and the security light comes on and
remains on, your Passlock

®

system is not working

properly. Your vehicle is not protected by Passlock

®

and you should see your dealer.

Cruise Control Light

The CRUISE light comes
on whenever you set your
cruise control, if equipped.

Low Washer Fluid Warning Light

This light will come on briefly when you turn on the
ignition. It will also stay on, or come on and a chime will
sound, if the windshield washer fluid reservoir is less
than one-third full.

United States

Canada

3-37

-------------------------------------------------------------------------------------------------------------------------------------------------------------

-------------------------------------------------------------------------------------------------------------------------------------------------------------

Service Vehicle Soon Light

This light will come on
briefly when you turn the
ignition to ON.

It will stay on, or come on and a chime will sound if it
detects a problem on the vehicle, such as a Daytime
Running Lamps (DRL) or an automatic headlamp
system malfunction. If this happens, see your dealer as
soon as possible.

Fuel Gage

Your fuel gage tells you about how much fuel you have
left, when the ignition is on. When the indicator nears
empty, the light will come on and you will hear a chime.
You still have a little fuel left, but you should get
more soon.

Here are four things that some owners ask about. None
of these show a problem with your fuel gage:

At the service station, the gas pump shuts off
before the gage reads full.

United States

Canada

3-38

-------------------------------------------------------------------------------------------------------------------------------------------------------------

-------------------------------------------------------------------------------------------------------------------------------------------------------------

It takes a little more or less fuel to fill up than the
gage indicated. For example, the gage may have
indicated the tank was half full, but it actually took a
little more or less than half the tank’s capacity to
fill the tank.

The indicator moves a little when you turn a corner
or speed up.

The gage goes back to empty when you turn off the
ignition.

Audio System(s)

Notice: Before you add any sound equipment to
your vehicle – like a tape player, CB radio, mobile
telephone or two-way radio – be sure you can add
what you want. If you can, it’s very important to do it
properly. Added sound equipment may interfere with
the operation of your vehicle’s engine, radio or other
systems, and even damage them. Your vehicle’s
systems may interfere with the operation of sound
equipment that has been added improperly.

So, before adding sound equipment, check with
your dealer and be sure to check federal rules
covering mobile radio and telephone units.

Your audio system has been designed to operate easily
and to give years of listening pleasure. You will get
the most enjoyment out of it if you acquaint yourself with
it first. Figure out which radio you have in your vehicle,
find out what your audio system can do and how to
operate all of its controls to be sure you’re getting the
most out of the advanced engineering that went into it.

Your vehicle has a feature called Retained Accessory
Power (RAP). With RAP, you can play your audio
system even after the ignition is turned off. See
“Retained Accessory Power (RAP)” under Ignition
Positions 
on page 2-17.

Setting the Time for Radios without
Radio Data Systems (RDS)

Press and hold the HR or MIN arrow for two seconds.
Then press the HR arrow until the correct hour appears
on the display. Press and hold the MIN arrow until
the correct minute appears on the display. The time may
be set with the ignition on or off.

3-39

-------------------------------------------------------------------------------------------------------------------------------------------------------------

-------------------------------------------------------------------------------------------------------------------------------------------------------------

Setting the Time for Radios with
Radio Data Systems (RDS)

Press and hold HR or MN for two seconds. Then press
and hold HR until the correct hour appears on the
display. AM or PM will appear on the display for morning
and evening hours. Press and hold MN until the
correct minute appears on the display. The time may be
set with the ignition on or off.

To synchronize the time with an FM station broadcasting
Radio Data System (RDS) information, press and
hold HR and MN at the same time for two seconds until
UPDATED appears on the display. If the time is not
available from the station, NO UPDATE will appear on
the display.

RDS time is broadcast once a minute. Once you have
tuned to an RDS broadcast station, it may take a
few minutes for your time to update.

Radio with CD (Base Level)

Playing the Radio

PWR (Power): Press this knob to turn the system on
and off.

VOL (Volume): Turn this knob to increase or to
decrease volume.

RCL (Recall): Press this knob to switch the display
between the radio station frequency and the time. Time
display is available with the ignition turned off.

3-40

-------------------------------------------------------------------------------------------------------------------------------------------------------------

-------------------------------------------------------------------------------------------------------------------------------------------------------------

Finding a Station

AM FM: Press this button to switch between FM1,
FM2, and AM. The display will show your selection.

TUNE: Turn this knob to select radio stations.

o

SEEK

p

Press the right or the left arrow to go to

the next or to the previous station and stay there.

To scan stations, press and hold either SEEK arrow for
two seconds until you hear a beep. The radio will go
to a station, play for a few seconds, then go on to
the next station. Press either SEEK arrow again to stop
scanning.

To scan preset stations, press and hold either SEEK
arrow for more than four seconds until you hear
two beeps. The radio will go to the first preset station
stored on your pushbuttons, play for a few seconds, then
go on to the next preset station. Press either SEEK
arrow again to stop scanning presets.

The radio will seek and scan only to stations that are in
the selected band and only to those with a strong
signal.

Setting Preset Stations

The six numbered pushbuttons let you return to your
favorite stations. You can set up to 18 stations (six FM1,
six FM2, and six AM) by performing the following
steps:

1. Turn the radio on.

2. Press AM FM to select FM1, FM2, or AM.

3. Tune in the desired station.

4. Press and hold one of the six numbered

pushbuttons until you hear a beep. Whenever you
press that numbered pushbutton, the station
you set will return.

5. Repeat the steps for each pushbutton.

Setting the Tone (Bass/Treble)

AUDIO: To adjust the bass or the treble, press and
release the AUDIO button until BAS or TRE appears on
the display. Then press and hold the up or the down
arrow to increase or to decrease. If a station is weak or
noisy, you may want to decrease the treble.

To adjust bass or treble to the middle position, select
BAS or TRE. Then press and hold the AUDIO button for
more than two seconds until you hear a beep. B and
a zero or T and a zero will appear on the display.

3-41

-------------------------------------------------------------------------------------------------------------------------------------------------------------

-------------------------------------------------------------------------------------------------------------------------------------------------------------

To adjust both tone controls and both speaker controls
to the middle position, first end out of audio mode
by pressing another button, causing the radio to perform
that function, or by waiting five seconds for the display
to return to the time of day. Then press and hold
the AUDIO button for more than two seconds until you
hear a beep. CEN will appear on the display.

Adjusting the Speakers (Balance/Fade)

AUDIO: To adjust the balance between the right
and the left speakers, press and release the AUDIO
button until BAL appears on the display. Then press and
hold the up or the down arrow to move the sound
toward the right or the left speakers.

To adjust the fade between the front and the rear
speakers, press and release the AUDIO button until
FAD appears on the display. Then press and hold the up
or the down arrow to move the sound toward the front
or the rear speakers.

To adjust balance or fade to the middle position, select
BAL or FAD. Then press and hold AUDIO for more
than two seconds until you hear a beep. L and a zero
or F and a zero will appear on the display.

To adjust both tone controls and both speaker controls to
the middle position, first end out of audio mode by
pressing another button, causing the radio to perform that
function, or by waiting five seconds for the display to
return to the time of day. Then press and hold AUDIO for
more than two seconds until you hear a beep. CEN will
appear on the display.

Radio Messages

CAL (Calibration): Your audio system has been
calibrated for your vehicle from the factory. If CAL
appears on the display it means that your radio has not
been configured properly for your vehicle and must
be returned to the dealer for service.

Playing a CD

With the ignition on, insert a CD partway into the slot,
label side up. The player will pull it in and the CD should
begin playing. CD will appear on the display. If you
want to insert a CD with the ignition off, first press the
eject button or the RCL knob.

If you turn off the ignition or radio with a CD in the
player, it will stay in the player. When you turn on the
ignition or the radio, the CD will start playing where
it stopped, if it was the last selected audio source.

3-42

-------------------------------------------------------------------------------------------------------------------------------------------------------------

-------------------------------------------------------------------------------------------------------------------------------------------------------------

As each new track starts to play, the track number will
appear on the display.

The CD player can play the smaller 8 cm single CDs
with an adapter ring. Full-size CDs and the smaller CDs
are loaded in the same manner.

If playing a CD-R the sound quality may be reduced
due to CD-R quality, the method of recording, the quality
of the music that has been recorded, and the way the
CD-R has been handled. You may experience an
increase in skipping, difficulty in finding tracks and/or
difficulty in loading and ejecting. If these problems occur
try a known good CD.

Do not add paper labels to CDs, they could get caught
in the CD player.

Do not play 3 inch CDs without a standard adapter CD.

If an error appears on the display, see “CD Messages”
later in this section.

1 PREV (Previous): Press this pushbutton to go to the
previous track if the current track has been playing
for less than eight seconds. If pressed when the current
track has been playing for more than eight seconds,
it will go to the beginning of the current track. The track
number will appear on the display. If you hold the
pushbutton or press it more than once, the player will
continue moving back through the CD.

2 NEXT: Press this pushbutton to go to the next track.
The track number will appear on the display. If you
hold the pushbutton or press it more than once,
the player will continue moving forward through the CD.

3 REV (Reverse): Press and hold this pushbutton to
reverse quickly within a track. Release it to play
the passage. The display will show the elapsed time of
the track.

4 FWD (Forward): Press and hold this pushbutton to
advance quickly within a track. Release it to play
the passage. The display will show the elapsed time of
the track.

5 RDM (Random): Press this pushbutton to hear the
tracks in random, rather than sequential, order. RND will
appear on the display. Press RDM again to turn off
random play. OFF will appear on the display.

6 RPT (Repeat): Press this pushbutton once to hear a
track over again. RPT will appear on the display.
The current track will continue to repeat. Press RPT
again to turn off repeat play. OFF will appear on
the display.

3-43

-------------------------------------------------------------------------------------------------------------------------------------------------------------

-------------------------------------------------------------------------------------------------------------------------------------------------------------

o

SEEK

p

Press the right or the left arrow to go to

the next or to the previous track. The track number
will appear on the display.

RCL (Recall): Press this knob to see the current track
number or how long the current track has been
playing.

AM FM: Press this button to listen to the radio when a
CD is playing. The inactive CD will remain safely
inside the radio for future listening.

CD: Press this button to play a CD when listening to
the radio. CD will appear on the display.

Z

(Eject): Press this button to eject a CD. Eject may

be activated with either the ignition or radio off. CDs
may be loaded with the radio and ignition off if this
button is pressed first.

CD Messages

If the CD comes out, it could be for one of the following
reasons:

It is very hot. When the temperature returns to
normal, the CD should play.

You are driving on a very rough road. When the
road becomes smoother, the CD should play.

The CD is dirty, scratched, wet, or upside down.

The air is very humid. If so, wait about an hour and
try again.

There may have been a problem while burning
the CD.

The label may be caught in the CD player.

If the CD is not playing correctly, for any other reason,
try a known good CD.

If any error occurs repeatedly or if an error cannot be
corrected, contact your dealer.

3-44

-------------------------------------------------------------------------------------------------------------------------------------------------------------

-------------------------------------------------------------------------------------------------------------------------------------------------------------

Radio with CD (Up Level)

Radio Data System (RDS)

Your audio system is equipped with a Radio Data
System (RDS). RDS features are available for use only
on FM stations that broadcast RDS information.

With RDS, your radio can do the following:

Seek to stations broadcasting the selected type of
programming

Receive announcements concerning local and
national emergencies

Display messages from radio stations

Seek to stations with traffic announcements

This system relies upon receiving specific information
from these stations and will only work when the
information is available. In rare cases, a radio station
may broadcast incorrect information that will cause
the radio features to work improperly. If this happens,
contact the radio station.

While you are tuned to an RDS station, the station name
or the call letters will appear on the display instead of the
frequency. RDS stations may also provide the time of
day, a program type (PTY) for current programming and
the name of the program being broadcast.

XM™ Satellite Radio Service
(48 Contiguous US States)

XM™ is a continental U.S. based satellite radio service
that offers 100 coast to coast channels including
music, news, sports, talk, and children’s programming.
XM™ provides digital quality audio and text information,
including song title and artist name. A service fee is
required in order to receive the XM™ service. For more
information, contact XM™ at www.xmradio.com or
call 1-800-852-XMXM (9696).

Playing the Radio

POWER: Push this knob to turn the system on and off.

VOLUME: Turn this knob to increase or to decrease
volume.

3-45

-------------------------------------------------------------------------------------------------------------------------------------------------------------

-------------------------------------------------------------------------------------------------------------------------------------------------------------

SCV (Speed-Compensated Volume): With SCV, your
audio system adjusts automatically to make up for
road and wind noise as you drive.

Set the volume at the desired level. Press this button to
select MIN, MED, or MAX. Each higher setting allows for
more volume compensation at faster vehicle speeds.
Then, as you drive, SCV automatically increases the
volume, as necessary, to overcome noise at any speed.
The volume level should always sound the same to you
as you drive. If you don’t want to use SCV, select OFF.

RCL (Recall): Press this knob to switch the display
between the radio station frequency and the time.
Pressing this knob with the ignition off will display
the time.

For XM™ (48 contiguous US states, if equipped), press
the RCL knob while in XM™ mode to retrieve four
different categories of information related to the current
song or channel: Artist, Song Title, Category or PTY,
Channel Number/Channel Name.

To change the default on the display, press the RCL knob
until you see the display you want, then hold the knob
until the display flashes. The selected display will now be
the default.

Finding a Station

BAND: Press this button to switch between FM1, FM2,
AM, or XM1 or XM2 (48 contiguous US states, if
equipped). The display will show your selection.

TUNE: Turn this knob to select radio stations.

S

SEEK

T

Press the right or the left arrow to go to

the next or to the previous station and stay there.

The radio will seek only to stations that are in the
selected band and only to those with a strong signal.

S

SCAN

T

Press and hold either arrow for two

seconds until SC appears on the display and you hear a
beep. The radio will go to a station, play for a few
seconds, then go on to the next station. Press either
arrow again to stop scanning.

To scan preset stations, press and hold either SCAN
arrow for more than four seconds until PRESET SCAN
appears on the display. You will hear a double beep and
the P will blink with the preset number. The radio will go
to the first preset station stored on your pushbuttons, play
for a few seconds, then go on to the next preset station.

3-46

-------------------------------------------------------------------------------------------------------------------------------------------------------------

-------------------------------------------------------------------------------------------------------------------------------------------------------------

Press either SCAN arrow again to stop scanning presets.

The radio will scan only to stations that are in the selected
band and only to those with a strong signal.

Setting Preset Stations

The six numbered pushbuttons let you return to your
favorite stations. You can set up to 30 stations
(six FM1, six FM2, and six AM, six XM1 and six XM2)
(48 contiguous US states, if equipped), by performing the
following steps:

1. Turn the radio on.

2. Press BAND to select FM1, FM2, AM, or XM1

or XM2.

3. Tune in the desired station.

4. Press AUTO EQ to select the equalization.

5. Press and hold one of the six numbered

pushbuttons until you hear a beep. Whenever you
press that numbered pushbutton, the station
you set will return and the equalization that you
selected will be automatically stored for that
pushbutton.

6. Repeat the steps for each pushbutton.

Setting the Tone (Bass/Treble)

AUDIO: Press and release this button until BASS, MID,
or TREB appears on the display. Press the knob above
the AUDIO button to extend it, then turn the knob to
increase or to decrease. If a station is weak or noisy, you
may want to decrease the treble.

Pressing and holding the AUDIO button for at least
two seconds will return all tone settings to the middle
position.

AUTO EQ (Automatic Equalizer): Press this button to
select customized bass, midrange, and treble
equalization settings designed for country, jazz, talk,
pop, rock, and classical.

Adjusting the Speakers (Balance/Fade)

AUDIO: To adjust the balance between the right
and the left speakers, press and release the AUDIO
button until BAL appears on the display. Press the knob
above the AUDIO button to extend it, then turn the
knob to move the sound toward the right or the
left speakers.

3-47

-------------------------------------------------------------------------------------------------------------------------------------------------------------


Content      ..     7      8      9      10     ..