Oldsmobile Alero (2004 year). Instruction - part 8


  Index      Oldsmobile     Oldsmobile Alero (2004 year) - instruction in english


Search            copyright infringement  


Content      ..     6      7      8      9     ..


Oldsmobile Alero (2004 year). Instruction - part 8


-------------------------------------------------------------------------------------------------------------------------------------------------------------

Delayed Headlamps

The delayed headlamps feature will continue to
illuminate the headlamps for 20 seconds after the key is
turned to OFF, then the headlamps will automatically
turn off.

To override the 20 second delayed headlamp feature
while it is active turn the turn signal/multifunction
lever up one position and then back to AUTO.

Fog Lamps

If your vehicle has this feature, the button for your fog
lamps is located on the instrument panel, to the left
of the steering wheel, beside the instrument panel
brightness thumbwheel.

When using the fog lamps, the ignition must be on as
well as the parking lamps or the low-beam headlamps.
Press the button to turn the fog lamps on and off.
An indicator light on the button will glow while the fog
lamps are on.

The fog lamps will turn off while the high-beam
headlamps are turned on.

Interior Lamps

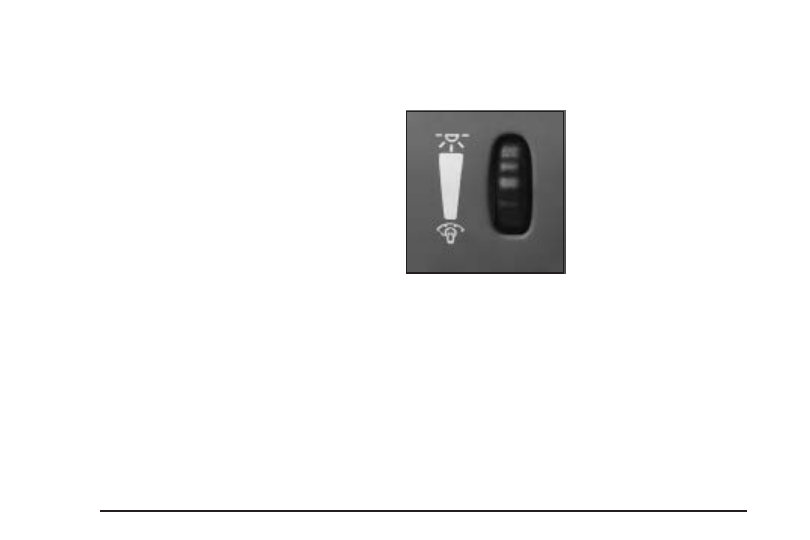
Instrument Panel Brightness

The thumbwheel for this
feature is located on the
instrument panel to the left
of the steering wheel.

Move the thumbwheel up to brighten the lights and
down to dim them.

3-16

-------------------------------------------------------------------------------------------------------------------------------------------------------------

-------------------------------------------------------------------------------------------------------------------------------------------------------------

Entry/Exit Lighting

The lamps inside your vehicle will go on when you open
any door. These lamps will fade out after about
10 seconds after all of the doors have been closed or
when the ignition is turned to ON. These lamps will also
go on when you press the trunk release, unlock
symbol button or the horn symbol on the remote keyless
entry system transmitter (if equipped).

The lamps inside your vehicle will stay on for about
10 seconds after your key is removed from the ignition
to provide an illuminated exit.

Dome Lamp

The switch on this lamp has three positions. The ON
position will turn on the light. The DOOR position
will turn on the light whenever a door is opened or when
the instrument panel brightness thumbwheel is moved
up. The OFF position will shut off the lamp completely,
even when a door is opened. If your vehicle is
equipped with a sunroof, the dome lamp also has
reading lamps for the rear seat passengers. Press the
left switch for the left reading lamp and the right
switch for the right reading lamp.

Trunk Lamp

The trunk lamp comes on when you open your trunk.

Battery Run-Down Protection

Your vehicle has a battery run-down protection feature
designed to protect your vehicle’s battery.

When any interior lamp (trunk, mirror reading lamps,
dome lamp or glove box) is left on when the ignition is
turned off, the battery saver system will automatically
shut the lamp off after 20 minutes. This will avoid
draining the battery.

To reactivate the interior lamps, do one of the following:

Lift the driver’s door handle,

open any door or

press any remote keyless entry transmitter button (if
equipped),

press the power door lock switch,

press the remote trunk release or

turn the lamp that was left on to off and then to on
again.

3-17

-------------------------------------------------------------------------------------------------------------------------------------------------------------

-------------------------------------------------------------------------------------------------------------------------------------------------------------

Accessory Power Outlets

With accessory power outlets you can plug in auxiliary
electrical equipment such as a cellular telephone or
CB radio.

The accessory power outlet is located to the left of the
glovebox on the lower side of the instrument panel
and behind a flip-out door.

Notice: Leaving electrical equipment on for
extended periods will drain the battery. Always turn
off electrical equipment when not in use and do
not plug in equipment that exceeds the maximum
amperage rating.

Certain electrical accessories may not be compatible
with the accessory power outlet and could result
in blown vehicle or adapter fuses. If you experience a
problem, see your dealer for additional information
on accessory power outlets.

Notice: Adding any electrical equipment to your
vehicle may damage it or keep other components
from working as they should. The repairs would not
be covered by your warranty. Check with your
dealer before adding electrical equipment.

When adding electrical equipment, be sure to follow the
proper installation instructions included with the
equipment.

Notice: Improper use of the power outlet can cause
damage not covered by your warranty. Do not
hang any type of accessory or accessory bracket
from the plug because the power outlets are
designed for accessory power plugs only.

3-18

-------------------------------------------------------------------------------------------------------------------------------------------------------------

-------------------------------------------------------------------------------------------------------------------------------------------------------------

Ashtrays and Cigarette Lighter

To use the lighter, push it in all the way and let go.

Notice: If you put papers or other flammable items
in the ashtray, hot cigarettes or other smoking
materials could ignite them and possibly damage
your vehicle. Never put flammable items in the
ashtray.

Notice: Holding a cigarette lighter in while it is
heating will not allow the lighter to back away from
the heating element when it is hot. Damage from
overheating may occur to the lighter or heating
element. Do not hold a cigarette lighter in while it is
heating.

Climate Controls

Climate Control System

With this system you can control the heating, cooling
and ventilation for your vehicle.

Operation

To change the current mode, select one of the following:

H

(Vent): This mode directs air to the instrument

panel outlets.

)

(Bi-Level): This mode directs half of the air to the

instrument panel outlets, and then directs most of
the remaining air to the floor outlets. Some air may be
directed toward the side windows.

3-19

-------------------------------------------------------------------------------------------------------------------------------------------------------------

-------------------------------------------------------------------------------------------------------------------------------------------------------------

A

(Floor): This mode directs most of the air to the floor

outlets with some air directed to the side windows.

The right knob can also be used to select defog or defrost
modes. Information on defogging and defrosting can be
found later in this section.

9

(Fan): Turn the left knob clockwise or

counterclockwise to increase or decrease the fan speed.

:

(Outside Air): Press this button to turn the outside

air mode on or off. When this mode is on, outside air will
circulate throughout your vehicle. The outside air mode
can be used with all modes, but it cannot be used with the
recirculation mode.

?

(Recirculation): This mode keeps outside air from

coming in the vehicle. It can be used to prevent outside
air and odors from entering your vehicle or to help heat or
cool the air inside your vehicle more quickly. Press this
button to turn the recirculation mode on or off. The
air-conditioning compressor will come on. The
recirculation mode cannot be used with the outside air
mode. Recirculation is not available when in the defog or
defrost modes or when the fan is off.

When you switch to the defog or defrost modes the
system will automatically move from recirculation to
outside air. When you move the mode knob back to
another mode, the system will move back into
recirculation. When the car is turned off and back on the
system will default to outside air automatically.

Temperature Control: Turn the center knob clockwise
or counterclockwise to instructionly increase or decrease
the temperature inside your vehicle.

When it’s cold outside 0°F (

18°C) or lower, use the

engine coolant heater, if equipped, to provide warmer air
faster to your vehicle. An engine coolant heater warms
the coolant that the engine uses to provide heat to
warm the inside of your vehicle. For more information,
see Engine Coolant Heater on page 2-20.

A/C (Air Conditioning): Press this button to turn the
air-conditioning system on or off. When A/C is pressed,
an indicator light in the button will come on to let you
know that air conditioning is activated.

The fan knob must be set to a speed for the air
conditioning to operate.

3-20

-------------------------------------------------------------------------------------------------------------------------------------------------------------

-------------------------------------------------------------------------------------------------------------------------------------------------------------

On hot days, open the windows to let hot inside air
escape; then close them. This helps to reduce the time
it takes for your vehicle to cool down. It also helps
the system to operate more efficiently.

For quick cool down on hot days:

1. Select the vent mode.

2. Select the highest fan speed.

3. Select A/C.

4. Select the recirculation mode.

5. Select the coolest temperature.

Using these settings together for long periods of time
may cause the air inside of your vehicle to become too
dry. To prevent this from happening, after the air in
your vehicle is cooled, turn the recirculation mode off.

The air-conditioning system removes moisture from
the air, so you may sometimes notice a small amount of
water dripping underneath your vehicle while idling or
after turning off the engine. This is normal.

Defogging and Defrosting

Fog on the inside of windows is a result of high humidity
(moisture) condensing on the cool window glass. This
can be minimized if the climate control system is
used properly. There are two modes to choose from to
clear fog or frost from your windshield. Use the

defog mode to clear the windows of fog or moisture and
warm the passengers. Use the defrost mode to
remove fog or frost from the windshield more quickly.

Turn the right knob to select the defog or defrost mode.

-

(Defog): This mode directs half of the air to the

windshield and most of the remaining air to the
floor outlets with a small amount directed at the side
windows. When you select this mode, the system turns
off recirculation and runs the air-conditioning
compressor unless the outside temperature is at or
below freezing. The recirculation mode cannot be
selected while in the defog mode. Do not drive the
vehicle until all the windows are clear.

1

(Defrost): This mode directs most of the air to the

windshield with some air directed to the floor outlets. In
this mode, the system will automatically turn off
recirculation and run the air-conditioning compressor,
unless the outside temperature is at or below freezing.
Recirculation cannot be selected while in the
defrost mode.

3-21

-------------------------------------------------------------------------------------------------------------------------------------------------------------

-------------------------------------------------------------------------------------------------------------------------------------------------------------

Rear Window Defogger

The rear window defogger uses a warming grid to
remove fog from the rear window.

<

Rear: Press this button to turn the rear window

defogger on or off. An indicator light in the button
will come on to let you know that the rear window
defogger is activated. Be sure to clear as much snow
from the rear window as possible.

The rear window defogger will turn off about 10 minutes
after the button is pressed. If turned on again, the
defogger will only run for about five minutes before
turning off. The defogger can also be turned off turning
off the engine.

Notice: Don’t use anything sharp on the inside of
the rear window. If you do, you could cut or damage
the warming grid, and the repairs wouldn’t be
covered by your warranty. Do not attach a temporary
vehicle license, tape, a decal or anything similar
to the defogger grid.

Outlet Adjustment

Use the sliding levers on the air outlets located in the
center and on the sides of the instrument panel, to
change the direction of the airflow.

Operation Tips

Clear away any ice, snow or leaves from the air
inlets at the base of the windshield that may
block the flow of air into your vehicle.

Use of non-GM approved hood deflectors may
adversely affect the performance of the system.

Keep the path under the front seats clear of objects
to help circulate the air inside of your vehicle more
effectively.

3-22

-------------------------------------------------------------------------------------------------------------------------------------------------------------

-------------------------------------------------------------------------------------------------------------------------------------------------------------

When an objectionable odor outside the vehicle is
encountered, use the recirculation mode, with the
temperature knob at a comfortable setting to prevent
the odor from entering the vehicle through the
ventilation system. This can be helpful when driving
through a long tunnel with poor ventilation.
However, extended usage of this mode in cold or
cool weather can cause window fogging.

Warning Lights, Gages and
Indicators

This part describes the warning lights and gages that may
be on your vehicle. The pictures will help you locate them.

Warning lights and gages can signal that something is
wrong before it becomes serious enough to cause
an expensive repair or replacement. Paying attention to
your warning lights and gages could also save you
or others from injury.

Warning lights come on when there may be or is a
problem with one of your vehicle’s functions. As you will
see in the details on the next few pages, some
warning lights come on briefly when you start the
engine just to let you know they are working. If you are
familiar with this section, you should not be alarmed
when this happens.

Gages can indicate when there may be or is a problem
with one of your vehicle’s functions. Often gages
and warning lights work together to let you know when
there is a problem with your vehicle.

When one of the warning lights comes on and stays on
when you are driving, or when one of the gages shows
there may be a problem, check the section that tells you
what to do about it. Please follow this instruction’s advice.
Waiting to do repairs can be costly — and even
dangerous. So please get to know your warning lights
and gages. They are a big help.

3-23

-------------------------------------------------------------------------------------------------------------------------------------------------------------

-------------------------------------------------------------------------------------------------------------------------------------------------------------

Instrument Panel Cluster

Your instrument panel cluster is designed to let you know at a glance how your vehicle is running. You’ll know how fast
you’re going, how much fuel you’re using, and many other things you’ll need to drive safely and economically.

Your vehicle has this cluster or one very similar to it. It includes indicator warning lights and gages that are explained on
the following pages. Be sure to read about them.

United States Automatic Transaxle Cluster shown, Instruction Transaxle and Canada Clusters similar

3-24

-------------------------------------------------------------------------------------------------------------------------------------------------------------

-------------------------------------------------------------------------------------------------------------------------------------------------------------

Speedometer and Odometer

Your speedometer lets you see your speed in both
miles per hour (mph) and kilometers per hour (km/h).

Your odometer shows how far your vehicle has
been driven, in either miles (used in the United States)
or kilometers (used in Canada).

Your vehicle has a tamper resistant odometer. The
digital odometer will read 999,999 if someone tries to
turn it back.

Repair or replacement of your instrument panel cluster
should only be performed by a qualified GM service
center.

Trip Odometer

The trip odometer can tell you how far you have driven
since you last reset it.

The reset button is located below the tachometer. To
reset the trip odometer to zero, press and hold briefly the
ribbed side of the button while the trip odometer is
displayed. Also, by pressing this button for less than one
second you can toggle between the odometer and the
trip odometer.

Tachometer

The tachometer shows your engine speed in revolutions
per minute (rpm).

Notice: If you operate the engine with the
tachometer in the shaded warning area, your vehicle
could be damaged, and the damages would not
be covered by your warranty. Do not operate
the engine with the tachometer in the shaded
warning area.

3-25

-------------------------------------------------------------------------------------------------------------------------------------------------------------

-------------------------------------------------------------------------------------------------------------------------------------------------------------

Safety Belt Reminder Light

When the key is turned to ON or START, a chime will
come on for several seconds to remind people to fasten
their safety belts, unless the driver’s safety belt is
already buckled.

The safety belt light will
also come on and stay on
for several seconds, then it
will flash for several more.

If the driver’s belt is already buckled, neither the chime
nor the light will come on.

Air Bag Readiness Light

There is an air bag readiness light on the instrument
panel, which shows the air bag symbol. The system
checks the air bag’s electrical system for malfunctions.
The light tells you if there is an electrical problem.
The system check includes the air bag modules, the
wiring and the crash sensing and diagnostic module. For
more information on the air bag system, see
Supplemental Restraint System (SRS) on page 1-54.

This light will come on
when you start your
vehicle, and it will flash for
a few seconds. Then
the light should go out.
This means the system is
ready.

3-26

-------------------------------------------------------------------------------------------------------------------------------------------------------------

-------------------------------------------------------------------------------------------------------------------------------------------------------------

If the air bag readiness light stays on after you start the
vehicle or comes on when you are driving, your air
bag system may not work properly. Have your vehicle
serviced right away.

{

CAUTION:

If the air bag readiness light stays on after you
start your vehicle, it means the air bag system
may not be working properly. The air bags in
your vehicle may not inflate in a crash, or they
could even inflate without a crash. To help
avoid injury to yourself or others, have your
vehicle serviced right away if the air bag
readiness light stays on after you start your
vehicle.

The air bag readiness light should flash for a few
seconds when you turn the ignition key to ON. If the
light doesn’t come on then, have it fixed so it will
be ready to warn you if there is a problem.

Charging System Light

The charging system light
will come on when you
turn on the ignition, but the
engine is not running, as
a check to show you it
is working.

When the engine is running, the light should go out.

If it stays on, or comes on while you are driving and you
hear a chime, you may have a problem with the
electrical charging system. It could indicate that you
have a loose generator drive belt or another electrical
problem. Have it checked right away. Driving while
this light is on could drain your battery.

If you must drive a short distance with the light on, be
certain to turn off all your accessories, such as the radio
and air conditioner.

3-27

-------------------------------------------------------------------------------------------------------------------------------------------------------------

-------------------------------------------------------------------------------------------------------------------------------------------------------------

Up-Shift Light

If your instruction transaxle
vehicle has this feature
this light comes on
when you need to shift to
the next higher gear.
See Instruction Transaxle
Operation 
on page 2-25.

Brake System Warning Light

Your vehicle’s hydraulic brake system is divided into two
parts. If one part isn’t working, the other part can still
work and stop you. For good braking, though, you need
both parts working well.

If the warning light comes on, there is a brake problem.
Have your brake system inspected right away.

This light should come on briefly when you turn the
ignition key to ON. If it doesn’t come on then, have it
fixed so it will be ready to warn you if there’s a problem.

When the ignition is on, the brake system warning
light will also come on when you set your parking brake.
The light will stay on if your parking brake doesn’t
release fully. If it stays on after your parking brake is
fully released, it means you have a brake problem.

If the light comes on while you are driving, pull off the
road and stop carefully. You may notice that the pedal is
harder to push. Or, the pedal may go closer to the
floor. It may take longer to stop. If the light is still on,
have the vehicle towed for service. See Towing
Your Vehicle 
on page 4-31.

United States

Canada

3-28

-------------------------------------------------------------------------------------------------------------------------------------------------------------

-------------------------------------------------------------------------------------------------------------------------------------------------------------

{

CAUTION:

Your brake system may not be working properly
if the brake system warning light is on. Driving
with the brake system warning light on can lead
to an accident. If the light is still on after you
have pulled off the road and stopped carefully,
have the vehicle towed for service.

Anti-Lock Brake System Warning
Light

If your vehicle has the anti-lock brake system, the light
will come on when your engine is started and may
stay on for several seconds. That’s normal.

If the light stays on, turn the ignition to OFF. Or, if the light
comes on when you’re driving, stop as soon as possible
and turn the ignition off. Then start the engine again to
reset the system. If the light still stays on, or comes on
again while you’re driving, your vehicle needs service. If
the regular brake system warning light isn’t on, you still
have brakes, but you don’t have anti-lock brakes. If the
regular brake system warning light is also on, you don’t
have anti-lock brakes and there’s a problem with your
regular brakes. See Brake System Warning Light on
page 3-28
.

The anti-lock brake system warning light will come on
briefly when you turn the ignition key to ON. This is
normal. If the light doesn’t come on then, have it fixed
so it will be ready to warn you if there is a problem.

United States

Canada

3-29

-------------------------------------------------------------------------------------------------------------------------------------------------------------

-------------------------------------------------------------------------------------------------------------------------------------------------------------

Enhanced Traction System Warning
Light

If your vehicle has the
Enhanced Traction System
(ETS), this warning light
should come on briefly as
you start the engine.

If the warning light doesn’t come on then, have it fixed
so it will be ready to warn you if there’s a problem.

If the warning light stays on, or comes on when you’re
driving, there may be a problem with your Enhanced
Traction System and your vehicle may need service.
When this warning light is on, the system will not
limit wheel spin. Adjust your driving accordingly.

The Enhanced Traction System warning light may come
on for the following reasons:

If you turn the system off by pressing the ETS
button on the center console near the gear
shift lever, the warning light will come on and stay
on. To turn the system back on, press the button
again. The warning light should go off. See
Enhanced Traction System (ETS) on page 4-9 for
more information.

If the traction control system is affected by an
engine-related problem, the system will turn off and
the warning light will come on.

If the vehicle is driven on an extremely rough road,
the warning light may come on momentarily but will
go off again when the vehicle leaves the rough
surface.

If the Enhanced Traction System warning light comes
on and stays on for an extended period of time when the
system is turned on and the parking brake is fully
released, your vehicle needs service.

3-30

-------------------------------------------------------------------------------------------------------------------------------------------------------------

-------------------------------------------------------------------------------------------------------------------------------------------------------------

Enhanced Traction System Active
Light

If your vehicle has the
Enhanced Traction System
(ETS), this light will
come on when the system
is limiting wheel spin.

Slippery road conditions may exist if the Enhanced
Traction System active light comes on, so adjust your
driving accordingly.

The light will stay on for a few seconds after the
Enhanced Traction System stops limiting wheel spin.

The Enhanced Traction System active light also comes
on briefly when you turn the ignition key to ON. If
the light doesn’t come on then, have it fixed so it will be
there to tell you when the system is active.

Engine Coolant Temperature Gage

This gage shows the
engine coolant
temperature. If the gage
pointer moves into the red
area, the light comes
on and you hear a chime,
your engine is too hot.
It means that your engine
coolant has overheated.

See Engine Overheating on page 5-26.

3-31

-------------------------------------------------------------------------------------------------------------------------------------------------------------


Content      ..     6      7      8      9     ..