Volvo C70 Convertible (2010 year). Manual - part 6
04 Interior
Front seats
04
``
93
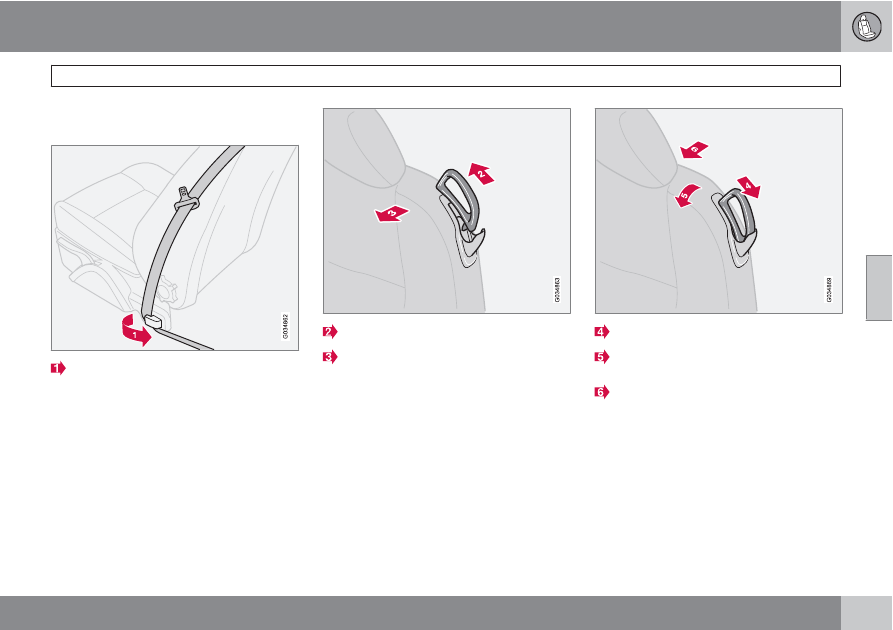
Manual seat
Moving the seat forward:
Remove the seat belt from its guide (see
page 19).
Pull up the handle.
Hold the handle up and move it forward
slightly until the backrest begins to move.
Press the handle down.
Fold the backrest forward until it locks in
position.
Move the seat forward.