Volkswagen Jetta / Jetta Hybrid. Service manual - part 15
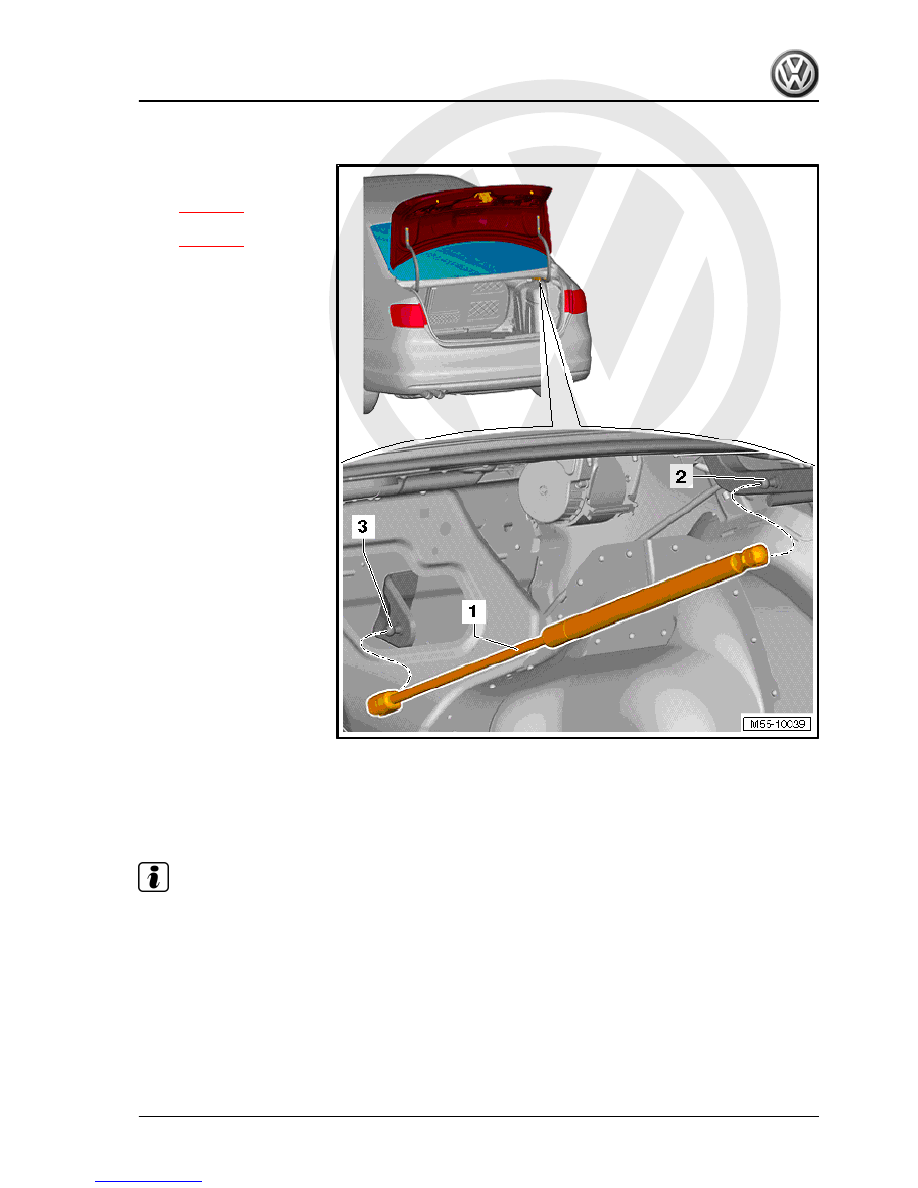
1 - Gas strut
❑ Removing and installing
⇒ page 57
❑ Releasing gas
⇒ page 60
2 - Ball-head pin
❑ Only at right hinge
❑ Cannot be separated
from hinge
3 - Retaining bracket with ball-
head pin
❑ On rear wall
❑ Cannot be separated
from rear wall
2.5
Removing and installing gas strut
2.5.1
Removing
Note
The rear lid must be supported if a gas strut is removed.
Jetta 2011 ➤ , Jetta Hybrid 2013 ➤
2. Rear lid
57