Volkswagen New Beetle. Manual - part 2329


  Index      Volkswagen     Volkswagen New Beetle 1998-2008 year - service repair manual


Search            


Content   ..  2327  2328  2329  2330   ..


Volkswagen New Beetle. Manual - part 2329


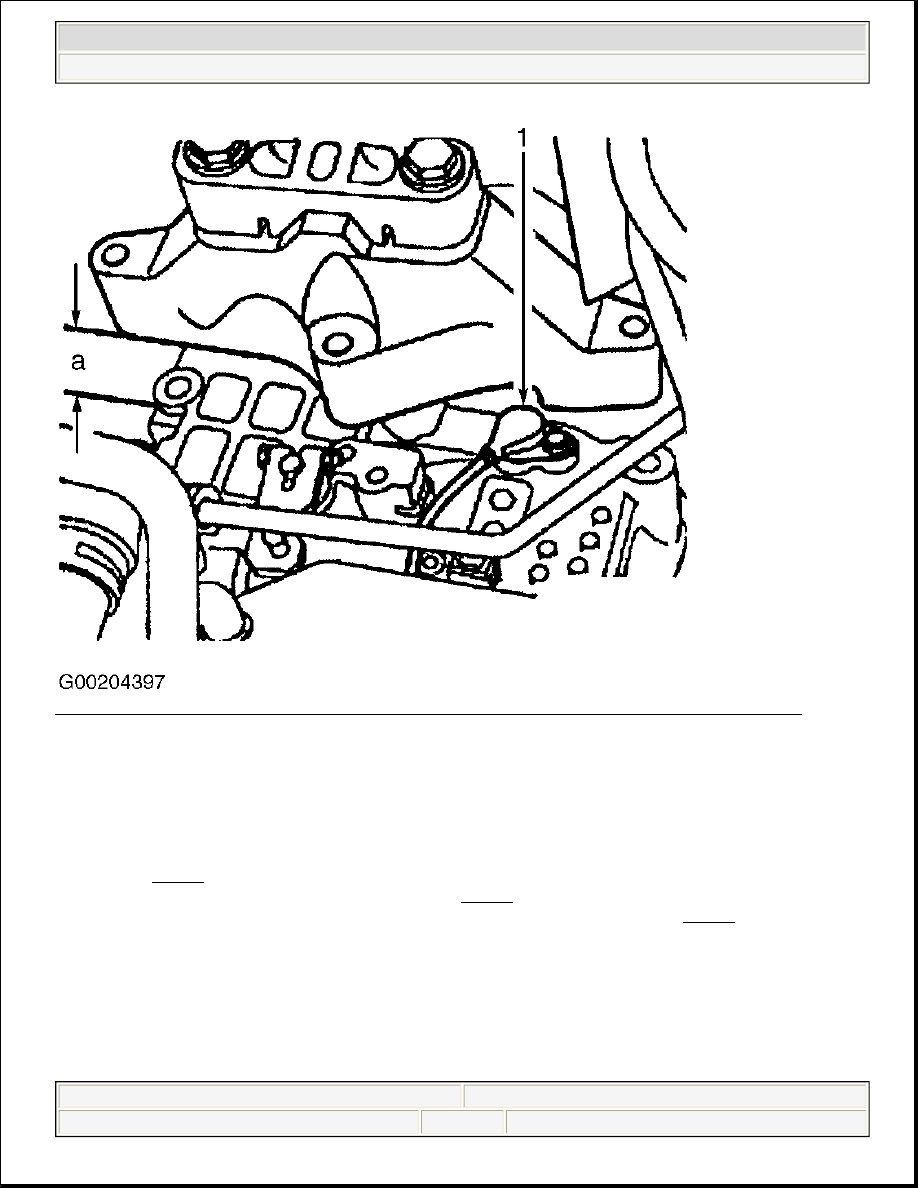
Fig. 53: Lowering Transaxle To Remove Sensor (01M Transaxle - Golf, GTI, Jetta & New Beetle) 
Courtesy of VOLKSWAGEN UNITED STATES, INC. 

Removal & Installation (01V Transaxle) 

Remove left wheel. On vehicles equipped with TDI engine, remove left drive axle noise insulation from wheel 
housing. See Fig. 10 . On all vehicles, remove left axle shaft protective plate. Pull connector (A) off sensor. 
Press down sensor retaining catch and turn (arrow). See Fig. 54 . Pull out sensor. To install, reverse removal 
procedure. Replace "O" rings (arrows) and lubricate with gear oil before inserting. See Fig. 55 . Install sensor 
and engage retaining catch on bearing bracket for flange shaft. Install left axle shaft protective plate. On 
vehicles equipped with TDI engine, install noise insulation at wheel housing. On all vehicles, install left wheel. 

NOTE:

In the following procedures, letters in parenthesis are shown in illustrations. 


2003 Volkswagen New Beetle GLS 

2001-04 AUTOMATIC TRANSMISSIONS Servicing - 01M & 01V


Helpmelearn Repair Manuals 


Wednesday, December 14, 2005 8:59:38 AM

Page 62 

© 2004 Mitchell Repair Information Company, LLC. 

Fig. 54: Removing Vehicle Speed Sensor (01V Transaxle) 
Courtesy of VOLKSWAGEN UNITED STATES, INC.


2003 Volkswagen New Beetle GLS 

2001-04 AUTOMATIC TRANSMISSIONS Servicing - 01M & 01V


Helpmelearn Repair Manuals 


Wednesday, December 14, 2005 8:59:38 AM

Page 63 

© 2004 Mitchell Repair Information Company, LLC. 

Fig. 55: Installing Vehicle Speed Sensor (01V Transaxle) 
Courtesy of VOLKSWAGEN UNITED STATES, INC. 

VALVE BODY ASSEMBLY 

Removal & Installation (01M Transaxle) 

1. Place container under the transaxle. Remove level plug (1). Remove plug seal from plug. Remove 

overflow pipe (2) and allow ATF to drain. For Cabrio, see Fig. 63 . For Golf, Jetta, GTI and New Beetle, 

NOTE:

In the following procedures, numbers in parenthesis are shown in illustrations. 

NOTE:

Code letters are stamped on a metal tab located on valve body for component 
identification. Metal tab must remain on the valve body. See Fig. 62 . 

WARNING:

Do not run engine or tow vehicle with oil pan removed or when there is no 
ATF in transaxle. 


2003 Volkswagen New Beetle GLS 

2001-04 AUTOMATIC TRANSMISSIONS Servicing - 01M & 01V


Helpmelearn Repair Manuals 


Wednesday, December 14, 2005 8:59:38 AM

Page 64 

© 2004 Mitchell Repair Information Company, LLC. 

see Fig. 64 . Screw overflow pipe in onto stop.  

2. Remove oil pan bolts, oil pan, gasket and ATF screen. To remove conductor strip, place Pry Bar (3373) 

onto stop under the solenoid valve plug. Pull plug off with pry bar in direction of arrow. Remove bolt (1). 
See Fig. 56 .  

3.  

Remove valve body bolts and valve body. Shift selector lever/shaft into "1" position. Pull manual selector 
valve out until it is just possible to unhook the operating rod (2). See Fig. 57 . Secure manual selector 
valve so that it cannot fall out. 

Fig. 56: Removing Conductor Strip 
Courtesy of VOLKSWAGEN UNITED STATES, INC.

NOTE:

When removing the valve body, the manual selector valve (1) remains in 
valve body. See Fig. 57 . Do not interchange manual selector valves of 
valve bodies. 


2003 Volkswagen New Beetle GLS 

2001-04 AUTOMATIC TRANSMISSIONS Servicing - 01M & 01V


Helpmelearn Repair Manuals 


Wednesday, December 14, 2005 8:59:38 AM

Page 65 

© 2004 Mitchell Repair Information Company, LLC. 


Content   ..  2327  2328  2329  2330   ..