Volkswagen Golf Variant / Jetta. Manual - part 821
♦ Left headlight - anti-clockwise
♦ Right headlight – clockwise
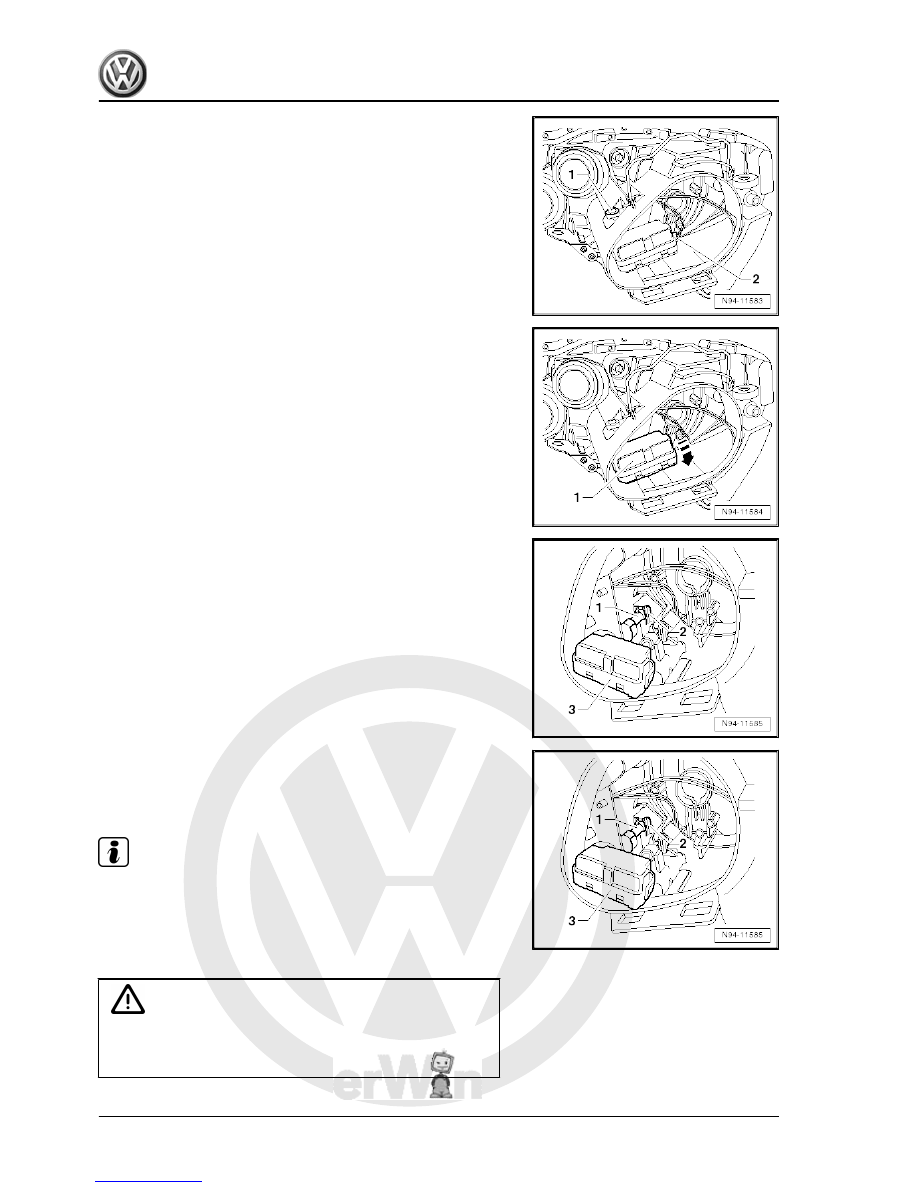
– Then lift adjuster screw -1- slightly with a suitable screwdriver
and pull it upwards out of headlight housing.
– Disconnect connector -2- from right headlight range control
motor -V49- .
– Swivel right headlight range control motor -V49- -1- to unlock
in direction of -arrow- to stop.
– Tilt right headlight range control motor -V49- -3- so that ball
head -1- can be swivelled upwards out of ball head mounting
-2-.
– Take right headlight range control motor -V49- out of headlight
housing.
Installing
Carry out installation in the reverse sequence, noting the follow‐
ing:
– Install right headlight range control motor -V49- into headlight.
– Reconnect connector.
– Carefully swivel ball head -1- from above in ball head mounting
-2-.
– Lock right headlight range control motor -V49- -3- by turning it
anti-clockwise to stop.
Note
When inserting adjuster screw for vertical adjustment of dipped
beam headlight, ensure that O-ring is present and in the right po‐
sition.
– Insert adjuster screw for vertical adjustment of dipped beam
headlight in headlight housing again.
Caution
When installing cover cap, ensure cap is seated correctly. The
ingress of water will lead to permanent damage to the head‐
light.
250