Index Peugeot Peugeot 206 CC - service manual 2006 year in english
Search
Content .. 1 2 3 ..
Peugeot 206 CC (2006 year). Manual - part 1
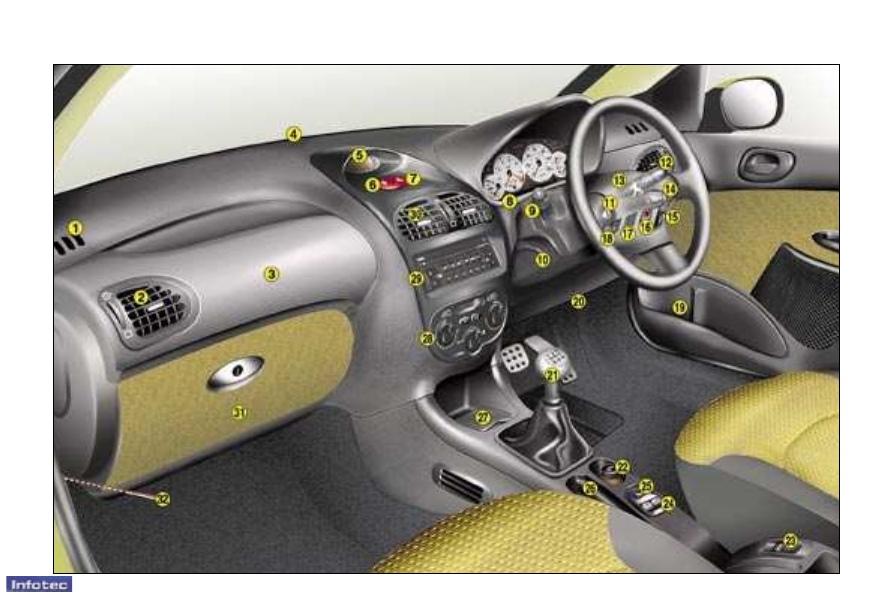
4 - Familiarisation
01-01-2006