Hyundai Veloster (2019 year). Manual - part 20

WINTER DRIVING
The severe weather conditions of
Snow tires
Tire chains
winter quickly wear out tires and
■ Wire type chain (Only for 215/45R17)
cause other problems. To minimize
WARNING
winter driving problems, you should
take the following suggestions:
Snow tires should be equivalent
in size and type to the vehicle’s
standard tires. Otherwise, the
Snow or Icy Conditions
safety and handling of your
You need to keep sufficient distance
vehicle may be adversely affect-
between your vehicle and the vehicle
ed.
in front of you.
Apply the brakes gently. Speeding,
If you mount snow tires on your vehi-
rapid acceleration, sudden brake
cle, make sure to use radial tires of
OJS058036
applications, and sharp turns are
the same size and load range as the
■ Fabric type chain
5
potentially very hazardous practices.
original tires. Mount snow tires on all
During deceleration, use engine
four wheels to balance your vehicle’s
braking to the fullest extent. Sudden
handling in all weather conditions.
brake applications on snowy or icy
The traction provided by snow tires
roads may cause the vehicle to skid.
on dry roads may not be as high as
your vehicle's original equipment
To drive your vehicle in deep snow, it
may be necessary to use snow tires
tires. Check with the tire dealer for
maximum speed recommendations.
or to install tire chains on your tires.
Always carry emergency equipment.
Some of the items you may want to
i
Information
carry include tire chains, tow straps
Do not install studded tires without
OJS058126
or chains, a flashlight, emergency
first checking local, state and munici-
flares, sand, a shovel, jumper cables,
Since the sidewalls of radial tires are
pal regulations for possible restric-
a window scraper, gloves, ground
thinner than other types of tires, they
tions against their use.
cloth, coveralls, a blanket, etc.
may be damaged by mounting some
types of tire chains on them.
5-123

Driving your vehicle
Therefore the use of snow tires is
Chain installation
WARNING
preferred over the use of tire chains.
When installing tire chains, follow the
Do not mount tire chains on vehicles
manufacturer's instructions and
The use of tire chains may
equipped with aluminum wheels; if
mount them as tightly possible. Drive
adversely affect vehicle han-
unavoidable, use a wire or fabric type
slowly (less than 20 mph (30 km/h))
dling:
snow chain.
with chains installed. If you hear the
• Drive less than
20 mph
chains contacting the body or chas-
If the road and weather conditions
(30 km/h) or the chain manu-
sis, stop and tighten them. If they still
require the use of tire chains, be sure
facturer's recommended speed
make contact, slow down until the
to use tire chains that have been
limit, whichever is lower.
noise stops. Remove the tire chains
properly selected for the size of tire
• Drive carefully and avoid
as soon as you begin driving on
on your HYUNDAI vehicle.
bumps, holes, sharp turns,
cleared roads.
Be sure to follow the guidelines and
and other road hazards, which
When mounting snow chains, park
installation instructions provided
may cause the vehicle to
from the tire chain manufacturer.
the vehicle on level ground away
bounce.
from traffic. Turn on the vehicle
Damage to your vehicle caused by
• Avoid sharp turns or locked
Hazard Warning Flasher and place a
improper tire chain use is not cov-
wheel braking.
triangular emergency warning device
ered by your vehicle manufacturer’s
behind the vehicle
(if available).
warranty.
Always place the vehicle in P (Park),
i
Information
apply the parking brake and turn off
the engine before installing snow
• Install tire chains on both left and
right front tires. It should be noted
chains.
that installing tire chains on the
tires will provide a greater driving
force, but will not prevent side
skids.
• Do not install studded tires without
first checking local, state and
municipal regulations for possible
restrictions against their use.
5-124

NOTICE
• Use wire chains less than 0.47
Change to "winter weight" oil if
inch (12 mm) wide to prevent
necessary
- When using tire chains:
damage to the chain's connec-
In some climates it is recommended
•
Make sure to use the right size
tion.
that a lower viscosity "winter weight"
and type of snow chains for your
oil be used during cold weather. See
tires. Incorrect snow chains can
Winter Precautions
chapter
8 for recommendations. If
cause damage to the vehicle
you aren't sure what weight oil you
body and suspension. Damage
Use high quality ethylene glycol
should use, consult an authorized
to your vehicle caused by
coolant
HYUNDAI dealer.
improper tire chain use is not
Your vehicle is delivered with high
covered by your vehicle manu-
quality ethylene glycol coolant in the
facturer's warranty.
Check battery and cables
cooling system. It is the only type of
•
If you hear noise caused by
coolant that should be used because
Winter puts additional burdens on
chains contacting the body,
it helps prevent corrosion in the cool-
the battery system. Visually inspect
retighten the chain to prevent
ing system, lubricates the water
the battery and cables as described
5
contact with the vehicle body.
pump and prevents freezing. Be sure
in chapter 7. The level of charge in
to replace or replenish your coolant
your battery can be checked by an
•
To prevent body damage,
in accordance with the maintenance
authorized HYUNDAI dealer or a
retighten the chains after driving
schedule in chapter 7. Before winter,
service station.
0.3~0.6 miles (0.5~1.0 km).
have your coolant tested to assure
•
Do not use tire chains on vehi-
that its freezing point is sufficient for
cles equipped with aluminum
Check spark plugs and ignition
the temperatures anticipated during
wheels. If unavoidable, use a
system
the winter.
wire or fabric type snow chain.
Inspect your spark plugs as
When using tire chains, install
described in chapter 7 and replace
the right type chain according to
them if necessary. Also check all
the below tire sizes.
ignition wiring and components to be
- 215/45R17 : Wire type chain
sure they are not cracked, worn or
damaged in any way.
- 225/40R18 : Fabric type chain
(Autosock)
5-125
Driving your vehicle
Use approved window washer
Do not let ice and snow accu-
To keep locks from freezing
anti-freeze in system
mulate underneath
To keep the locks from freezing,
To keep the water in the window
Under some conditions, snow and
squirt an approved de-icer fluid or
washer system from freezing, add an
ice can build up under the fenders
glycerine into the key opening. If a
approved window washer anti-freeze
and interfere with the steering. When
lock is covered with ice, squirt it with
solution in accordance with instruc-
driving in severe winter conditions
an approved de-icing fluid to remove
tions on the container. Window wash-
where this may happen, you should
the ice. If the lock is frozen internally,
er anti-freeze is available from an
periodically check underneath the
you may be able to thaw it out by
authorized HYUNDAI dealer and
car to be sure the movement of the
using a heated key. Handle the heat-
most auto parts outlets. Do not use
front wheels and the steering com-
ed key with care to avoid injury.
engine coolant or other types of anti-
ponents is not obstructed.
freeze as these may damage the
paint finish.
Don't place foreign objects or
materials in the engine com-
Do not let your parking brake
partment
freeze
Placement of foreign object or mate-
Under some conditions your parking
rials which prevent cooling of the
brake can freeze in the engaged
engine, in the engine compartment,
position. This is most likely to happen
may cause a failure or combustion.
when there is an accumulation of
The manufacturer is not responsible
snow or ice around or near the rear
for the damage caused by such
brakes or if the brakes are wet. If
placement.
there is a risk the parking brake may
freeze, apply it only temporarily while
you put the gear selector lever in P
and block the rear wheels so the car
cannot roll. Then release the parking
brake.
5-126

VEHICLE LOAD LIMIT
Two labels on your driver's door sill
Cargo Weight
GVW (Gross Vehicle Weight)
show how much weight your vehicle
This figure includes all weight added
This is the Base Curb Weight plus
was designed to carry: the Tire and
to the Base Curb Weight, including
actual Cargo Weight plus passen-
Loading Information Label and the
cargo and optional equipment.
gers.
Certification Label.
Before loading your vehicle, familiar-
GAW (Gross Axle Weight)
GVWR (Gross Vehicle Weight
ize yourself with the following terms
Rating)
for determining your vehicle's weight
This is the total weight placed on
ratings, from the vehicle's specifica-
each axle (front and rear) - including
This is the maximum allowable
tions and the Certification Label:
vehicle curb weight and all payload.
weight of the fully loaded vehicle
(including all options, equipment,
passengers and cargo). The GVWR
Base Curb Weight
GAWR (Gross Axle Weight Rating)
is shown on the Certification Label
This is the weight of the vehicle
This is the maximum allowable
located on the driver’s door sill.
including a full tank of fuel and all
weight that can be carried by a single
5
standard equipment. It does not
axle (front or rear). These numbers
include passengers, cargo, or option-
are shown on the Certification Label.
al equipment.
The total load on each axle must
never exceed its GAWR.
Vehicle Curb Weight
This is the weight of your new vehicle
when you picked it up from your deal-
er plus any aftermarket equipment.
5-127

Driving your vehicle
Tire Loading Information Label
■ Type A
■ Type B
■ Type C
OJS058145N
OJS058146N
OJS058147N
■ Type D
■ Type E
■ Type F
OJS058148N
OJS058149N
OJS058150N
The label located on the driver's door sill gives the original tire size, cold tire pressures recommended for your
vehicle, the number of people that can be in your vehicle and vehicle capacity weight.
5-128
Vehicle capacity weight
Cargo capacity
5. Determine the combined weight of
luggage and cargo being loaded
699 lbs. (317 kg)
The cargo capacity of your vehicle
on the vehicle. That weight may
Vehicle capacity weight is the maxi-
will increase or decrease depending
not safely exceed the available
on the weight and the number of
mum combined weight of occupants
cargo and luggage load capacity
and cargo. If your vehicle is equipped
occupants and the tongue load, if
calculated in Step 4.
your vehicle is equipped with a trailer.
with a trailer, the combined weight
6. If your vehicle will be towing a trail-
includes the tongue load.
er, load from your trailer will be
Steps for determining correct
transferred to your vehicle. Consult
load limit
Seating capacity
this manual to determine how this
Total : 4 persons
1. Locate the statement "The com-
reduces the available cargo and
(Front seat : 2 persons,
bined weight of occupants and
luggage load capacity of your vehi-
Rear seat : 2 persons)
cargo should never exceed XXX
cle.
kg or XXX lbs." on your vehicle's
Seating capacity is the maximum
placard.
5
number of occupants including a
WARNING
driver, your vehicle may carry.
2. Determine the combined weight of
the driver and passengers that will
Do not overload the vehicle as
However, the seating capacity may
be reduced based upon the weight of
be riding in your vehicle.
there is a limit to the total
all of the occupants, and the weight
3. Subtract the combined weight of
weight, or load limit, including
of the cargo being carried or towed.
the driver and passengers from
occupants and cargo, the vehi-
Do not overload the vehicle as there
XXX kg or XXX lbs.
cle can carry. Overloading can
is a limit to the total weight, or load
shorten the life of the vehicle. If
4. The resulting figure equals the
limit including occupants and cargo,
the GVWR or the GAWR is
available amount of cargo and lug-
the vehicle can carry.
exceeded, parts on the vehicle
gage load capacity. For example, if
can break, and it can change
the "XXX" amount equals 1400
the handling of your vehicle.
Towing capacity
lbs. and there will be five 150 lb
These could cause you to lose
passengers in your vehicle, the
We do not recommend using this
control and result in an acci-
amount of available cargo and lug-
vehicle for trailer towing.
dent.
gage load capacity is
650 lbs.
(1400 - 750 (5 x 150) = 650 lbs.)
5-129

Driving your vehicle
Example 1
≥
+
Maximum Load
Passenger Weight
Cargo Weight
(1400 lbs.)
(150 lbs. × 2 = 300 lbs.)
(1100 lbs.)
(635 kg)
(68 kg × 2 = 136 kg)
(499 kg)
Example 2
≥
+
Maximum Load
Passenger Weight
Cargo Weight
(1400 lbs.)
(150 lbs. × 5 = 750 lbs.)
(650 lbs.)
(635 kg)
(68 kg × 5 = 340 kg)
(295 kg)
Example 3
≥
+
Maximum Load
Passenger Weight
Cargo Weight
(1400 lbs.)
(172 lbs. × 5 = 860 lbs.)
(540 lbs.)
(635 kg)
(78 kg × 5 = 390 kg)
(245 kg)
5-130

Certification label
The total weight of the vehicle,
WARNING
including all occupants, accessories,
cargo, and trailer tongue load must
Overloading
not exceed the Gross Vehicle Weight
Rating (GVWR) or the Gross Axle
• Never exceed the GVWR for
Weight Rating (GAWR). To find out
your vehicle, the GAWR for
the actual loads on your front and
either the front or rear axle
rear axles, you need to go to a weigh
and vehicle capacity weight.
station and weigh your vehicle. Be
Exceeding these ratings can
sure to spread out your load equally
affect your vehicle’s handling
on both sides of the centerline.
and braking ability, and cause
an accident.
• Do not overload your vehicle.
OBH059070
Overloading your vehicle can
5
The certification label is located on
cause heat buildup in your
the driver’s door sill at the center pil-
vehicle’s tires and possible
lar and shows the maximum allow-
tire failure, increased stop-
able weight of the fully loaded vehi-
ping distances and poor vehi-
cle. This is called the GVWR (Gross
cle handling-all of which may
Vehicle Weight Rating). The GVWR
result in a crash.
includes the weight of the vehicle, all
occupants, fuel and cargo.
This label also tells you the maxi-
mum weight that can be supported
by the front and rear axles, called
Gross Axle Weight Rating (GAWR).
5-131

Driving your vehicle
TRAILER TOWING
NOTICE
We do not recommend using this vehicle for trailer towing.
Overloading your vehicle may
cause damage. Repairs would not
be covered by your warranty. Do
not overload your vehicle.
WARNING
If you carry items inside your
vehicle
(e.g., suitcases, tools,
packages, or anything else),
they are moving as fast as the
vehicle. If you have to stop or
turn quickly, or if there is a
crash, the items will keep going
and can cause an injury if they
strike the driver or a passenger.
• Put items in the cargo area of
your vehicle. Try to spread the
weight evenly.
• Do not stack items, like suit-
cases, inside the vehicle
above the tops of the seats.
• Do not leave an unsecured
child restraint in your vehicle.
• When you carry something
inside the vehicle, secure it.
5-132
What to do in an emergency
Hazard Warning Flasher
6-2
If you Have a Flat Tire
6-14
In Case of an Emergency While Driving
6-2
With Compact Spare Tire
6-14
If the Engine Stalls While Driving
6-2
With Tire Mobility Kit (TMK)
6-20
If the Engine Stalls at a Crossroad or Crossing
6-2
Towing
6-27
If you Have a Flat Tire While Driving
6-3
Towing Service
6-27
If the Engine will not Start
6-3
Removable Towing Hook
6-28
If the Engine Doesn't Turn Over or
Emergency Towing
6-29
Turns Over Slowly
6-3
Tie-down Hook
6-30
If the Engine Turns Over Normally but
Doesn't Start
6-3
Jump Starting
6-4
If The Engine Overheats
6-6
Tire Pressure Monitoring System (TPMS)
6-8
Check Tire Pressure
6-8
Tire Pressure Monitoring System
6-9
Low Tire Pressure Telltale
6-10
6
Low Tire Pressure LCD Display with
Position Indicator
6-10
TPMS Malfunction Indicator
6-11
Changing a Tire with TPMS
6-12

What to do in an emergency
HAZARD WARNING FLASHER
IN CASE OF AN EMERGENCY
To turn the hazard warning flasher
WHILE DRIVING
on or off, press the hazard warning
flasher button. The button is located
If the Engine Stalls While
in the center fascia panel. Both the
Driving
left and right turn signal lights will
• Reduce your speed gradually,
flash simultaneously.
keeping a straight line. Move cau-
•
The hazard warning flasher oper-
tiously off the road to a safe place.
ates whether your vehicle is run-
• Turn on your hazard warning flash-
ning or not.
er.
•
The turn signals do not work when
• Try to start the engine again. If your
the hazard flasher is on.
vehicle will not start, contact an
OJS048034
authorized HYUNDAI dealer or
The hazard warning flasher serves
seek other qualified assistance.
as a warning to other drivers to exer-
cise extreme caution when approach-
If the Engine Stalls at a
ing, overtaking, or passing your vehi-
cle.
Crossroad or Crossing
It should be used whenever emer-
If the engine stalls at a crossroads or
gency repairs are being made or
crossing, if safe to do so, move the
when the vehicle is stopped near the
shift lever to the N (Neutral) position
edge of a roadway.
and then push the vehicle to a safe
location.
6-2

IF THE ENGINE WILL NOT START
If you Have a Flat Tire While
If the Engine Doesn't Turn
If the Engine Turns Over
Driving
Over or Turns Over Slowly
Normally but Doesn't Start
If a tire goes flat while you are driving:
• Be sure the shift lever is in N
Check the fuel level and add fuel if
•
Take your foot off the accelerator
(Neutral) or P (Park). The engine
necessary.
pedal and let the vehicle slow down
starts only when the shift lever is in
If the engine still does not start, have
while driving straight ahead. Do not
N (Neutral) or P (Park).
your vehicle checked by an author-
apply the brakes immediately or
• Check the battery connections to
ized HYUNDAI dealer.
attempt to pull off the road as this
be sure they are clean and tight.
may cause loss of vehicle control
• Turn on the interior light. If the light
resulting in an accident. When the
dims or goes out when you operate
vehicle has slowed to such a speed
the starter, the battery is drained.
that it is safe to do so, brake care-
fully and pull off the road. Drive off
Do not push or pull the vehicle to
the road as far as possible and park
start it. This could cause damage to
on firm, level ground. If you are on
your vehicle. See instructions for
a divided highway, do not park in
"Jump Starting" provided in this
the median area between the two
chapter.
traffic lanes.
6
•
When the vehicle is stopped, press
CAUTION
the hazard warning flasher button,
move the shift lever into P (Park),
Push or pull starting the vehicle
and apply the parking brake, and
may cause the catalytic con-
place the ignition switch in the
LOCK/OFF position.
verter to overload which can
lead to damage to the emission
•
Have all passengers get out of the
control system.
vehicle. Be sure they all get out on
the side of the vehicle that is away
from traffic.
•
When changing a flat tire, follow
the instructions provided later in
this chapter.
6-3

What to do in an emergency
JUMP STARTING
Jump starting can be dangerous if
WARNING
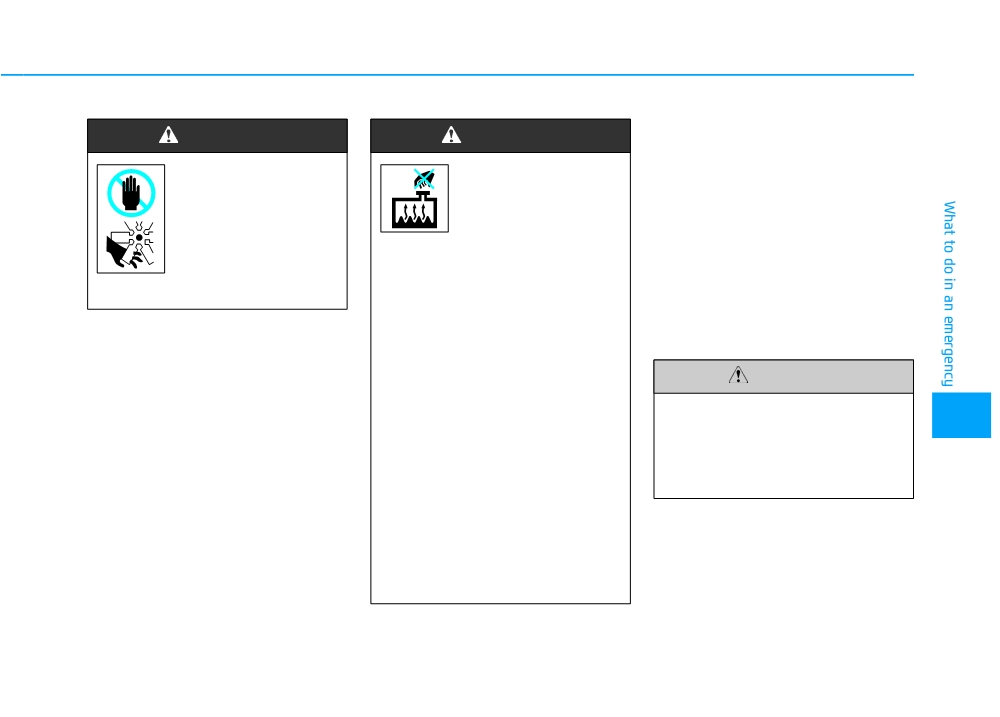
Batteries contain sulfu-
done incorrectly. Follow the jump
ric acid which is highly
starting procedure in this section to
To prevent SERIOUS INJURY or
corrosive. Do not allow
avoid serious injury or damage to
DEATH to you or bystanders,
acid to contact your
your vehicle. If in doubt about how to
always follow these precautions
eyes, skin or clothing.
properly jump start your vehicle, we
when working near or handling
If acid gets into your eyes, flush
strongly recommend that you have a
the battery:
your eyes with clean water for at
service technician or towing service
do it for you.
Always read and follow
least 15 minutes and get imme-
instructions carefully
diate medical attention. If acid
when handling a battery.
gets on your skin, thoroughly
wash the area. If you feel pain or
Wear eye protection
a burning sensation, get med-
designed to protect the
ical attention immediately.
eyes from acid splashes.
• When lifting a plastic-cased
Keep all flames, sparks,
battery, excessive pressure
or smoking materials
on the case may cause battery
away from the battery.
acid to leak. Lift with a battery
Hydrogen is always
carrier or with your hands on
present in battery cells,
opposite corners.
is highly combustible,
• Do not attempt to jump start
and may explode if ignit-
your vehicle if your battery is
ed.
frozen.
Keep batteries out of
• NEVER attempt to recharge
reach of children.
the battery when the vehicle's
battery cables are connected
to the battery.
6-4

Jump starting procedure
• The electrical ignition system
1. Position the vehicles close enough
works with high voltage.
that the jumper cables will reach,
NEVER touch these compo-
but do not allow the vehicles to
nents with the engine running
touch.
or when the ignition switch is
in the ON position.
2. Avoid fans or any moving parts in
the engine compartment at all
times, even when the vehicles are
i Information
turned off.
An inappropriately disposed
3. Turn off all electrical devices such
battery can be harmful to the
as radios, lights, air conditioning,
1VQA4001
Pb
environment and human
etc. Put the vehicles in P (Park)
health. Dispose of the battery
and set the parking brakes. Turn
4. Connect the jumper cables in the
exact sequence shown in the illus-
according to your local law(s)
both vehicles OFF.
tration. First connect one jumper
or regulations.
cable to the red, positive
(+)
jumper terminal of your vehicle
NOTICE
6
(1).
To prevent damage to your vehicle:
5. Connect the other end of the
• Only use a 12-volt power supply
jumper cable to the red, positive
(battery or jumper system) to
(+) battery/jumper terminal of the
jump start your vehicle.
assisting vehicle (2).
• Do not attempt to jump start
6. Connect the second jumper cable
your vehicle by push-starting.
to the black, negative (-) battery/
chassis ground of the assisting
vehicle (3).
6-5
What to do in an emergency
IF THE ENGINE OVERHEATS
7. Connect the other end of the sec-
Disconnect the jumper cables in the
If your temperature gage indicates
ond jumper cable to the black,
exact reverse order you connected
overheating, you experience a loss
negative
(-) chassis ground of
them:
of power, or hear loud pinging or
your vehicle (4).
knocking, the engine may be over-
1. Disconnect the jumper cable from
heating. If this happens, you should:
Do not allow the jumper cables to
the black, negative
(-) chassis
contact anything except the cor-
ground of your vehicle (4).
1. Pull off the road and stop as soon
rect battery or jumper terminals or
as it is safe to do so.
2. Disconnect the other end of the
the correct ground. Do not lean
jumper cable from the black, neg-
2. Place the shift lever in P (Park)
over the battery when making
ative (-) battery/chassis ground of
and set the parking brake. If the air
connections.
the assisting vehicle (3).
conditioning is ON, turn it OFF.
8. Start the engine of the assisting
3. Disconnect the second jumper
3. If engine coolant is running out
vehicle and let it run at approxi-
cable from the red, positive
(+)
under the vehicle or steam is com-
mately 2,000 rpm for a few min-
battery/jumper terminal of the
ing out from the hood, stop the
utes. Then start your vehicle.
assisting vehicle (2).
engine. Do not open the hood until
If your vehicle will not start after a
the coolant has stopped running
4. Disconnect the other end of the
few attempts, it probably requires
or the steaming has stopped. If
jumper cable from the red, positive
servicing. In this event please seek
there is no visible loss of engine
(+) jumper terminal of your vehicle
qualified assistance. If the cause of
coolant and no steam, leave the
(1).
your battery discharging is not
engine running and check to be
apparent, have your vehicle checked
sure the engine cooling fan is
by an authorized HYUNDAI dealer.
operating. If the fan is not running,
turn the engine off.
6-6
6. If you cannot find the cause of the
WARNING
WARNING
overheating, wait until the engine
temperature has returned to nor-
While the engine is
Your vehicle is
mal. Then, if coolant has been
running, keep hands,
equipped with a pres-
lost, carefully add coolant to the
clothing and tools
surized
coolant
reservoir to bring the fluid level in
away from the mov-
reserve tank. NEVER
the reservoir up to the halfway
ing parts such as the
remove the engine
mark.
cooling fan and drive
coolant reservoir tank/radiator
7. Proceed with caution, keeping
belt to prevent seri-
cap or the drain plug while the
alert for further signs of overheat-
ous injury.
engine and radiator are HOT.
ing. If overheating happens again,
Hot coolant and steam may
call an authorized HYUNDAI deal-
blow out under pressure, caus-
er for assistance.
4. Check for coolant leaking from the
ing serious injury.
radiator, hoses or under the vehi-
Turn the engine off and wait
cle.
(If the air conditioning had
until the engine cools down.
CAUTION
been in use, it is normal for cold
Use extreme care when remov-
water to be draining from it when
ing the engine coolant reservoir
Serious loss of coolant indi-
6
you stop.)
tank/radiator cap. Wrap a towel
cates a leak in the cooling sys-
5. If engine coolant is leaking out,
or thick rag around it, and turn it
tem and should be checked as
stop the engine immediately and
counterclockwise slowly to
soon as possible by an author-
call the nearest authorized
release some of the pressure
ized HYUNDAI dealer.
HYUNDAI dealer for assistance.
from the system. Step back
while the pressure is released.
When you are sure all the pres-
sure has been released, contin-
ue turning the cap counter-
clockwise to remove it.
6-7