Honda Accord (2019 year). Manual - part 43
672
uu
Engine Does Not Start
u
If the Remote Battery is Weak
Han
d
lin
g the U
n
expected
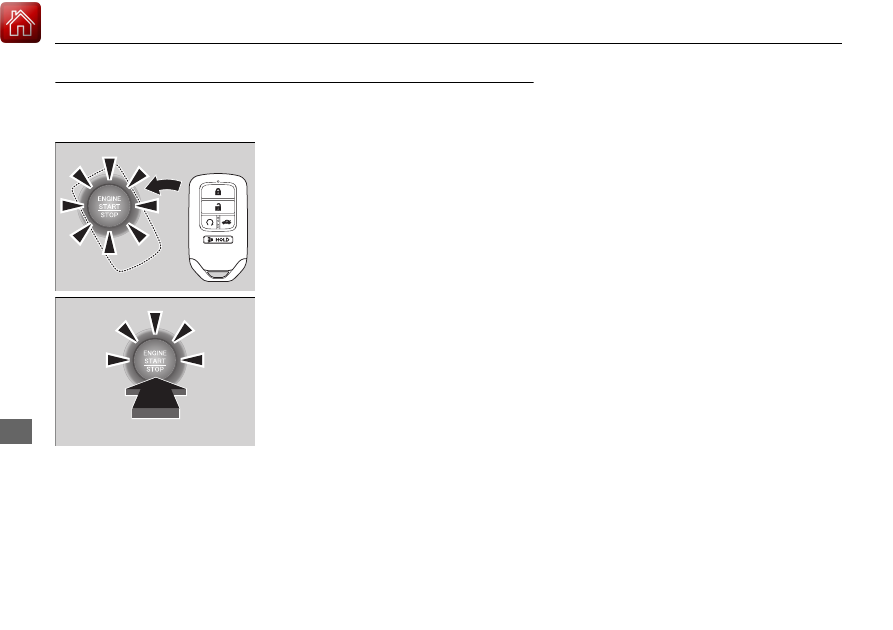
If the Remote Battery is Weak
If the beeper sounds, the To Start, Hold Remote Near Start Button message
appears on the driver information interface, and the ENGINE START/STOP button
flashes, and the engine won’t start, start the engine as follows:
1. Touch the center of the ENGINE START/
STOP button with the H logo on the
remote while the ENGINE START/STOP
button is flashing. The buttons on the
remote should be facing you.
u
The ENGINE START/STOP button
flashes for about 30 seconds.
2. Depress the brake pedal (automatic
transmission/continuously variable
transmission) or clutch pedal (manual
transmission) and press the ENGINE
START/STOP button within 10 seconds
after the beeper sounds and the ENGINE
START/STOP button changes from
flashing to on.
u
If you don’t depress the pedal, the mode
will change to ACCESSORY.