Honda Accord (2019 year). Manual - part 39
608
uu
Maintenance Minder
TM
u
To Use Maintenance Minder
TM
Main
tenan
ce
To Use Maintenance Minder
TM
Maintenance items, which should be serviced at the same time that you replace the
engine oil, appear on the driver information interface.
You can view them on the engine oil life screen at any time.
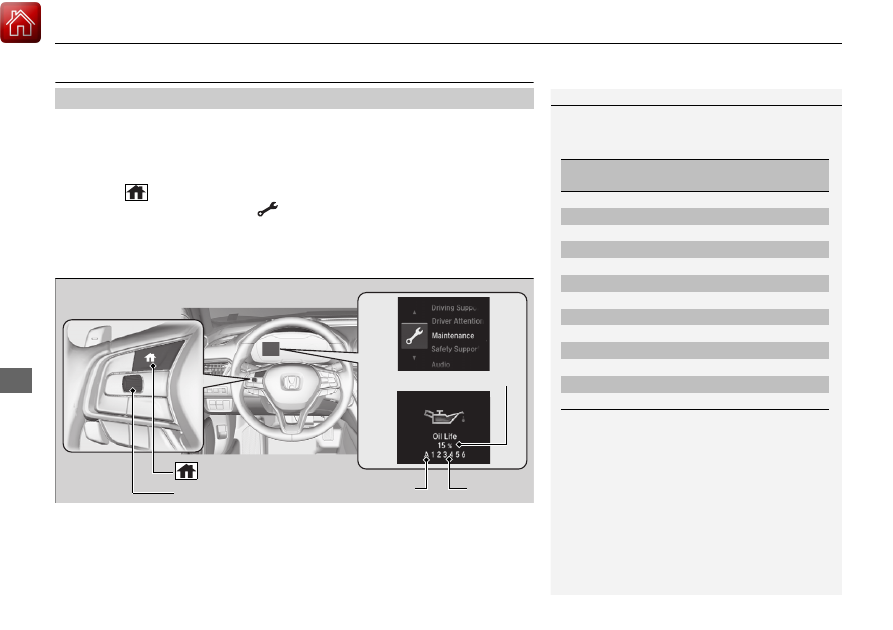
1. Set the power mode to ON.
2. Press the
(home) button.
3. Roll the left selector wheel until
is displayed.
4. Press the left selector wheel to go to the Maintenance Minder screen. The
engine oil life appears on the driver information interface along with maintenance
items due soon.
■
Displaying the Maintenance Minder Information
1
Displaying the Maintenance Minder Information
Based on the engine operating conditions, the
remaining engine oil life is calculated and displayed
as a percentage.
There is a list of maintenance main and sub items you
can view on the driver information interface.
2 Maintenance Service Items P. 611
Displayed Engine Oil
Life (%)
Calculated Engine Oil
Life (%)
100
100 to 91
90
90 to 81
80
80 to 71
70
70 to 61
60
60 to 51
50
50 to 41
40
40 to 31
30
30 to 21
20
20 to 16
15
15 to 11
10
10 to 6
5
5 to 1
0
0
(home) Button
Engine Oil Life
Main Item
Sub Item
Left Selector Wheel