Ford Focus RS (2011 year). Manual - part 141


  Index      Ford     Ford Focus RS - service repair manual (2011 year) in english


Search            


Content   ..  139  140  141  142   ..


Ford Focus RS (2011 year). Manual - part 141


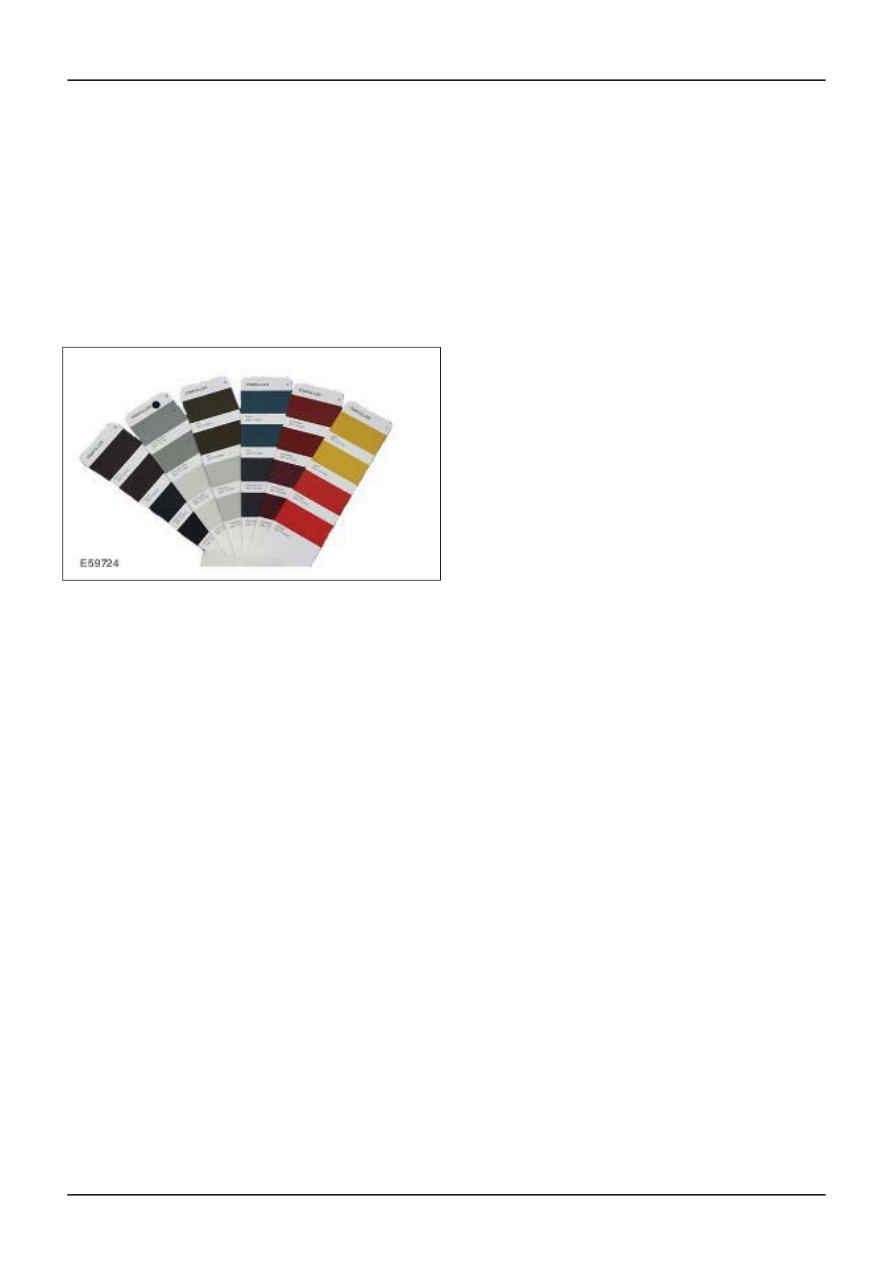
Matching tinted filler to the color code

NOTE: Color samples must always be made from
the same materials as the subsequent repair
painting. Perform color shade matching in the fully
hardened state, in natural light or under suitable
artificial light.

Various tinted fillers are used during factory
painting. In order to achieve the exact color shade
of the factory applied paint, attention should be
paid that the correctly matched fillers are used.

The repair paint manufacturers offer suitable
precolored primers. The use of filler color cards
allows the matching color shade to be determined.

G506676en

501-36-

64

Paint - General Information

501-36-

64

DESCRIPTION AND OPERATION

Tips and Tricks

Comparing paint structures

It may happen that an area remains visible,
especially when the area of the repair is small. The
reason for this is the structural variation in the paint
surface at the repair location compared with the
original paint finish. The original paint finish has a
slight orange peel effect while the repair areas is
extremely smooth.

This effect can be reduced by fine sanding using
P3000 of the area around the repair location and
then polishing.

Etching substrate

If the substrate can be etched during the solvent
test, suitable preparation must be done.

Job steps:

NOTE: Follow the manufacturer specific
instructions.

• Sand the damaged area extensively using an

eccentric sander and P80 or P120 abrasive
sheets. Finish off sanding with P150 or P180.

• Remove the sanding dust and clean the area

of the damage using silicone remover.

• Apply polyester stopper to the bare panel and

to the damaged area.

• Sand the dried polyester stopper to an even

surface using P80 - P150. Finish sanding using
P180 - P240. If required apply more stopper,
again only on the bare panel.

• Wet sand the residual old paint finish using

P600 - P800. Transitions with P400 - P600.
Clean with silicone remover.

• Prime bare metal areas with acid primer.

• After the acid primer has been left exposed to

the air for the correct evaporation time, apply
2-component primer filler in thin layers over the
complete repair area, leaving enough air
exposure time in between coats.

• After the filler has dried, sand wet with P800 or

sand dry with P400. Sanded through areas must
be covered again with 2-component Nonstop
filler primer.

Another possible method of preventing etching of
the substrate is to use waterbased primer and filler
materials.

Masking the vehicle

Masking and covering work are among the most
important preparations required to achieve a high
quality paint finish. Paint application onto
neighboring components, paint mist and sharp
paint transitions are quality faults. For this reason
it is extremely important to take special care and
to use suitable masking materials.

NOTE: When water based paints are used, all
materials must be stable towards water.

Plan the masking work:

• Determine the sequence of masking work.

Sometimes after masking film has been applied,
it is difficult or impossible to reach certain areas.

• Prepare the masking material.

• Start with small difficult areas.

Pay special attention to the areas of profiled seals,
edges, openings and paint transitions.

Masking tape

Masking tape is available in various widths for
special application areas. In practice however, a
wide tape has proved best for almost all areas,
also taking into account the time required for
masking work.

NOTE: Use of differing masking materials is often
much more time-consuming.

Advantages

• Good coverage. Narrower tapes must often be

applied in several layers.

• More resistant to tearing.

• Wide tapes can be applied deep into joints and

therefore protect from paint mist and
contamination.

• Removal is often easier.

Masking film

Transparent plastic film has become accepted as
a practical method to mask large areas of a whole
vehicle. It can quickly and easily be applied to the
vehicle from the roll.

G506677en

501-36-

65

Paint - General Information

501-36-

65

DESCRIPTION AND OPERATION

NOTE: Only mask the vehicle when it is dry.
Moisture under the film can lead to matt paint in
the drying process.

Using masking film

• Clean the vehicle before masking it.

• Pull the film over the vehicle. Because of the

static charge, the film lies on the vehicle like a
second skin.

• Cut out the repair area using the film knife and

then mask it.

Other ways of masking a vehicle are:

• Masking using masking paper.

• Painting cloth (mostly used during filling work).

Profiled seals

If it is not possible to remove a profiled seal, then
it must be masked in such a way that no edges
can form due to paint accumulation.

To do this, the seal is lifted slightly and masked.
The following techniques are possible:

Description

Item

Masking tape with plastic strips

1

Sealing lip

2

Sandpaper with masking tape

3

• Laying a string or cord under the seal. Suitable

for soft and elastic seal lips.

• Special masking tape with plastic strips for hard

seal lips.

• Instead of using plastic strips, fine sandpaper

cut into strips can be inserted and secured using
normal masking tape.

• If the seal can be easily displaced, normal

masking tape can also be used.

Edges/openings

Smooth paint transitions can be produced by
positioning adhesive tapes.

NOTE: Pull the adhesive tapes away immediately
after the paint has been applied and check the
paint transitions.

Description

Item

Vehicle edge

1

Adhesive surface

2

Masking paper

3

Possible variations

• At edges apply one strip of masking tape half

on the area not to be painted and mask using
a second strip.

• On surfaces, two masking strips can be

attached, each affixed by half their adhesive
surface. The adhesive strip which arises is then
applied with one half on the edge of the area to
be painted. The other half is aligned and fixed
in addition in the curves.

• Affix masking paper on one side over the area

to be painted. Double back the masking paper
and secure it.

• Affix round profiled foam at the edge of the area

to be painted using masking tape.

Foam strips are suitable for affixing to openings
such as door gaps.

G506677en

501-36-

66

Paint - General Information

501-36-

66

DESCRIPTION AND OPERATION

NOTE: Choose a suitable profile diameter. A profile
which is too thick will protrude from the opening,
one which is too thin will leave a gap.

Clean the door opening well and affix the matching
shape.

Color shade problems

If a vehicle color shade is taken from a vehicle on
a hot summer day and the mixed color applied,
this may cause color shade problems. Some colors
change so much at higher temperatures that it can
lead to an incorrect result. Red color shades are
particularly prone to this shade behavior.

This means that color determination should always
be done on the bodywork when it is at about the
same temperature as the later working temperature
will be. The best temperature of the item is between
15° and 25° C.

Isopropanol and water

Painted surfaces are very easily cleaned using a
mixture of 70% water and 30% isopropanol (can
be obtained through a laboratory supplies specialist
or a pharmacist).

Temperature reduction spray

If finishing work must be performed on touched-up
surfaces and newly painted plastic parts, problems
may arise. The paint and the transitions are not
yet fully hardened.

NOTE: When working with the polishing machine,
make certain that each operating run lasts no
longer than about 5 - 10 seconds, in order to
prevent the paint becoming warm.

Even so, in order to be able to polish over
transitions, temperature reduction spray must be

applied to the surface. The transition area is then
alternately sprayed and polished until a perfect
transition surface is achieved.

Paint faults on soft plastic components where
elasticizer additive has been used in painting must
be wet sanded using grade P2000 - P2500 paper.

In doing this the sanding location and the
surroundings are sprayed with temperature
reduction spray and the paint faults sanded out by
hand. Afterwards the location is polished as
described above.

Paint plane

Dirt inclusions and paint runs can be removed with
the sanding cylinder ("Finiball") and hand sanding
or eccentric sander in a wet sanding process.

Another practical tool for removal of paint faults
which lie proud of the surface is the paint plane.

NOTE: Guide the tool carefully with the minimum
of force. It must not tilt, otherwise more serious
damage may easily be caused.

This tool allows paint faults to be carefully removed
in shavings. Afterwards the surface must be
polished using suitable materials.

Shading

Even when all the rules, steps and corresponding
instructions have been followed concerning
possible shades, it may happen that the mixed
color shade does not exactly match the vehicle
color.

In these cases, shading must be done. Because
there is no fixed formula for this, experience and
a trained eye are important. Some rules must be
followed for shading.

NOTE: Self-made color sample plates of the
current colors are very helpful for determining the

G506677en

501-36-

67

Paint - General Information

501-36-

67

DESCRIPTION AND OPERATION

color shade.

Refer to the chapter Color

• When shading, if possible only use the paint

mixture that is also allotted in the color shade
formula.

• Observe the rules concerning contrary colors

(complementary colors) and partner colors
according to the Oswald color circle.

• Complementary colors are not recommended

during shading because they mutually inhibit
and lead to muddy mixtures.

Sanding marks

In certain circumstances, the recommended
sanding methods up to now are no longer suitable
for light metallic color shades. Wet sanding with
grade P1200 paper or a grey sanding pad can
cause sanding scratches which can become very
visible under certain lights.

In order to achieve an excellent paint result on
difficult color shades, follow these working rules:

• Sand filler as before, rub down area to be

painted with 3M ultra fine matting sponge and
3M matting gel.

• Sand filler as before, rub down area to be

painted with soaked 3M wet sand paper P1500
- P2000.

• Sand filler as before, rub down area to be

painted with 3M 260 L P1000 eccentric
(Interface Pad).

Improving touch-up work

During application of special effect base paints,
the effect particles align themselves exactly parallel
to the surface in the paint layer while it is still liquid.
This means a particular thickness of the paint layer
is required.

Because during painting the layer thickness in the
transition zones reduces from normal to zero, the
effect particles can no longer align themselves.
This leads to lighter, darker or cloudy zones.

If 1-component clear lacquer is sprayed before the
base coat, this effect is prevented. An optically
perfect transition will result.

G506677en

501-36-

68

Paint - General Information

501-36-

68

DESCRIPTION AND OPERATION

Determination

and

Color Theory.

SECTION 502-00 Uni-Body, Subframe and Mounting
System

PAGE

CONTENTS

SPECIFICATIONS

502-00-2

Specifications......................................................................................................................

REMOVAL AND INSTALLATION

502-00-3

Front Axle Crossmember....................................................................................................

502-00-12

Front Axle Crossmember — 2.5L Duratec-RS (224kW/305PS) - VI5................................

502-00-17

Front Axle Crossmember Front Bushing............................................................................

502-00-20

Front Axle Crossmember Rear Bushing.............................................................................

502-00-27

Rear Axle Crossmember — Vehicles With: Solid Stabilizer Bar Link, Vehicles Without:

Fuel Additive Tank............................................................................................................

502-00-37

Rear Axle Crossmember — Vehicles With: Ball Joint Stabilizer Bar Link, Vehicles Without:

Fuel Additive Tank............................................................................................................

502-00-

Uni-Body, Subframe and Mounting System

502-00-

1

.

VEHICLE APPLICATION:

Torque Specifications

lb-in

lb-ft

Nm

Item

-

38

51

Catalytic converter to rear muffler flange retaining

nuts - Vehicles with diesel engine

-

35

48

Catalytic converter to rear muffler flange retaining

nuts - All except vehicles with diesel engine

-

59

80

Engine support insulator retaining bolts

-

35

48

Stabilizer bar clamp retaining bolts

-

85

115

Lower arm rear clamp retaining bolts

-

129

175

Lower arm front retaining bolt

-

52

70

Front axle crossmember bracket retaining bolts

-

85

115

Front axle crossmember front retaining bolts

-

203

275

Front axle crossmember rear retaining bolts

-

66

90

Steering gear mounting bolts

-

52

70

Lower arm ball joint retaining nut

-

35

48

Stabilizer bar to stabilizer bar link retaining nut

71

-

8

Headlamp leveling front sensor bracket retaining

bolt

-

92

125

Rear axle crossmember retaining bolts

-

85

115

Rear lower arm to wheel knuckle retaining bolt

-

85

115

Upper arm retaining bolts

-

85

115

Front lower arm retaining bolts

-

18

25

Stabilizer bar link to rear lower arm retaining nut -

Vehicles with solid stabilizer bar link

-

35

48

Stabilizer bar link to rear lower arm retaining nut -

Vehicles with ball joint stabilizer bar link

71

-

8

Fuel additive tank retaining screws

-

66

90

Rear lower arm adjustment cam nut

G167787en

502-00-

2

Uni-Body, Subframe and Mounting System

502-00-

2

SPECIFICATIONS

Front Axle Crossmember

Special Tool(s)

Protector, Ball Joint Gaiter
204-349

E42949

Alignment Pins, Subframe
205-316 (15-097A)

15097A

General Equipment

Ball joint separator

Securing strap

Transmission jack

CAUTION: Make sure the strut and spring
assembly does not move in a forwards or
rearwards direction, to prevent damage to
the top mount center cup.

All vehicles

1. NOTE: Make sure the road wheels are in the

straight ahead position.

Centralize the steering wheel and lock it in
position.

TIE38834

2. Remove the front wheels and tires.

For additional information, refer to:

Wheel

and

T

ire

(204-04 Wheels and Tires, Removal

and Installation).

3. Remove the engine undershield.

E40677

4. Detach the headlamp leveling front sensor

bracket from the right-hand lower arm and
secure it to one side (if equipped).

TIE44651

8 Nm

5.

CAUTION: Over bending of the exhaust

flexible pipe may cause damage resulting in
failure.

Support the exhaust flexible pipe with a
suitable support wrap or a suitable splint.

TIE0002772

G296452en

502-00-

3

Uni-Body, Subframe and Mounting System

502-00-

3

REMOVAL AND INSTALLATION


Content   ..  139  140  141  142   ..