Ford Focus RS (2011 year). Manual - part 139


  Index      Ford     Ford Focus RS - service repair manual (2011 year) in english


Search            


Content   ..  137  138  139  140   ..


Ford Focus RS (2011 year). Manual - part 139


Level IV - Repair painting with stopper applied to
more than 50% of the surface.

In repair level IV, apart from painting the complete
bodywork surface, partial stopper work is carried
out on more than 50% of the surface to be painted.
The necessary primer and filler work are also
included.

The following damage must be rectified in this level:

• Damage due to hail.

• More extensive stone chip damage.

• Extensively dented body panels.

• Sectional repairs with large weld seams.

• Surfaces with severe corrosion damage.

The scope of the work is different to level III
because of the partial application of stopper to
more than 50% of the area to be painted. In
addition, more extensive sanding work is usually
required.

Polish

In order to achieve faultless quality, it is sometimes
necessary afterwards to polish a newly painted
surface.

Even after the most careful painting, it sometimes
happens that dirt inclusions and paint runs occur
in work with top coat or clear lacquer. Before
polishing, such paint faults must be removed with
the sanding cylinder ("Finiball") and hand sanding
or eccentric sander in a wet sanding process.
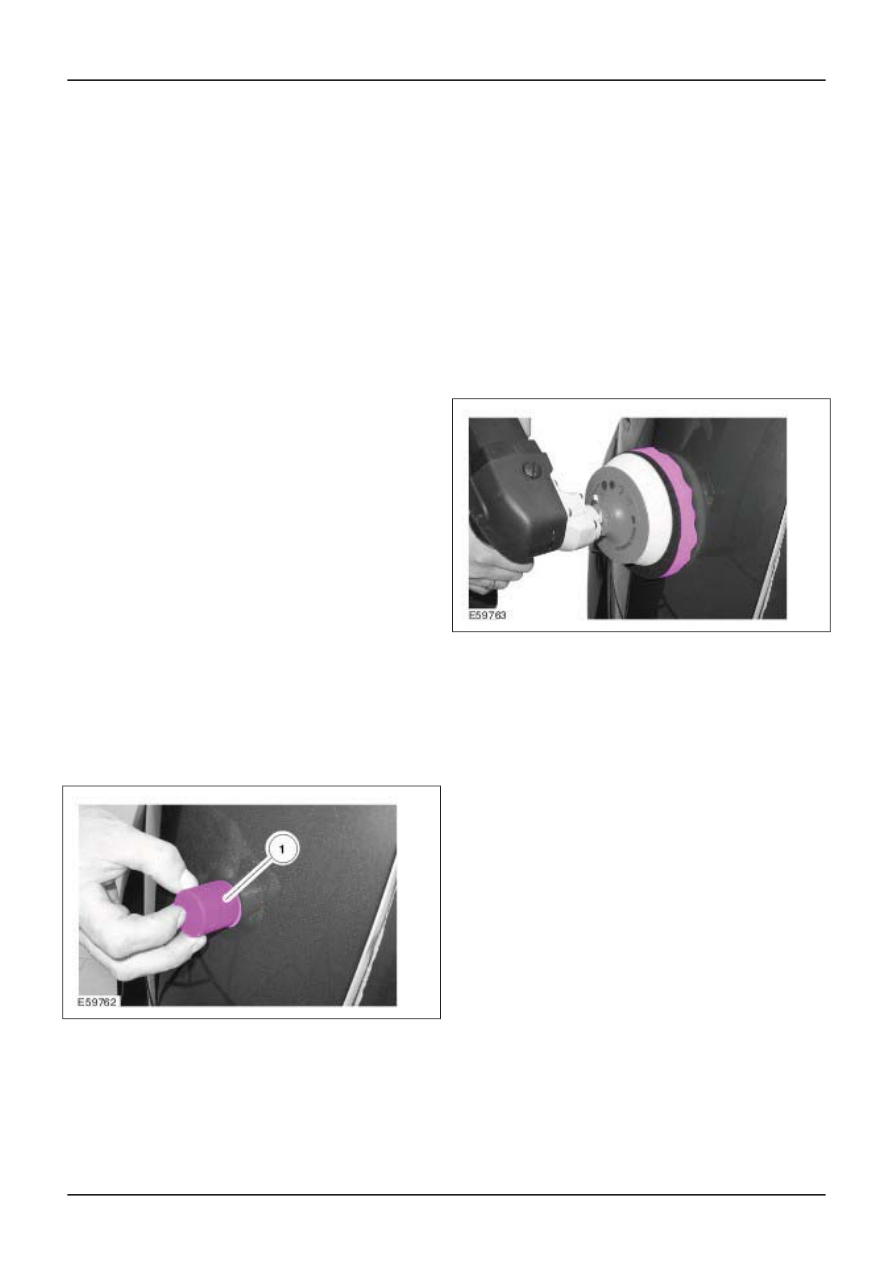
Sanding cylinder

The special sanding compound -1- (sanding bloom)
for the sanding cylinder is self-adhering and
available in grades from P1000 to P2500.

• P1000 - P1500 for pre-sanding of runs and large

imperfections in the paint.

• P1500 - P3000 for subsequent sanding of runs

and sanding out of dust inclusions.

A small eccentric sander can be used for more
extensive working areas. When doing so, first of
all put the eccentric sander in place and then switch
it on, so that the danger of sanding through on
edge is reduced.

Finally polish the sanded area to a high gloss with
suitable polish. To this end the various
manufacturers recommend materials and process
techniques which are specially suited to their
products.

NOTE: The polishing is to be done in the same
way as that used to remove swirl marks.

Polish

NOTE: Before using the nap sponge for the first
time and after any long pauses in working, dampen
the nap sponge with polish.

Job steps:

• Clean and degrease the area to be polished

using silicone remover.

• Apply the polish to the polishing disc and spread

it.

• Place the polishing machine down flat on the

area to be polished and before switching it on,
gently distribute the polish over the underlying
surface.

• Polish out the location for 10 - 15 seconds with

the edge, working with a criss-cross motion.

• Subsequently polish the location for about 10

seconds with the machine laid down flat.

• Wash off and clean the polished location using

the professional polishing cloth and then clean
the polished surface.

• It is absolutely vital to carry out a visual check

after finishing the polishing procedure. If any
swirl marks are not completely removed by the
first polishing procedure, then process must be
repeated.

G506672en

501-36-

48

Paint - General Information

501-36-

48

DESCRIPTION AND OPERATION

Aids

Cleaning putty

Cleaning putty allows deposits on the paint surface
to be removed easily and gently. The following
paint faults can be removed using cleaning putty:

• Metal deposits and iron dust.

• Paint or color mist.

• Tree resin and tar.

• Insect residues.

The surface to be worked must be thoroughly
cleaned before the cleaning putty can be applied.
Then the surface is sprayed with soapy water. Now
the cleaning putty can be slid over the surface until
all unevenness is removed.

G506672en

501-36-

49

Paint - General Information

501-36-

49

DESCRIPTION AND OPERATION

Painting Plastic Parts

General

Although these days plastics can be produced in
all colors and with a matt or gloss surface, painting
is often necessary.

NOTE: Manufacturer's limitations concerning the
feasibility of painting certain components must
always be observed.

Reasons in favor of applying paint to plastic are:

• Individual coloring, matching the body paint.

• More gloss and color brilliance through painting.

• Removal of production imperfections.

• Protection from atmospheric exposure.

Nowadays painting plastic presents no problems
because the materials are known and matched to
the paint. In order that the painter can use the
correct painting materials, the type of plastic must
first be correctly determined.

To allow this, plastics are marked on the rear in
accordance with the recommendations of the
Association of Vehicle Manufacturers.

Once the type of plastic is determined it is an easy
matter to assign special paint recommendations,
matched to that particular plastic. Unmarked
plastics require knowledge of materials so that a
correct choice of paint materials can be made and
the component can be reliably painted.

Plastic groups

Thermoplastics

When warmed these undergo a reversible
transformation into a plastic deformable state and
once cooled they maintain their shape. They
consist of string-like (linear) or only slightly
branched molecular chains.

Thermosets

Thermosets are hard and have the form of a
close-meshed network in all directions. They do
not undergo plastic deformation, are especially
resistant to chemicals, are difficult to swell and are
insoluble. At normal temperatures they are hard to
brittle. At first the material does not undergo any
change when heated, but when it reaches a critical
point, the thermoset is totally destroyed.

Elastomers

Elastomers are characterized by high elasticity
over a wide temperature range. They have
properties like rubber or a sponge and after
compression or distension they return to their
original state.

Types of plastic

The plastics used in the automotive area:

• ABS - Acrylonitrile butadiene styrene (polymer)

• PA - Polyamide

• PC - Polycarbonate

• PE - Polyethylene

• PP - Polypropylene

• PP/EPDM - Polypropylene/ethylene propylene

diene copolymer

• PC/PBT - Polycarbonate/Polybutylene

terephthalate

• PBT/PC - Polybutylene

terephthalate/Polycarbonate

• PUR - Polyurethane

• GRP - Glass reinforced plastic

NOTE: PE and PP are plastics which cannot be
painted, or can only be painted using special
techniques.

As well as the pure plastics, so-called 'blends' are
also used. This means combinations of different
plastics. If we were dealing with metals they would
be called alloys.

Plastic identification

Normally the identifier is marked on the plastic
components used in vehicle construction.

One method to determine the plastic group is the
sanding test. In this a place is chosen which will
not be visible later, and the finger belt sander is
used to sand the plastic.

The plastic group can be determined using the
pattern left by the sanding and the dust:

• Thermosets produce a white dust.

• Thermoplastics smear and do not produce dust.

The plastic group can be determined by a sound
test:

G506673en

501-36-

50

Paint - General Information

501-36-

50

DESCRIPTION AND OPERATION

• Degree of hardness - the higher-pitched the

sound, the harder the plastic.

• Elasticity - the more muffled the sound, the

higher the elasticity of the plastic.

Cleaning plastic

Plastic components are manufactured using
complicated moulds and presses or other highly
engineered tools, mostly using an injection
moulding process or reactive injection moulding
process.

In order to be able to remove the component from
a particular tool, a separating agent is used, which
in some cases adheres very strongly to the plastic.

This separating agent on the plastic components
must be completely removed before any surface
coating is applied.

Warm storage (tempering) before actual cleaning
brings the following advantages:

• The separating agent sweats out of the plastic.

• Tensions in the plastic are released.

• Air inclusions can be recognized and removed.

Intensively clean the item several times using a
pad and fresh cleaning agent.

NOTE: A single wipe, even with cleaning agent, is
not usually sufficient in most cases. Clean textured
components with the aid of a soft brush.

After cleaning, it is absolutely vital that cleaning
agent absorbed by the plastic should be expelled
by tempering again. If the ventilation is good and
the room temperature is about 20°C the solvent
can be evaporated away by overnight storage.

Painting new components

It is absolutely vital that the substrate of an
unpainted new component is free of separating
agent. Paint can only be applied directly to very
few plastics. The plastic must first be identified
exactly and then worked with a repair system which
is matched to the type of plastic. In most cases a
plastic etch primer must be applied as adhesion
base to all plastics which can be painted.

NOTE: Plastics have a tendency to become
electrostatically charged. This can easily cause
contamination during painting. Special antistatic
cleaning cloths prevent electrostatic charging.

Work process for thermoplastics:

• Thoroughly clean the surface.

• Temper the plastic.

• Afterwards clean with antistatic cleaner or

antistatic cloths.

• Apply the bonding agent.

• Apply elastic filler. After it has dried, sand and

clean.

• Apply one coat Uni-paint with elasticizer

additive. For two layer painting the elasticizer
additive is in the clear lacquer.

NOTE: Follow the paint manufacturer's guidelines
during all work.

Work process for thermosets:

• As a rule, thermosets can be handled in the

same way as normal body components.

Work process for PUR soft foam:

• The work process is the same as for

thermoplastic.

• Instead of using bonding agent, a filler wash is

applied to close the pores of the PUR soft foam.

The primer which has been applied to a primed
new component can vary greatly. If no
manufacturer's data is available, the composition
and suitability for further working must be tested.

Painted components with an already ascertained
and intact paint coat present no problems for
possible repainting. After sanding and careful
cleaning with plastic cleaner or thinners, painting
can be done directly.

Unknown primer

When dealing with unknown substrates it is
important to carry out an adhesion test on the
existing paint before any repainting is attempted.
First of all a mechanical test must be carried out,
for instance using a lattice cut and tear-off band.
If the adhesion of the old paint is not acceptable,
it must be mechanically removed and new paint
finish applied.

If the adhesion is acceptable, then an etch test is
performed using 2-component thinners. If no
etching can be detected in this test, application of
the the paint finish can be started directly.
Otherwise the old paint must be removed and a
new paint finish created.

With the help of universal or special plastic primers
and with only a few materials complementary to
those previously present anyway, the painter can
now apply a long-lasting paint finish to all popular
vehicle attachments made of plastic.

G506673en

501-36-

51

Paint - General Information

501-36-

51

DESCRIPTION AND OPERATION

Paint faults on plastic substrates

NOTE: Paint faults are fully described in the
chapter Paint Defects and Damage.

The most common paint faults which can occur
when painting plastic components and the methods
of repair are briefly described.

Discoloration

Cause/damage pattern:

• Plastic material is not suitable for painting.

• Incorrect bonding agent.

• Paint used not solvent resistant.

Repair of damage:

• Repaint using suitable materials.

• Install a new unpainted component.

Softening

Cause/damage pattern:

• Substrate not carefully cleaned.

• Air humidity too high or working temperature

too low.

• Drying time incorrect (too short).

• Materials for substrate not correctly matched to

each other or not mixed correctly.

Repair of damage:

• Dry out, sand, re-isolate and paint.

• Sand away faulty paint coats and re-apply paint

finish.

Paint damage caused by detachment, poor
adhesion

Cause/damage pattern:

• Insufficient paint adhesion between top coat

and filler. The whole of the paint finish detaches
from the plastic.

• Plastic not cleaned sufficiently, not or

inadequately tempered.

• Unsuitable cleaning agent or materials used.

• Poor or lack of intermediate sanding.

• Paint finish underbaked or overbaked.

Repair of damage:

• Sand away faulty paint coats and re-apply paint

finish.

Paint damage caused by blisters, craters,
sink holes

Cause/damage pattern:

• Painting on PUR plastic which was not painted

in production.

• Surface of the plastic material too porous.

• Flash-off time not adhered to.

• Drying temperature too high.

• Moisture in plastic material.

• Layers too thick.

Repair of damage:

• Clean the damaged area, sand, re-isolate and

paint.

• Remove the paint layers and re-paint.

Crack formation

Cause/damage pattern:

• Overexpansion of painted PUR plastic

components.

• Use of unsuitable paint materials.

• Paint materials not suited to each other or

incorrect mixture ratio.

Repair of damage:

• It is not possible to repair overexpanded PUR

plastic components.

• On other plastics, sand away damaged layers,

isolate and repaint.

G506673en

501-36-

52

Paint - General Information

501-36-

52

DESCRIPTION AND OPERATION

Spot Repairs

General

In general, partial surface painting at a point is
called a spot repair. Using this technique, minor
paint damage can be resolved economically and
to time.

Advantage of this method

Because this application remains confined to the
area of the damage, it is often unnecessary to
remove components or color match against
neighboring components. The material used is very
much reduced because only a part of the repair
area is coated.

Practical application areas

Only occasionally can satisfactory results be
achieved in the centre of larger surfaces and/or on
difficult colors. In addition, unprofessional

application may cause tear-off edges to appear in
clear lacquer. Only certain application areas are
recommended.

NOTE: The final decision on whether to spot repair
or paint the component must be made by an expert.

Application areas:

• 2-layer paint.

• Depending on the damage zone, paint damage

up to a diameter of 3.5 cm or a length of 10 cm.

• Scratches.

• Clear lacquer application up to an area of DIN

A4 max.

• Smaller areas which are optically broken up by

other components such as trim strip, tail lights,
swage lines and edges.

• Boundary zones and edge areas of larger

components.

The best application areas have proven to be
optical break lines such as corners, narrow
surfaces, fenders and wheel arches.

Because of their locations, the violet colored areas
are the most suitable for spot repair painting. The
turquoise areas are only marginally suitable and

the rest of the areas are not suitable for spot
repairs.

G506674en

501-36-

53

Paint - General Information

501-36-

53

DESCRIPTION AND OPERATION

Repair process

Perfect preparation of the subsurface is the
precondition for a brilliant paintwork result. Faults
in the preliminary stages delay completion and
cause unnecessary extra work. The working steps
described here demonstrate how important it is to
follow these instructions step by step.

Illustration of damage

A typical case for spot repair is a small stone chip
on the fender.

Cleaning

First of all the component is thoroughly cleaned
using silicone remover and refurbished using
abrading and polishing paste. This re-creates the
original degree of shine and ensures exact color
matching on the touch-up surface.

Sand out

Sand out the damaged location using P180 - P320.
Only small sanding blocks and small sanding
machines must be used, so that the area of the
repair remains as small as possible.

Sanding is completed by rubbing down the
surrounding surface with a fine sanding pad or
P1000 paper. Remove sanding residues and clean
the repair area with silicone remover. The
peripheral zone must then be masked for
application of the filler.

NOTE: The size of the repair area must be kept
as small as possible (maximum size DIN A4).

Filling

The filler layer is applied in stages. First of all, filler
is only applied to the location which has been
sanded away. After a wait time for flashing off, the
second coat is applied so that it spreads over onto
the existing paintwork.

The filler must be dried according to the instructions
of the material supplier.

G506674en

501-36-

54

Paint - General Information

501-36-

54

DESCRIPTION AND OPERATION

Rubbing down

The repair location is now rubbed down with P400
- P500 and the bordering surface with P2000 -
P4000. Remove sanding residues and clean the
repair area with silicone remover.

Paint

Before painting, clean the area for the final time
using a dust-bonding cloth. Then apply the basic
paint in thin layers using a spray gun until enough
coverage is achieved.

After drying, apply clear lacquer in 1 or 2 coats
(depending on product). In doing so, spray so that
only the newly applied basic paint is completely
covered. Finally a touch-up thinners is sprayed
over the edge of the clear lacquer to dissolve the
clear lacquer spray mist.

Dry

Now dry the clear lacquer according to the
manufacturer's instructions using an infrared gun.

Polish

Polish the component using a polisher and polish
and check the polished area for any swirl marks
which may be present. Polish away any swirl marks
which are present.

Dirt inclusions

Sand out

Minor damage can be removed with a small
sanding machine or preferably with an eccentric
sander with P1500 - P2000. Very fine spray mist

G506674en

501-36-

55

Paint - General Information

501-36-

55

DESCRIPTION AND OPERATION


Content   ..  137  138  139  140   ..