Snowmobile Polaris 340 Edge / 550 LX (2008 year). Instruction - part 21


  Index      Snowmobiles / ATV     Snowmobile Polaris 340 Edge / 550 LX - instruction 2008 year


Search            copyright infringement  


Content   ..  19  20  21  22   ..


Snowmobile Polaris 340 Edge / 550 LX (2008 year). Instruction - part 21


84

MAINTENANCE

Exhaust System

Check the exhaust system for wear or damage at approximately 2000 

miles (3200 km). To inspect, allow the engine and exhaust system to 

cool completely. Open the hood and inspect the muffler and pipes for 

cracks or damage. Check for weak or missing retaining springs or 

damper/support grommets.
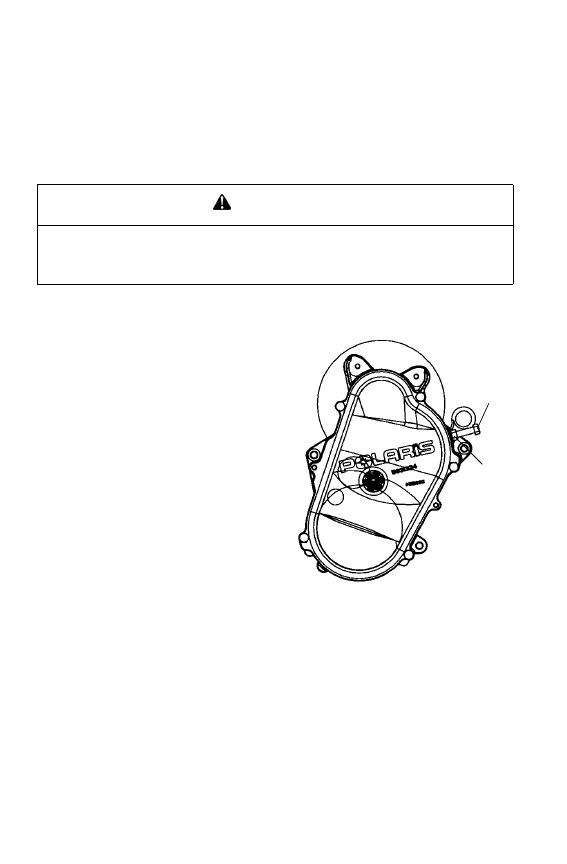
Drive Chain Tension

Check drive chain tension 

weekly and before each long trip. 

To obtain correct chain tension: 
1. Rotate the driven clutch 

counterclockwise to move all 

chain slack to the tensioner 

side. Lock the brake lever 

lock, or have an assistant 

hold the brake lever firmly.

2. Loosen the adjuster bolt jam 

nut (1).

3. Finger tighten the adjuster 

bolt (2) until it can no longer 

be adjusted by hand, then 

back off 1/4 turn.

4. Tighten the jam nut while 

holding the adjuster bolt. 

Torque to 21 ft. lbs. (28 Nm).

5. Release the brake lever lock.

WARNING

Hot exhaust system parts can cause serious burns. Allow adequate time for 

the exhaust system to cool. Never perform this procedure with the engine 

running.

1

2

85

MAINTENANCE

Brakes

n

Hydraulic Brake Inspection

Inspect the brake lever reserve before each use of the snowmobile. See 

page 47.

Brake pads must be replaced when the brake pad material becomes thin-

ner than the backing plate (approximately 1/16I). A kit is available for 

replacing brake pads. See your dealer.

Excessive Lever Travel

Hydraulic brakes are self-adjusting, but if excessive brake pad clearance 

develops, bring the machine to an authorized Polaris dealer for inspec-

tion and adjustment.

Brake Components

1. Brake Caliper
2. Brake Disc
3. Brake Pad Material (Replace 

when thickness is less than 

1/16I/1.5 mm).

WARNING

Brake failure during operation can result in serious injury or death. Properly 

functioning brakes are vital to your safety. Be sure the brake pads do not 

drag on the disc and that brake lever travel is not excessive.
Always replace brake pads when the brake pad material becomes thinner 

than the backing plate (approximately 1/16

I

).

2

1

3

86

MAINTENANCE

Brakes

Brake Fluid

On some models, the brake fluid level can be seen through a plastic 

sight glass in the brake reservoir. If the fluid is sufficient, the sight glass 

will be black. If the sight glass is any color other than black, add brake 

fluid.

On all other models, frequently check the reservoir to be sure it contains 

the correct amount of fluid. To add fluid, remove the master cylinder 

reservoir cover. Add the recommended brake fluid to bring the level up 

to the top of the fluid level mark on the inside of the reservoir.

Replace brake fluid at least every two years with Polaris DOT 4 high 

temperature brake fluid. See page 113 for the part numbers of Polaris 

products.

WARNING

After opening a bottle of brake fluid, always discard any unused portion. 

Never store or use a partial bottle. Brake fluid is hygroscopic, meaning it rap-

idly absorbs moisture from the air. The moisture causes the boiling tempera-

ture of the brake fluid to drop, which can lead to early brake fade and the 

possibility of accident or serious injury.

WARNING

Keep the master cylinder cover free of dirt and debris. The vent slits allow for 

diaphragm movement, and if they become plugged, movement of brake fluid 

below the diaphragm may be restricted, altering brake function.

CAUTION

Brake fluid will damage decals, paint and some plastics. Always wipe up 

spills immediately.

87

MAINTENANCE

Brakes

Bleeding the Hydraulic Brake System

Air in the hydraulic brake system will cause spongy brake lever action. 

Bleed the system before operating the snowmobile.

During the bleeding procedure, keep the brake handle as level as possi-

ble. The reservoir must be in this position to minimize the possibility of 

air entering the system through the reservoir vent.
1. Remove the brake master cylinder reservoir cover and gasket.
2. Fill the master cylinder reservoir to between the MIN and MAX 

marks or 1/4-5/16I (.6-.8 cm) below the lip of the reservoir open-

ing. Reinstall the gasket and cover.

3. Slip a rubber tube over the ball of the bleeder valve and direct the 

flow of fluid into an approved container.

4. Squeeze the brake lever a full stroke. Then unscrew the bleeder 

valve 3/4 of a turn to release air.

5. Close the bleeder valve and release the brake lever.
6. Repeat steps 4 and 5 until fluid flows from the bleeder valve in a 

solid stream free of air bubbles.

7. After bleeding is complete, refill the reservoir to the proper level. 

See page 86. 

8. Reinstall the gasket and cover.

WARNING

Operating the vehicle with a spongy brake lever can result in loss of brakes, 

which could cause an accident and lead to serious injury or death. Never 

operate the vehicle with a spongy-feeling brake lever.

WARNING

Overfilling the master cylinder leaves no room for fluid expansion and may 

cause the brakes to lock, resulting in serious injury or death. Always add 

brake fluid to the fill line as recommended.


Content   ..  19  20  21  22   ..