Volkswagen Golf / Golf GTI / Golf Variant. Service manual - part 450


  Index      Volkswagen     Volkswagen Golf / Golf GTI / Golf Variant - service and repair manual 2013 year


Search            copyright infringement  


Content   ..  448  449  450  451   ..


Volkswagen Golf / Golf GTI / Golf Variant. Service manual - part 450


Note

Clean the Clutch Cover Plate Guide Sleeve - T10302- before us‐

ing, and do not use any scratched sleeves

Brief Description
The clutch cover seals the transmission toward the outside. It is

held in place by a circlip. Remove the circlip and pry out the clutch

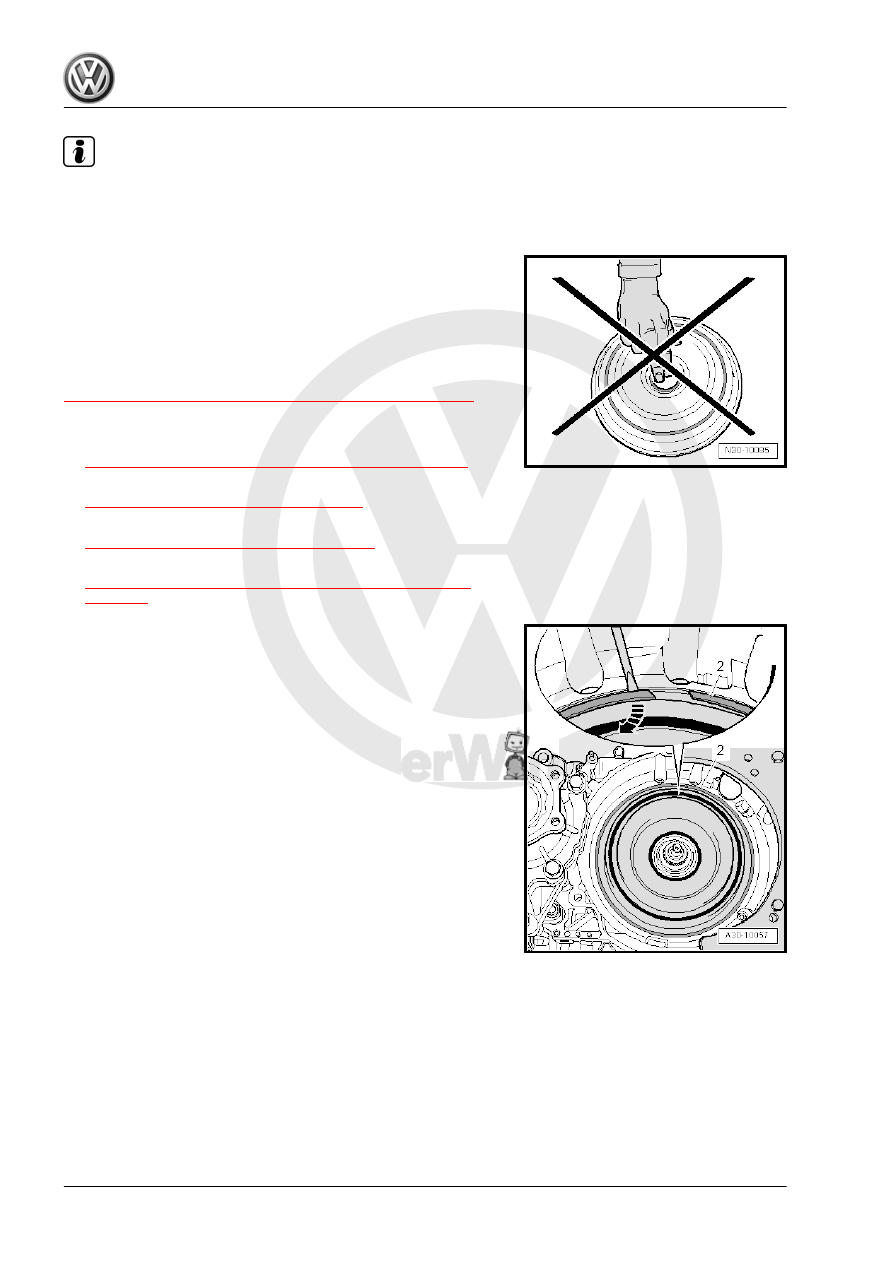
cover. Always replace the clutch cover and the circlip. Never use

a hammer to install the clutch cover and never lubricate the center

seal or touch it. If this should occur, the clutch cover will certainly

leak!
To remove and install the clutch end cover, the transmission must

be secured in a vertical position on the assembly stand. Refer to

⇒ “7 Securing on Engine and Transmission Holder”, page 104

 .

Removing
– Drain the transmission fluid. Refer to

⇒ “9.2 Transmission Fluid, Draining and Filling”, page 116

 .

– Remove the transmission. Refer to

⇒ “3.1 Transmission, Removing”, page 72

 .

– Secure the transmission on the assembly stand. Refer to

⇒ “5 Transmission, Transporting”, page 100

 .

– If necessary change the transmission fluid filter. Refer to

⇒ “8.3 Transmission Fluid Filter, Removing and Installing”,

page 110

 .

– Pry out and remove the circlip -2- for the clutch cover with a

screwdriver -1- in the direction of -arrow-.

– Lift the clutch cover -2- through the opening in the starter with

a screwdriver -1- or a pry bar in direction of -arrow- and then

remove it.

Note

The clutch end cover that was removed cannot be installed again.

Installing

Caution

Always replace the clutch end cover and the locking ring. Never

use a hammer to install the clutch cover and never lubricate

the center seal or touch it. Leaks will develop.

– Only hold the clutch end cover as shown in this illustration!
Note the Following Before Installing the Clutch End Cover:
The new clutch cover must not have any oil in the around the

center seal and it must be dry.

– If necessary, clean the sealing surface on the drive plate

-arrow- thoroughly.

Do not apply adhesive to inside of clutch end cover.
– Carefully remove the adhesive if it has already been applied!
Only coat outer edge of seal with oil.

– Clean the Clutch Cover Plate Guide Sleeve - T10302- “before

using, do not use any scratched sleeves”

– Place the sleeve on a level surface.
The center seal on the new clutch end cover must now be “per‐

formed”:

– Guide the clutch end cover horizontally and evenly over the

whole sleeve in direction of -arrow-. This brings the sealing lip

into its installed position.

– Remove the sleeve upward out of the clutch end cover and

place it on the end of the dual clutch shaft.

– Guide the cover horizontally over the sleeve and press it even‐

ly onto its seat.

Caution

The clutch end cover may not be exposed to direct hammer

hits. If the cover is hit in any way, leakage will definitely occur.

The cover can be pried out of its seat using a screwdriver to install

the “new” circlip -arrow-.
– Install the new circlip.

– Only remove bushing once circlip is installed.
– Install the transmission. Refer to

⇒ “3.2 Transmission, Installing”, page 91

 .

– Fill with transmission fluid. Refer to

⇒ “9.2 Transmission Fluid, Draining and Filling”, page 116

 .

WARNING

Do not start the engine if there is no transmission fluid in the

transmission.

– After installing the transmission, perform the 

Basic Set-

ting

 using the 

Guided Functions

. Refer to Vehicle Diag‐

nostic Tester .

1.3

DSG

®

 Clutch, Removing

Brief Description
• Adjust the dual clutch axial play when installing.
• Secure the transmission to the assembly stand so that it is

vertical when removing and installing the dual clutch. Refer to

⇒ “7 Securing on Engine and Transmission Holder”,

page 104

 . This is the only position in which the dual clutch

axial play can later be adjusted without error.

• The large plate carrier is inserted in all clutch plates in the dual

clutch. The large plate carrier must not slide out of the lowest

plate.

• Transmission fluid pump shaft is removed.
• Do not install any wavy circlips
Removing
– Remove the clutch end cover. Refer to

⇒ “1.2 Clutch End Cover, Removing and Installing”, page 15

 .

Caution

A »used« clutch must not be installed again.
Removed circlips are also not installed again.


Content   ..  448  449  450  451   ..