Volkswagen Golf / Golf GTI / Golf Variant. Service manual - part 424


  Index      Volkswagen     Volkswagen Golf / Golf GTI / Golf Variant - service and repair manual 2013 year


Search            copyright infringement  


Content   ..  422  423  424  425   ..


Volkswagen Golf / Golf GTI / Golf Variant. Service manual - part 424


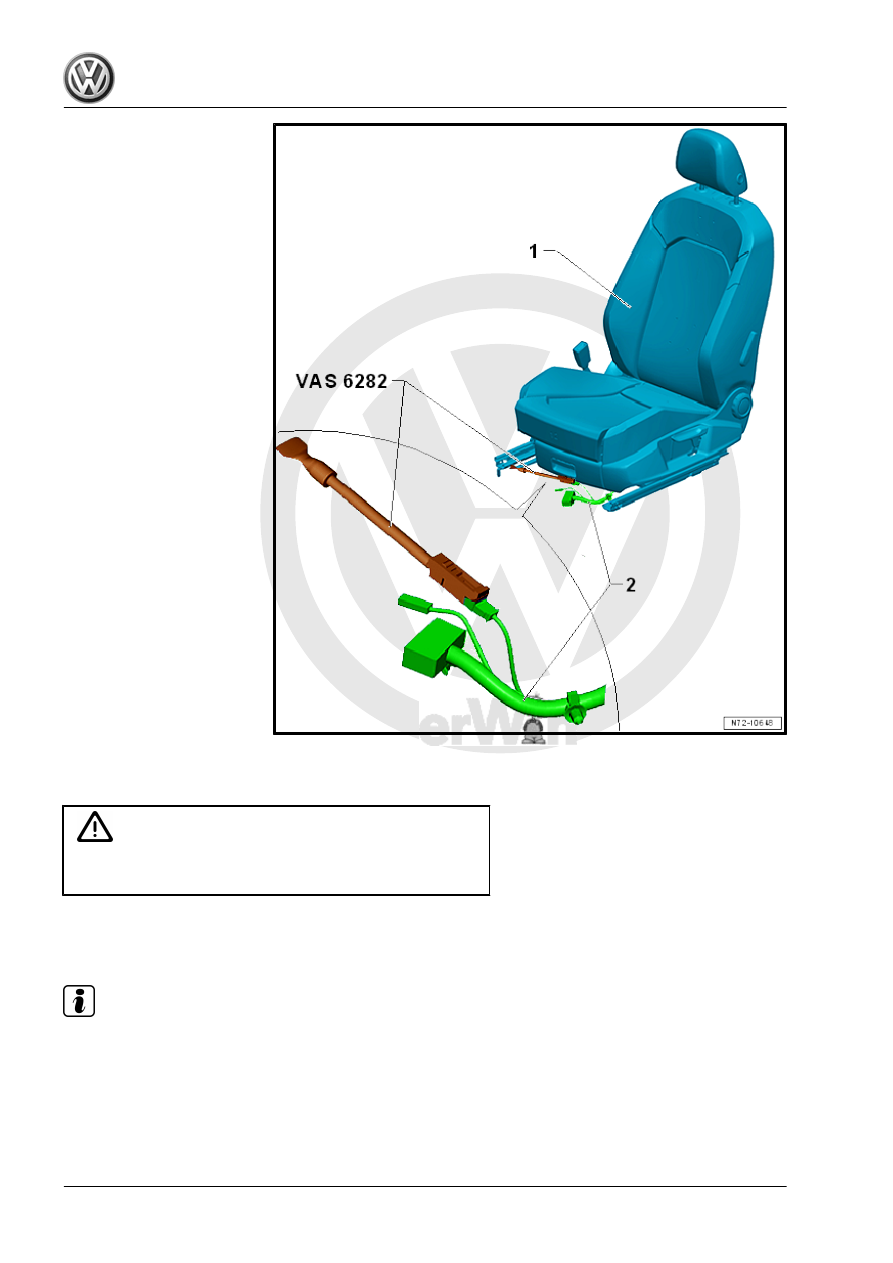
– Connect the Airbag Lockout Adapter - VAS6282- to the side

airbag wiring harness -1-.

Caution

The Airbag Lockout Adapter - VAS6282- must stay connected

to seat until seat is installed again.

2.13

Tunnel-Side Seat Trim, Removing and

Installing

Note

The following describes the removing and installing on the left

side of the vehicle. Removing and installing on the right side is

identical.

Special tools and workshop equipment required
♦ Trim Removal Wedge - 3409-

Removing
– Remove the front seat. Refer to

⇒ “2.10 Front Seat, Removing and Installing”, page 335

 .

– Remove the trim panel -1- expanding rivets -arrows-.
– To do so, press the clamping pins in the expanding rivets

-arrows- toward the inside.

– Pry off the expanding rivets -arrows- using the Trim Removal

Wedge - 3409- .

– Remove the trim panel -1- from the mounts in the seat frame.

Installing
Install in reverse order of removal while paying attention to the

following:
– Insert the expanding rivets -arrows- and push the pins in.
Tightening Specifications
♦ Refer to 

⇒ “2.2 Overview - Front Seat”, page 318

2.14

Sill-Side Seat Trim, Removing and In‐

stalling

⇒ “2.14.1 Door Sill Side Seat Trim, Removing and Installing, Ex‐

cept Power Seat”, page 345
⇒ “2.14.2 Door Sill Side Seat Trim, Removing and Installing, Pow‐

er Seat”, page 347

2.14.1

Door Sill Side Seat Trim, Removing and

Installing, Except Power Seat

Note

The following describes the removing and installing on the left

side of the vehicle. Removing and installing on the right side is

identical.

Special tools and workshop equipment required
♦ Trim Removal Wedge - 3409-

Removing
– Position the seat into its highest position.
– Remove the backrest adjuster. Refer to

⇒ “2.21.1 Backrest Adjuster, Removing and Installing, Except

Power Seat”, page 358

 .

– Remove the seat height adjustment handle. Refer to

⇒ “2.18 Seat Height Adjustment Handle, Removing and In‐

stalling”, page 352

 .

– Press the clamping pin -3- toward the inside.
– Pry off the expanding rivet -2- using the Trim Removal Wedge

- 3409- .

– Remove the bolt -arrow- from below.
– Open the bracket -4- on the trim panel -1- from below.
– Guide out the rear trim panel -1-.
– Remove the trim panel -1- forward from the bracket -5-.
Installing
Install in reverse order of removal.

Tightening Specifications

Component

Tightening Specification

Screw between bracket and

side trim panel. Refer to

⇒ page 346

2 Nm

2.14.2

Door Sill Side Seat Trim, Removing and

Installing, Power Seat

Note

The following describes the removing and installing on the left

side of the vehicle. Removing and installing on the right side is

identical.

Special tools and workshop equipment required
♦ Trim Removal Wedge - 3409-
Removing
– Position the seat into its highest position.


Content   ..  422  423  424  425   ..