Volkswagen Golf / Golf GTI / Golf Variant. Service manual - part 262


  Index      Volkswagen     Volkswagen Golf / Golf GTI / Golf Variant - service and repair manual 2013 year


Search            copyright infringement  


Content   ..  260  261  262  263   ..


Volkswagen Golf / Golf GTI / Golf Variant. Service manual - part 262


Note

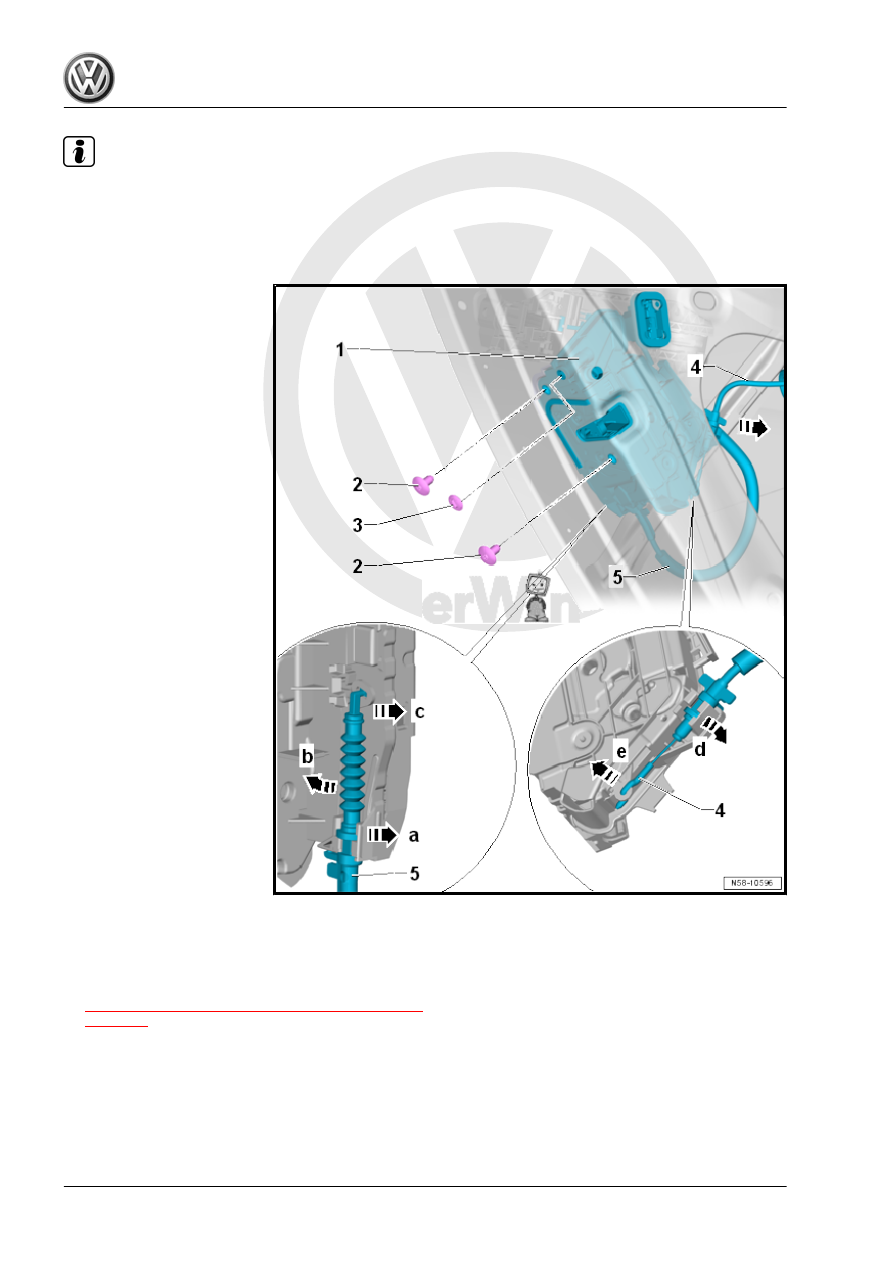
The following describes the removal and installation of the left door lock. The right side is identical.

The door window must be closed for the following work procedures.

Removing

– Remove the rear door trim panel. Refer to ⇒  Body Interior;

Rep. Gr.  70 ; Rear Door Trim Panels; Rear Door Trim Panel,

Removing and Installing .

– Remove the door inner cover. Refer to

⇒ “2.8 Door Inner Cover, Removing and Installing”,

page 170

 .

– Unlock and disconnect the connector.
– Remove the cap -3-.
– Remove the bolts -2-.
– Remove the door lock -1- from the door -arrow-.

Note

If it is necessary for the following work steps, loosen the cables.

Detach the Release Cable from the Mounting Bracket.
– Remove the cover. Refer to 

⇒ page 181

 .

– Turn the release cable -5- 90° and remove it in direction of

-arrow a-.

– Move the release cable in direction of -arrow b- until it can be

guided out of the eye in the door lock -1- in direction of

-arrow c-.

Detach the Release Cable to the Interior Door Mechanism.
– Turn the release cable -4- 90° and remove it.
– Move the release cable in direction of -arrow d- until it can be

guided out of the eye in the door lock -1- in direction of

-arrow e-.

Cover, Removing

– Release the hook -3- in direction of -arrow a-.

– Pull the cover -1- with the hook from the door lock -2- in di‐

rection of -arrow b-.

– Remove the cover -1- upward in direction of -arrow c- from the

door lock -2-.

Installing

– Install the removed cables -4 and 5- on the door lock -1-.
– Install the cover. Refer to 

⇒ page 182

 .

– Install the door lock -1- in the door -arrow-.
– Connect the connector.
– Install the bolts -2-.
– Install the cap -3-.
Installation is performed in reverse order of the removal.
Tightening Specifications
Cover, Installing

– Push the cover -1- onto the bracket -3- on the door lock -2- in

direction of -arrow a-.

– Engage the hook -4- with the door lock -2- in direction of

-arrow b-.

2.14

Window Guide, Removing and Installing

Note

The following describes the removal and installation of the left window guide. Removing and installing the

right window guide is identical.

Do not bend the window guide when removing it.


Content   ..  260  261  262  263   ..