Subaru Impreza WRX (2014 year). Manual - part 3
1-6
Seat, seatbelt and SRS airbags/Seat heater
Seat heater (if equipped)
The seat heater is equipped in the front
seats.
The seat heater operates when the igni-
tion switch is either in the “Acc” or “ON”
position.
CAUTION
. There is a possibility that people
with delicate skin may suffer
slight burns even at low tempera-
tures if they use the seat heater
for a long period of time. When
using the heater, always be sure
to warn the persons concerned.
. Do not put anything on the seat
which insulates against heat,
such as a blanket, cushion, or
similar items. This may cause the
seat heater to overheat.
NOTE
Use of the seat heater for a long period
of time while the engine is not running
can cause battery discharge.
&
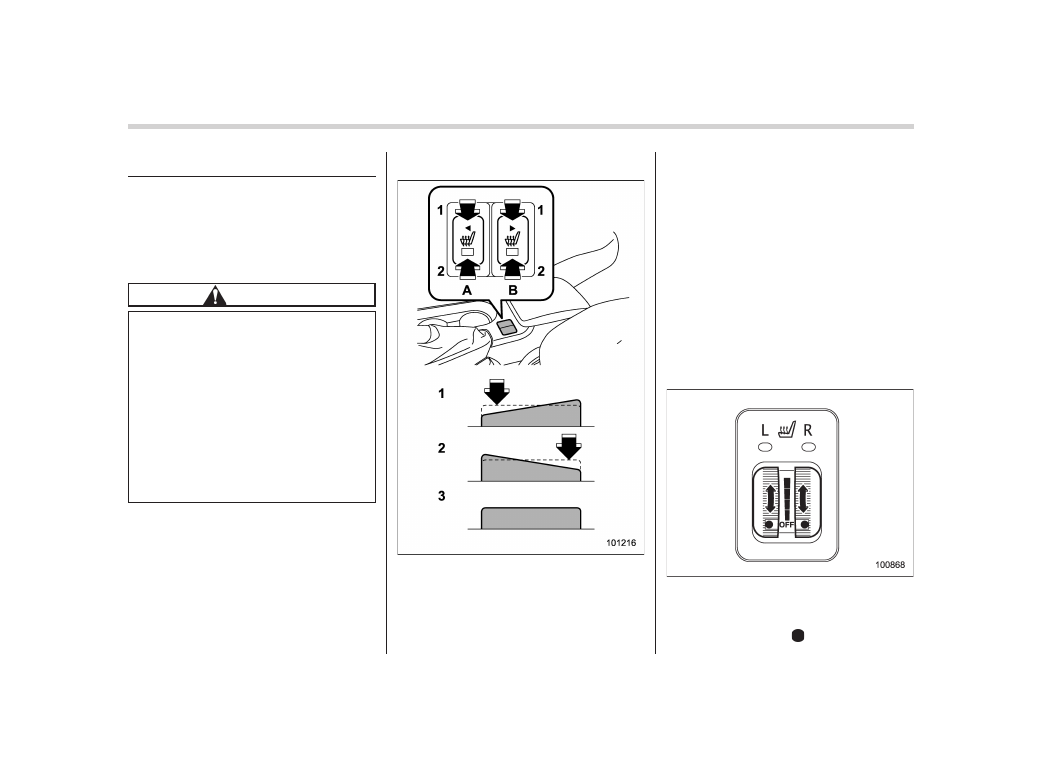
Type A seat heater
1)
HI – Rapid heating
2)
LO – Normal heating
3)
OFF – Off
A)
Left-hand side
B)
Right-hand side
To turn on the seat heater, push the “LO”
or “HI” position on the switch, as desired,
depending on the temperature.
Selecting the “HI” position will cause the
seat to heat up quicker.
To turn off the seat heater, lightly press the
opposite side of the current position.
The indicator located on the switch illumi-
nates when the seat heater is in operation.
When the vehicle’s interior is warmed
enough or before you leave the vehicle,
be sure to turn the switch off.
&
Type B seat heater
Each seat heater has four levels of
adjustment. To use the heater in the
right-hand seat, turn the “R” adjustment
dial forward until the “ ” mark reaches the