Subaru Forester (2019). Instruction - part 29
(237,1)
3-12. Steering Responsive
Headlight (SRH) (if equipped)
1)
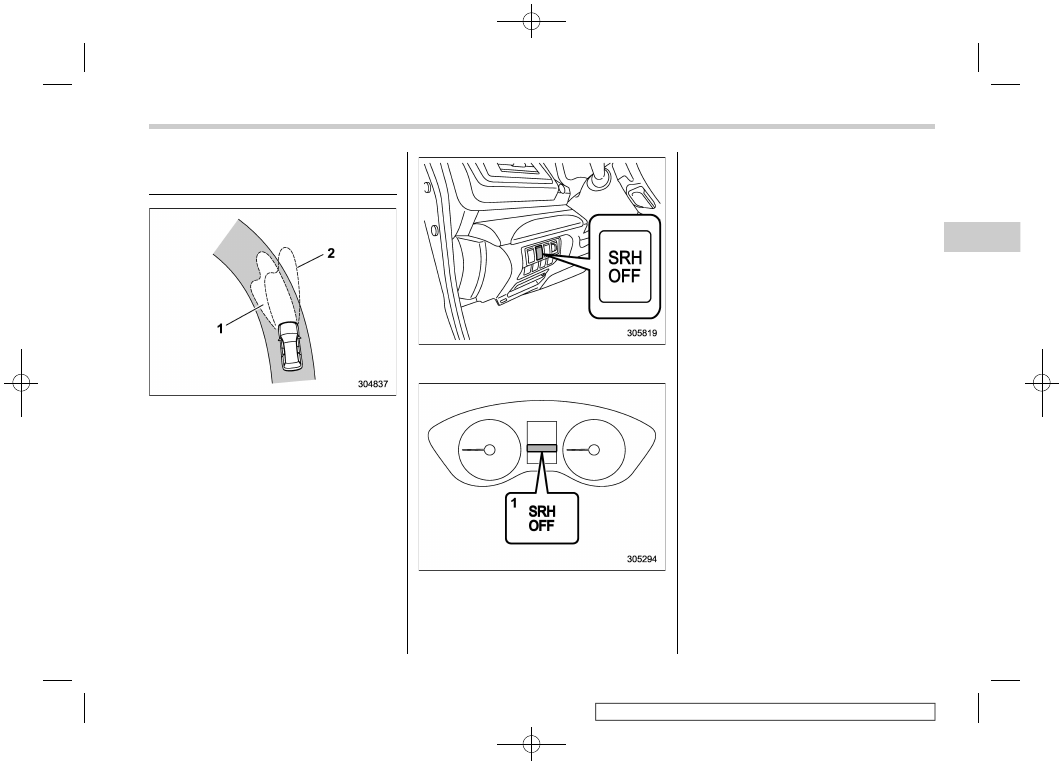
The target area of illumination when SRH
is activated.
2)
The target area of illumination when SRH
is not activated.
SRH is a function that automatically moves
the headlight beam to the left or right in
accordance with the steering angle and
vehicle speed. This function helps to
improve the visibility at night by illuminat-
ing the road ahead at corners and inter-
sections.
You can turn the SRH function on or off by
pressing the SRH OFF switch.
1)
SRH OFF indicator light
The SRH OFF indicator light on the
combination meter turns off when SRH is
turned on.
The SRH OFF indicator light on the
combination meter illuminates when SRH
is turned off.
If SRH is malfunctioning, the SRH OFF
indicator light on the combination meter
flashes when the ignition switch is in the
“ON” position. It indicates that SRH has
been deactivated. Contact a SUBARU
dealer for an inspection.
NOTE
.
If you turn the ignition switch to the
“OFF” position with SRH turned off and
then start the engine again, SRH will
automatically turn on.
.
When you turn the ignition switch to
the “ON” position, the SRH OFF indi-
cator light will illuminate and turn off
after several seconds.
.
SRH only activates when the vehicle
is traveling forward at the speed of
approximately 5 mph (8 km/h) or more.
Steering Responsive Headlight (SRH)
235
3
Instruments
and
controls