Peugeot Partner Tepee (2017 year). Manual - part 5
63
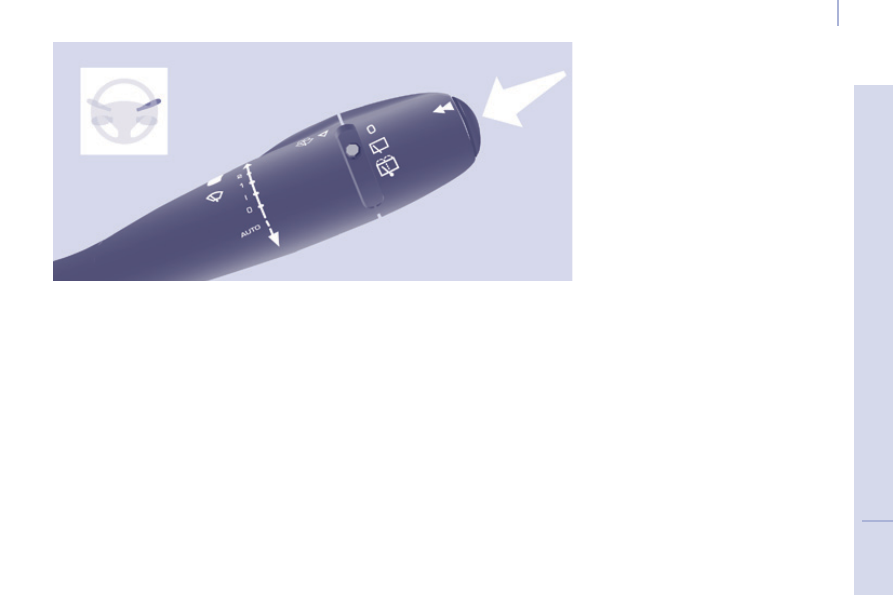
Steering mounted controls
EASE OF USE and COMFORT
4
Partner2VP_en_Chap04_Ergonomie_ed02-2016
TRIP COMPUTER
A few definitions
Range: displays the distance which
can travelled with the remaining fuel
detected in the tank, basd on the
average consumption over the last few
miles (kilometres).
This displayed value may vary
significantly following a change in the
vehicle speed or the relief of the route.
Current fuel consumption: only
calculated and displayed above
20 mph (30 km/h).
Average fuel consumption: this is the
average fuel consumption since the
last trip computer zero reset.
Distance travelled: calculated since
the last trip computer zero reset.
Distance remaining to the
destination: calculated with reference to
the final destination, entered by the user.
If guidance is activated, the navigation
system calculates it as a current value.
Average speed: this is the average
speed calculated since the last trip
computer zero reset (ignition on).
Each press of the button, located at
the end of the wiper stalk, displays the
different trip computer information in
turn, depending on the screen.
When the required trip is displayed,
press the control for more than
two seconds.
When the range falls below 20 miles
(30 km), dashes are displayed. After
filling with at least 10 litres of fuel, the
range is recalculated and is displayed
when it exceeds 60 miles (100 km).
If, whilst driving, dashes are displayed
continuously in place of the digits,
contact a PEUGEOT dealer.
The "vehicle" tab with the range,
current fuel consumption and the
remaining distance to run.
The "1" tab (trip 1) with the average
speed, the average fuel consumption
and the distance travelled in trip
"1".
The "2" tab (trip 2) with the same
information for a
2
nd
trip.
Reset