Nissan NV200 Taxi (2017 year). Manual - part 4
䊊
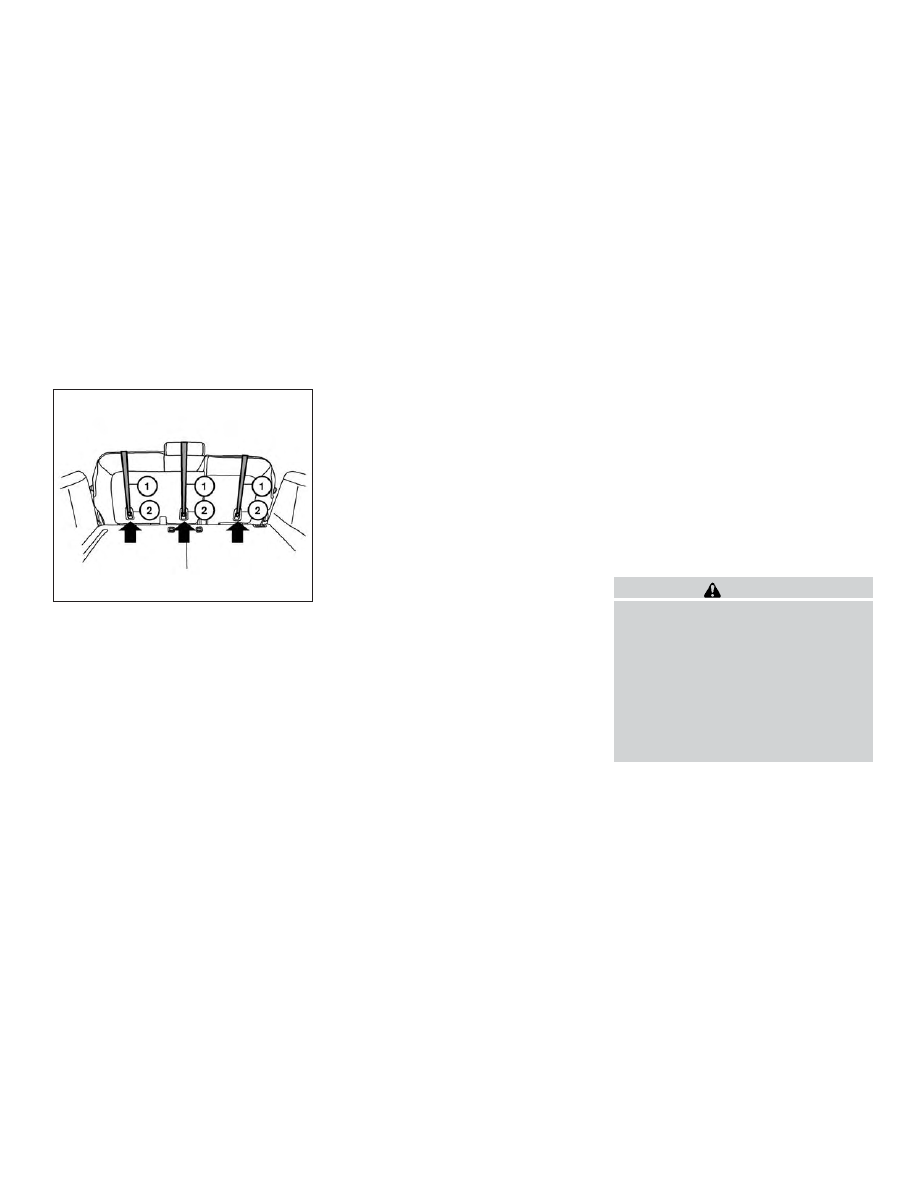
1
Top tether strap
䊊
2
Anchor point
Installing top tether strap
The child restraint top tether strap must be used
when installing the child restraint with the LATCH
lower anchor attachments.
First, secure the child restraint with the LATCH
lower anchors (rear bench outboarding seating
positions only).
Rear bench seat
OUTBOARD SEATING POSITIONS
1. Remove the head restraint/headrest and
store it in a secure place. Be sure to reinstall
the head restraint/headrest when the child
restraint is removed. For additional informa-
tion, refer to “Head restraints/headrests” in
this section for head restraint/headrest ad-
justment, removal and installation informa-
tion.
2. Position the top tether strap
䊊
1
over the
seatback.
3. Secure the tether strap to the tether anchor
point
䊊
2
as shown.
4. Tighten the tether strap according to the
manufacturer’s instructions to remove any
slack.
CENTER SEATING POSITION
1. Remove the head restraint/headrest and
store it in a secure place. Be sure to reinstall
the head restraint/headrest when the child
restraint is removed. For additional informa-
tion, refer to “Head restraints/headrests” in
this section for head restraint/headrest ad-
justment, removal and installation informa-
tion.
2. Position the top tether strap
䊊
1
over the
seatback.
3. Secure the tether strap to the tether anchor
point
䊊
2
as shown.
4. Tighten the tether strap according to the
manufacturer’s instructions to remove any
slack. Make sure the head restraint/headrest
does not contact the top tether strap.
If you have any questions when installing a
top tether strap, it is recommended that
you visit a NISSAN dealer for this service.
WARNING
Child restraint anchorages are designed
to withstand only those loads imposed by
correctly fitted child restraints. Under no
circumstances are they to be used to at-
tach adult seat belts, or other items or
equipment to the vehicle. Doing so could
damage the child restraint anchorages.
The child restraint will not be properly
installed using the damaged anchorage,
and a child could be seriously injured or
killed in a collision.
Rear bench seat
LRS2553
Safety—Seats, seat belts and supplemental restraint system
1-33