Nissan Versa Sedan. Instruction - part 778
TM-18
< DTC/CIRCUIT DIAGNOSIS >
[5MT: RS5F91R]
POSITION SWITCH
DTC/CIRCUIT DIAGNOSIS
POSITION SWITCH
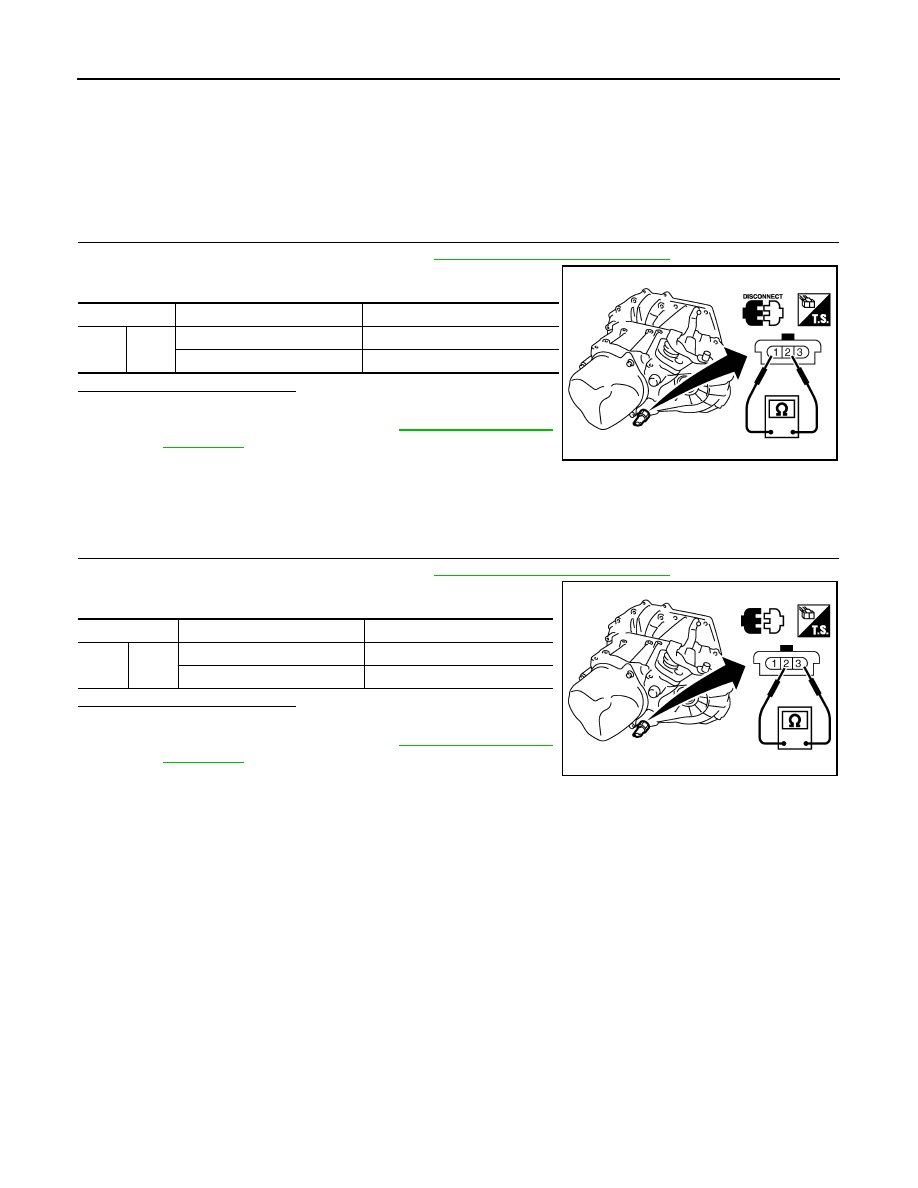
BACK-UP LAMP SWITCH
BACK-UP LAMP SWITCH : Component Inspection
INFOID:0000000009267776
1.
CHECK BACK-UP LAMP SWITCH
1. Disconnect position switch connector. Refer to
TM-22, "Removal and Installation"
.
2. Check continuity between position switch terminals.
Is the inspection result normal?
YES
>> INSPECTION END
NO
>> Replace position switch. Refer to
PARK/NEUTRAL POSITION (PNP) SWITCH
PARK/NEUTRAL POSITION (PNP) SWITCH : Component Inspection
INFOID:0000000009267777
1.
CHECK PARK/NEUTRAL POSITION (PNP) SWITCH
1. Disconnect position switch connector. Refer to
TM-22, "Removal and Installation"
.
2. Check continuity between position switch terminals.
Is the inspection result normal?
YES
>> INSPECTION END
NO
>> Replace position switch. Refer to
Terminals
Condition
Continuity
1
2
Reverse gear position
Yes
Except reverse gear position
No
MCIA0157E
Terminals
Condition
Continuity
2
3
Neutral gear position
Yes
Except neutral gear position
No
JPDIC0092ZZ