Nissan Versa Sedan. Instruction - part 483
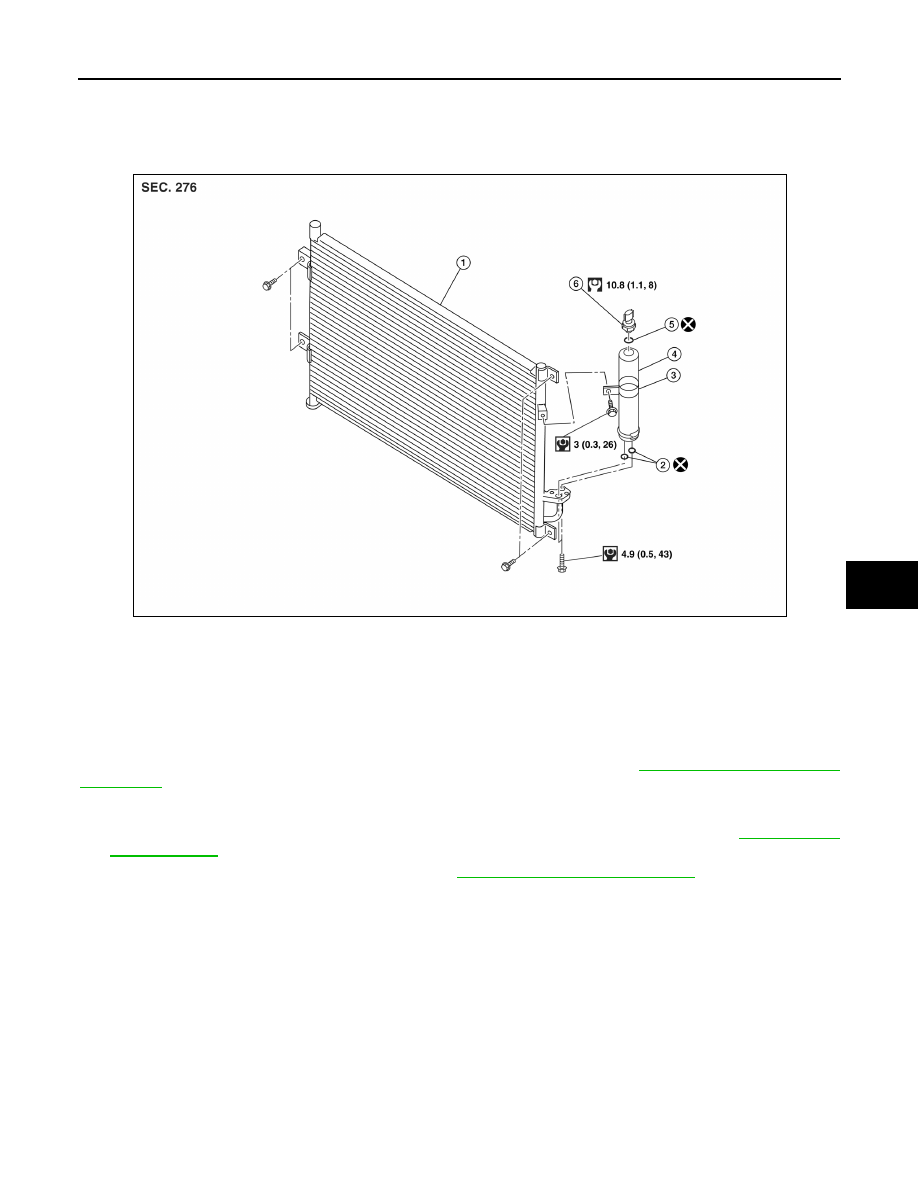
CONDENSER
HA-31
< REMOVAL AND INSTALLATION >
C
D
E
F
G
H
J
K
L
M
A
B
HA
N
O
P
CONDENSER
Exploded View
INFOID:0000000009269754
Removal and Installation
INFOID:0000000009269755
CAUTION:
Perform oil return operation before each refrigeration system disassembly. However, if a large amount
of refrigerant or oil is detected do not perform oil return operation. Refer to
REMOVAL
1. Use refrigerant collecting equipment (for HFC-134a) to discharge the refrigerant. Refer to
2. Remove the radiator core upper support. Refer to
CO-14, "Removal and Installation"
.
3. Remove high-pressure flexible hose bolt and disconnect high-pressure flexible hose from the condenser.
CAUTION:
Cap or wrap the joint of the A/C piping and condenser with suitable material such as vinyl tape to
avoid the entry of air.
4. Remove high-pressure flexible hose bolt and disconnect high-pressure pipe from the condenser.
CAUTION:
Cap or wrap the joint of the A/C piping and condenser with suitable material such as vinyl tape to
avoid the entry of air.
5. Remove the condenser and liquid tank assembly.
CAUTION:
Be careful not to damage core surface of condenser.
INSTALLATION
Installation is in the reverse order of removal.
1.
Condenser
2.
O-rings
3.
Liquid tank bracket
4.
Liquid tank
5.
O-ring
6.
Refrigerant pressure sensor
AWIIA1612ZZ