Nissan Frontier (2019 year). Manual - part 8
Trip computer reset
Pressing the change/reset button for
more than 3 seconds will reset all modes
except Trip A and distance to empty.
This unit has the following functions:
∙ Measures terrestrial magnetism and in-
dicates the heading direction of the ve-
hicle
∙ Indicates outside air temperature
With the ignition switch in the ON position,
press the
or
button as de-
scribed in the charts below to activate vari-
ous features of the automatic anti-glare
rearview mirror.
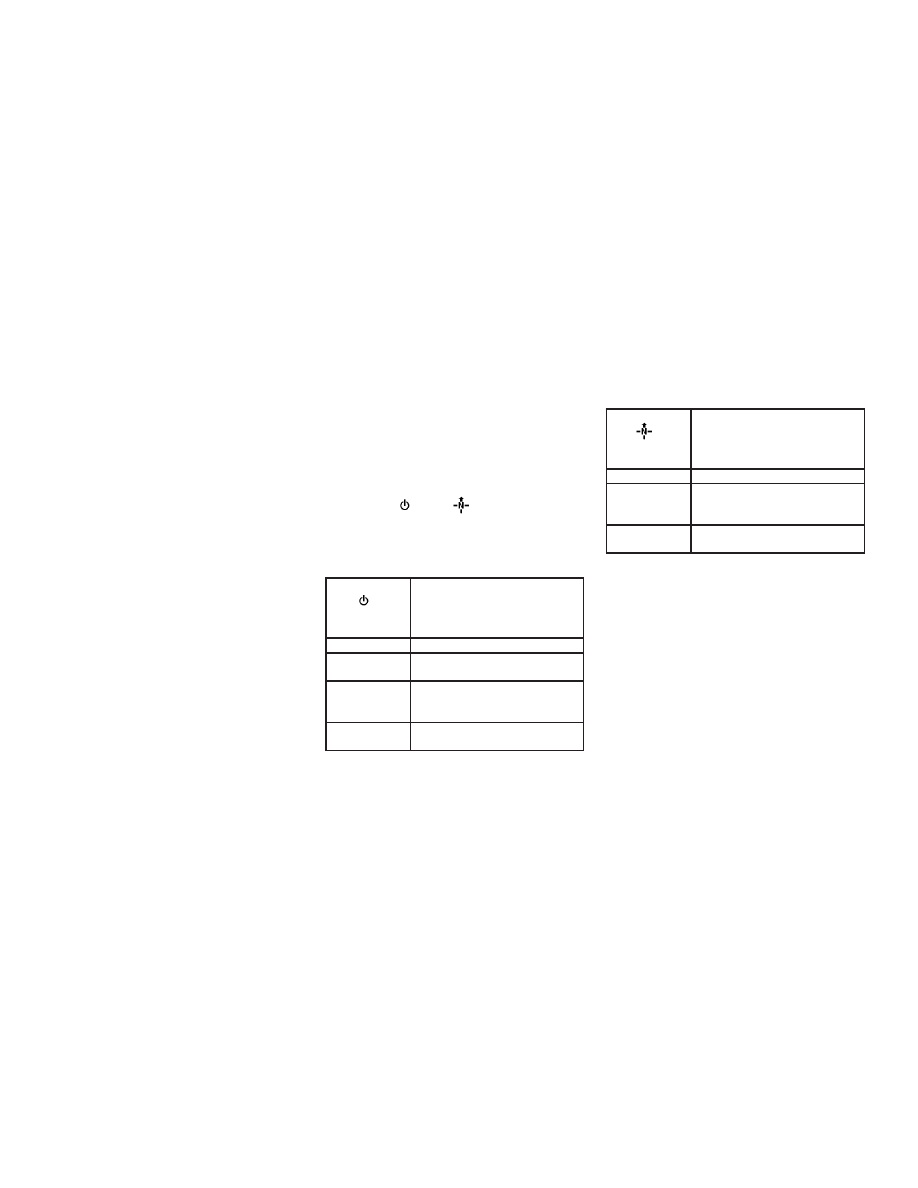
Type A (if so equipped)
Press and hold
the
button for
about:
Feature:
(Press button again for about
1 second to change settings)
1 second
Compass toggles on/off
8 seconds
Automatic anti-glare/indicator
light toggles on/off
11 seconds
Compass zone can be changed
to correct false compass read-
ings
13 seconds
Compass enters calibration
mode
Type B (if so equipped)
Press and hold
the
button for
about:
Feature:
(Press button again for about
1 second to change settings)
1 second
Compass toggles on/off
8 seconds
Compass zone can be changed
to correct false compass read-
ings
10 seconds
Compass enters calibration
mode
For additional information, refer to “Auto-
matic anti-glare rearview mirror” in the
“Pre-driving checks and adjustments” sec-
tion of this manual.
COMPASS AND OUTSIDE
TEMPERATURE DISPLAY (if so
equipped)
2-10
Instruments and controls