Nissan Pathfinder. Instruction - part 749
FRONT DOOR FINISHER
INT-15
< REMOVAL AND INSTALLATION >
C
D
E
F
G
H
I
K
L
M
A
B
INT
N
O
P
REMOVAL AND INSTALLATION
FRONT DOOR FINISHER
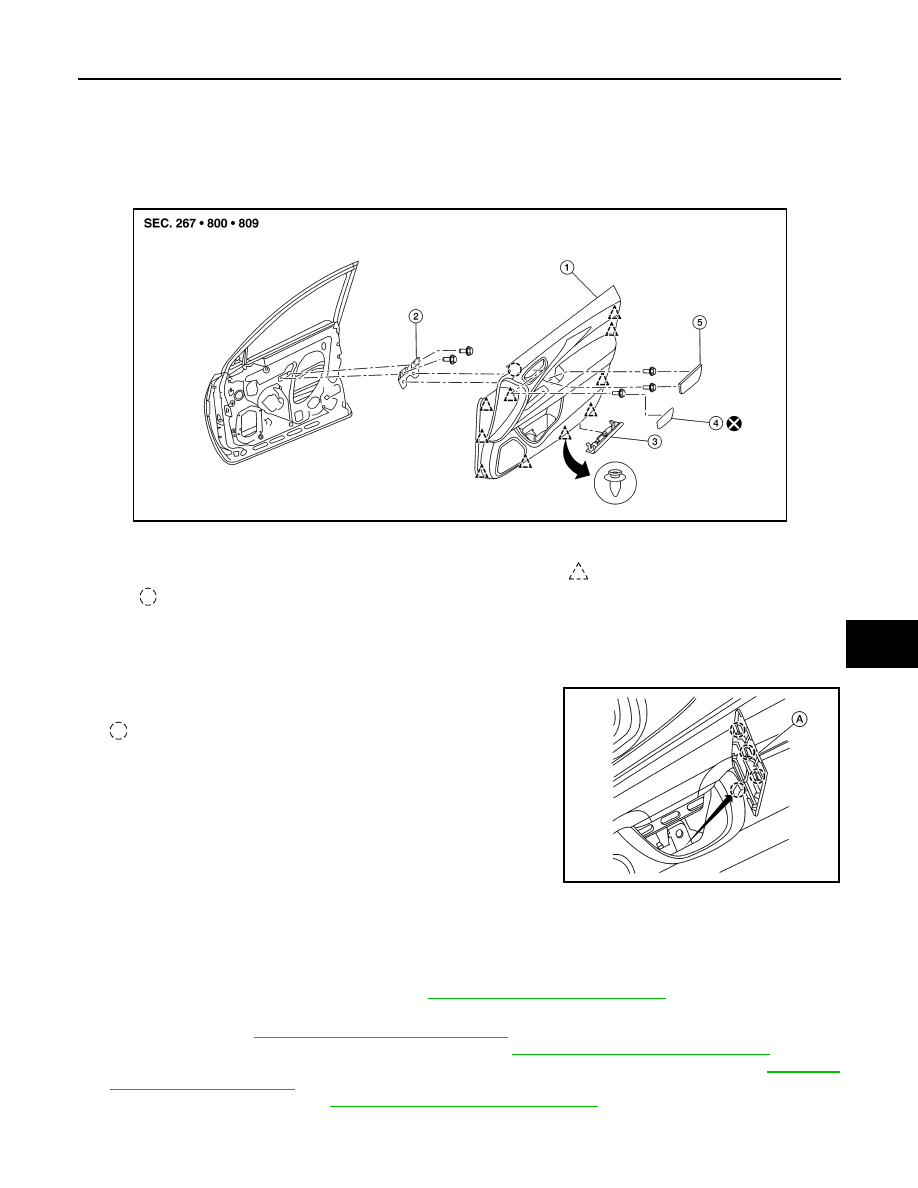
Exploded View
INFOID:0000000009176403
Removal and Installation
INFOID:0000000009176404
REMOVAL
1. Release pawls using a suitable tool and remove armrest cover
(A).
: Pawl
2. Remove the front door finisher bolts.
3. Remove the inside door handle escutcheon using a suitable tool, then remove the front door finisher bolt.
CAUTION:
Do not reuse inside door handle escutcheon. Replace with new part after removal.
4. Remove the step lamp (if equipped). Refer to
INL-64, "Removal and Installation"
.
5. Remove the main power window and door lock/unlock switch or power windows and door lock/unlock
switch RH. Refer to
PWC-62, "Removal and Installation"
[MAIN POWER WINDOW AND DOOR LOCK/
UNLOCK SWITCH - LH FRONT ONLY AUTO DOWN],
PWC-63, "Removal and Installation"
[POWER
WINDOW AND DOOR LOCK/UNLOCK SWITCH RH - LH FRONT ONLY AUTO DOWN],
[MAIN POWER WINDOW AND DOOR LOCK/UNLOCK SWITCH - LH & RH
FRONT AUTO UP/DOWN] or
PWC-138, "Removal and Installation"
[POWER WINDOW AND DOOR
LOCK/UNLOCK SWITCH RH - LH & RH FRONT AUTO UP/DOWN].
1.
Front door finisher
2.
Inside door pull handle bracket 3.
Front step lamp
4.
Inside door handle escutcheon
5.
Armrest cover
Clip
Pawl
AWJIA1171ZZ
AWJIA1147ZZ